FAQs about single cell sample preparation (covering the basics)

Single cell RNA-sequencing (scRNA-seq) and other single cell or single nuclei sequencing–based methods, such as immune profiling or chromatin accessibility profiling, are powerful approaches that allow researchers to explore gene expression dynamics, gene regulation, antigen specificity, and more on a cell-by-cell basis. However, to make the most of these tools, you’ll need to know how to properly prepare your samples.
In fact, what happens upstream of your single cell experiments may be just as important as the experiments themselves. Skillful sample preparation that yields a high-quality single cell or nuclei suspension will be a key determining factor for a successful experiment.
That’s why we’d like to do everything we can to ensure you have the tips and know-how you need to master single cell sample preparation. That includes the basics—cells versus nuclei, the number of cells to start with, how to maximize cell viability, sample logistics—and beyond.
In this blog, we highlight some frequently asked, introductory questions about single cell sample preparation and provide guidance from 10x Genomics Field Application Scientist, Claudia Tamburini, PhD, who shared a related presentation at a recent User Group Meeting (UGM) in London. Keep reading to find helpful tips, as well as cell preparation guides and product documentation, that can help you approach single cell or single nuclei sample prep with confidence.
Interested in learning more about single cell RNA-seq in fresh, frozen, and fixed samples—even FFPE? Stay tuned for an upcoming blog sharing a comprehensive sample prep introduction for Chromium Single Cell Gene Expression Flex.
Experimental design informs sample prep choices
Should I use single cells or nuclei for my experiment?
Your overall experimental design, and, in particular, the analytes you’re looking to measure, will determine whether you should use single cells or nuclei. scRNA-seq works with both cells and nuclei, and, in most cases, you'll get very similar results. However, if you’re looking to measure B- or T-cell receptor (BCR/TCR) sequences or other cell surface proteins, you will need to maintain whole, intact cells for your experiments. If you want to measure chromatin accessibility, you will need to use nuclei.
Additionally, the tissue or biological fluid you're working with may influence your decision between cells and nuclei. For example, hepatocyte cells and neurons are, in some cases, too large to run through the Chromium instrument microfluidics channel, which accommodates cells up to 30 microns in diameter. In such cases, you’d want to isolate nuclei from your samples. Some cells may be a challenging shape as well (like cardiomyocytes or yeast cells), making nuclei isolation more suitable. Some complex tissues are very difficult to dissociate into a single cell suspension, so, again, nuclei isolation may be the better option for these tissues.
How many cells are required for a single cell experiment?
There is no simple answer as it depends on the complexity of your sample and your experimental questions. The more complex your sample—meaning, for example, it’s very heterogeneous or includes fragile cells that are typically more difficult to maintain through sample preparation—the more cells required. Additionally, if you’re interested in profiling rare cell populations, you will likely need to start with more cells to ensure you can identify those low-proportion cell types.
On the other hand, if your sample is fairly homogeneous and robust, and most cells are likely to respond similarly throughout the course of your experiment (including through any possible treatments and sample preparation steps), then you can start with fewer cells.
It’s important to remember that our single cell assays have up to a 65% cell capture rate, meaning you will likely see 65% recovery of cells loaded onto a chip. You should plan to run the appropriate number of cells with this capture rate in mind, so you can achieve your final targeted cell count. Sequencing requirements should also be considered at this point in your experimental design because the more cells you use, the higher the sequencing costs.
How to ensure the highest quality single cell sample
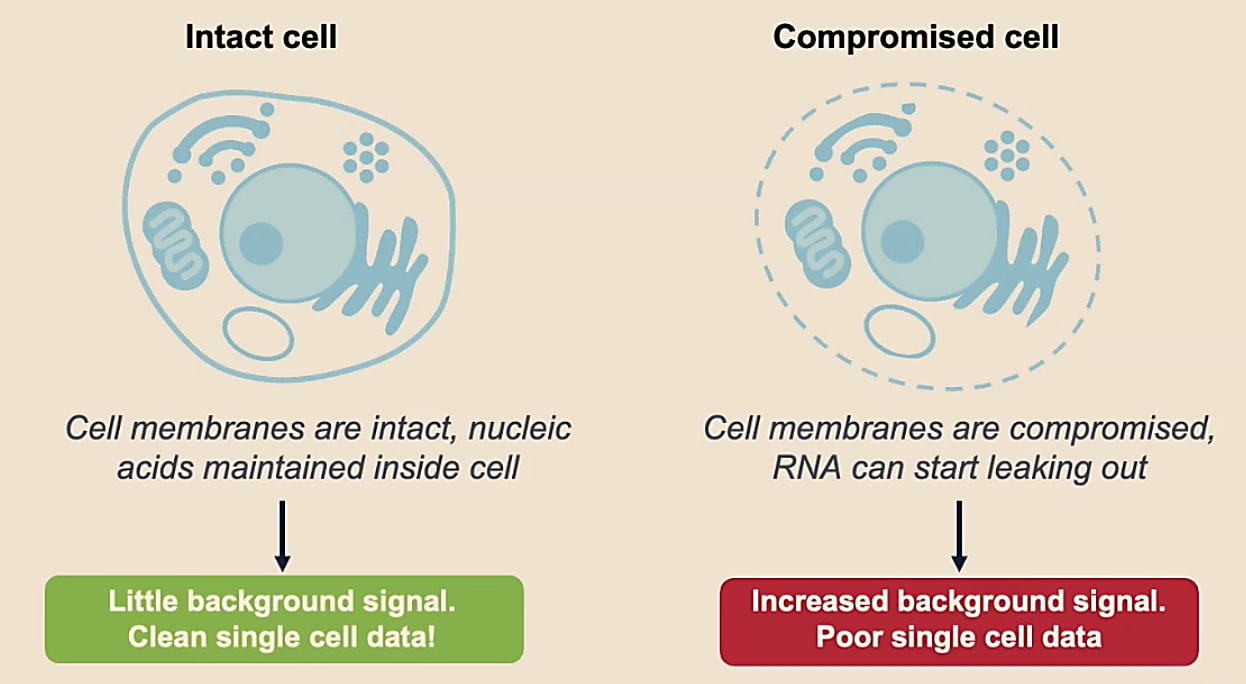
Why is sample quality important?
You want to be sure you’re capturing information from individual cells. When a cell is not intact, it will start to leak RNA, which can increase background signal. Thus, a poor quality sample ultimately decreases our confidence that RNA transcripts are coming from a particular cell and that we’re capturing true information about that cell.
What makes a good-quality single cell sample?
There are three basic standards to keep in mind during sample preparation. A good-quality sample should be:
- Clean: Single cell suspensions must be free from debris, cell aggregates, and any other contaminants (such as background RNA, DNA, or EDTA). This requires washing samples through centrifugation steps, filtering samples to exclude debris or bigger particles, and enriching cells through sorting or using dead cell removal kits.
- Healthy: You want your cells to be alive! We recommend at least 90% viability to ensure really good single cell data. And while preparing to load chips, cells should be kept in PBS + 0.04% BSA on ice. This buffer isn’t necessarily very rich in nutrients, therefore if you think your sample needs it, you can use one of the alternative cell culture media we’ve validated (listed in the Cell Preparation Guide below) to maintain cell viability.
- Intact: It’s very important to maintain intact cellular membranes, which requires that you treat cells very gently. We recommend using wide-bore pipette tips to slowly, gently resuspend cells.
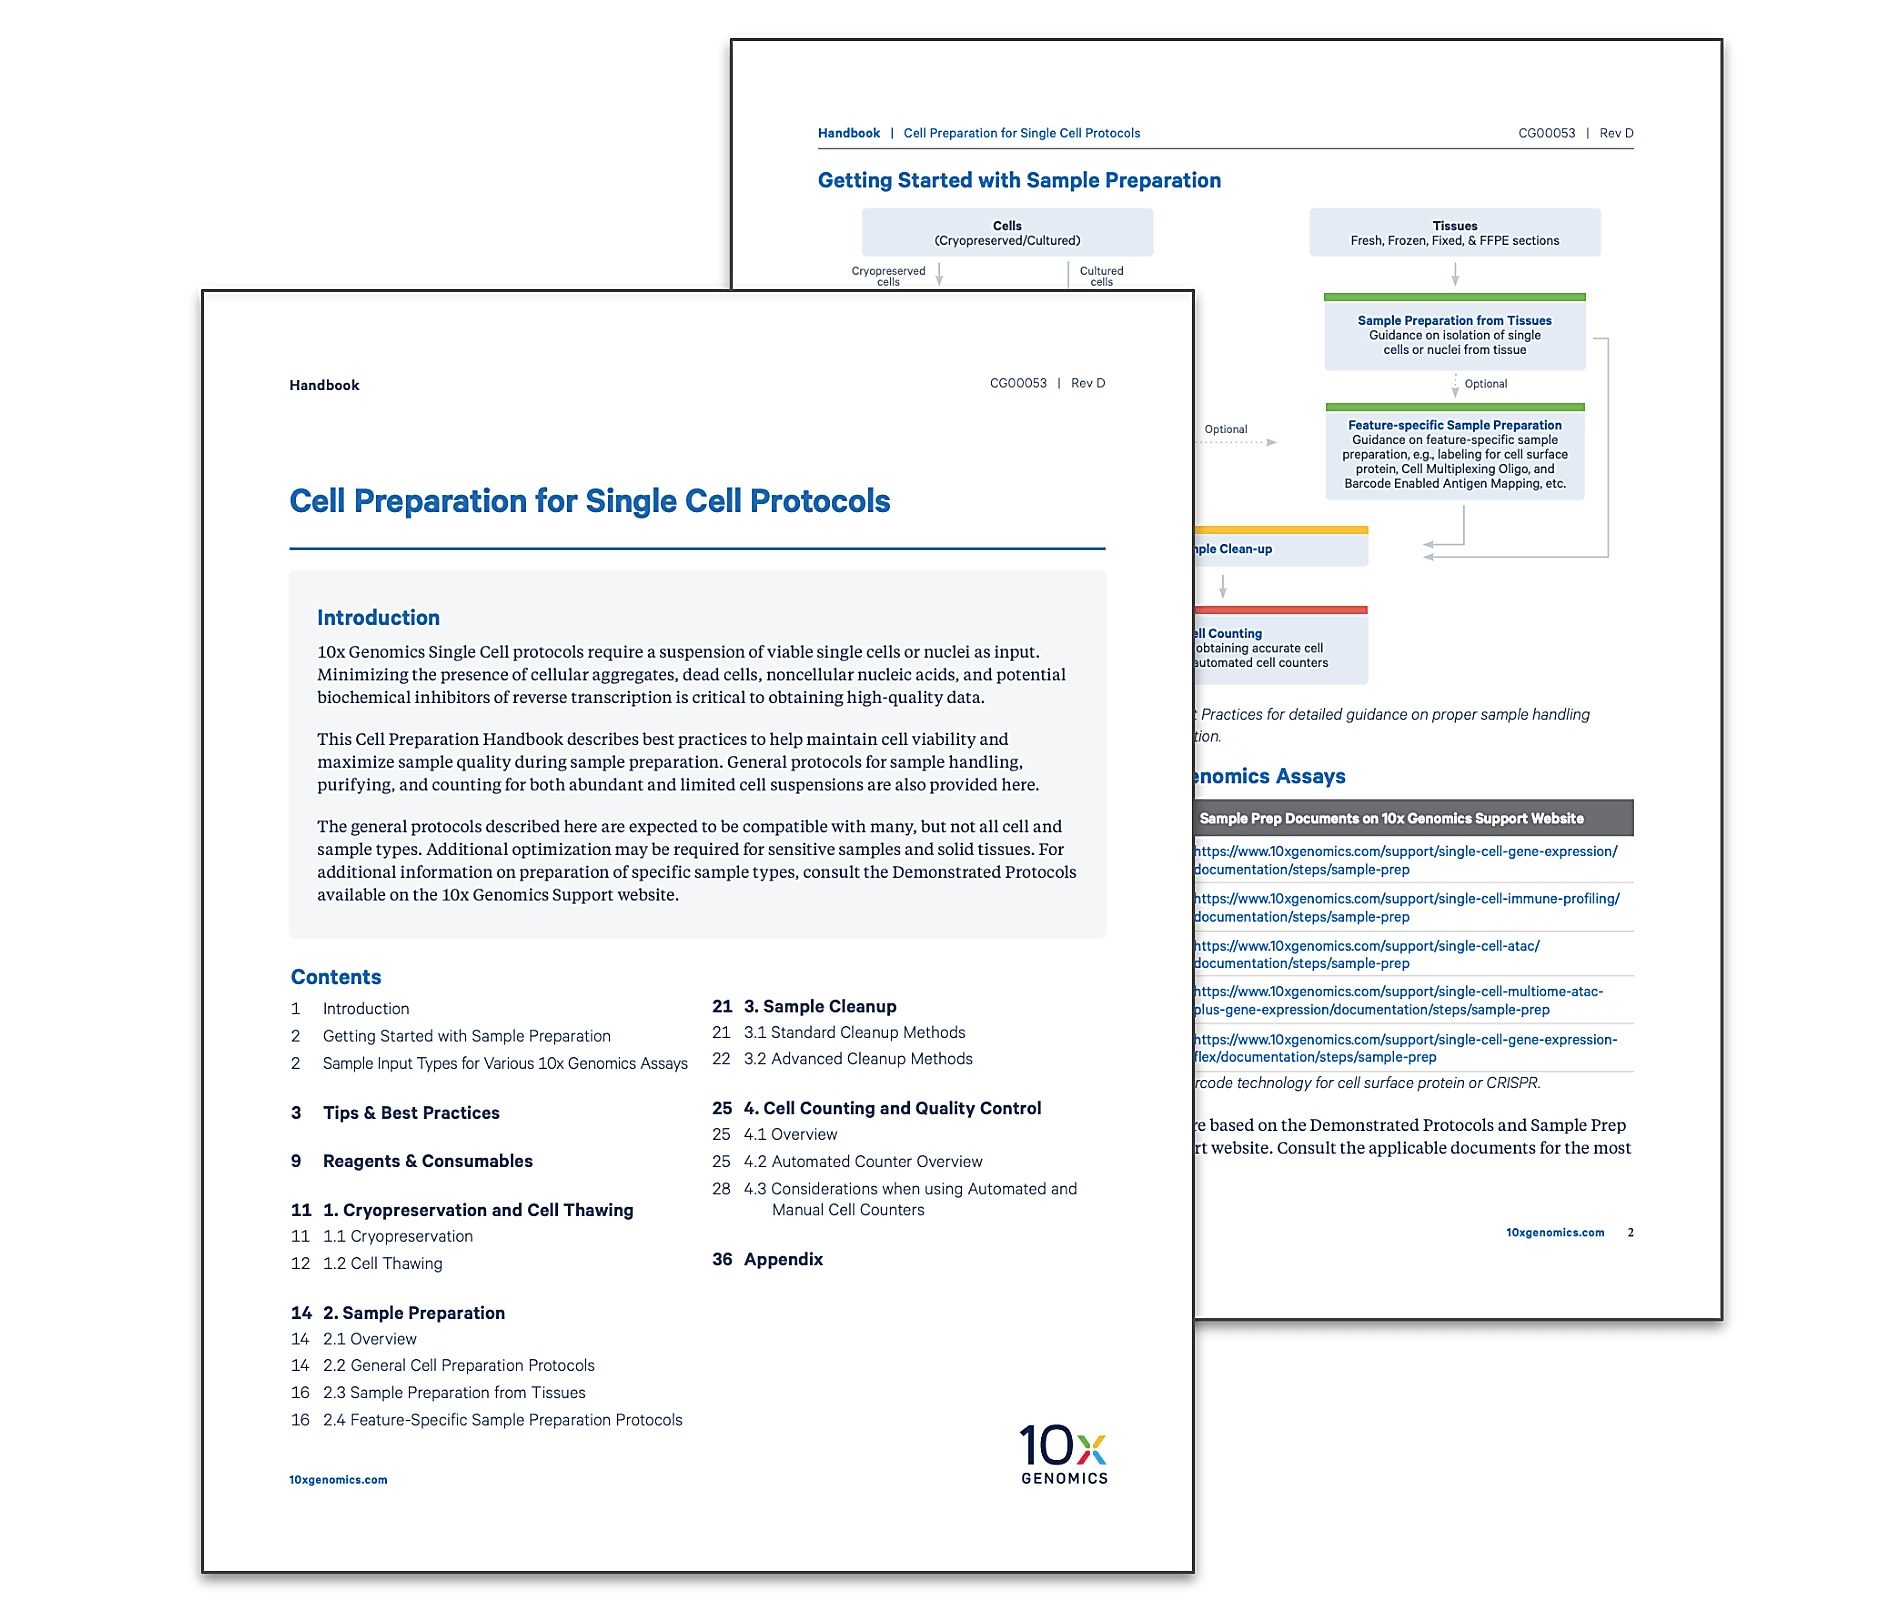
Download our comprehensive Cell Preparation Guide to find more single cell sample prep best practices.
What if my sample doesn’t meet the quality criteria?
You may still be able to work with this sample, but it’s important to think about how to perform sample optimization in advance of your experiment. In other words, if you thaw or collect a sample that you find is not up to quality standards, you should have a plan for how to improve it. There are many options to explore in this case, including using dead cell removal kits, enriching for live cells, and enriching or depleting for specific cell types, among other methods.
Why is cell counting important prior to loading cells onto the Chromium chip?
Accurate cell counting is not only essential to meet the targeted cell recovery for your experimental goals, but it can also be viewed as a final check of sample quality. Whether using a manual hemocytometer or an automated cell counter, it’s important to have a consistent process and to include markers for live/dead cell discrimination. Trypan Blue stain can be used to distinguish live and dead cells when samples don’t have much debris; however, it may be better to use a fluorescent dye to ensure you don’t stain debris and miscount them as cells, particularly when working with automated counters.
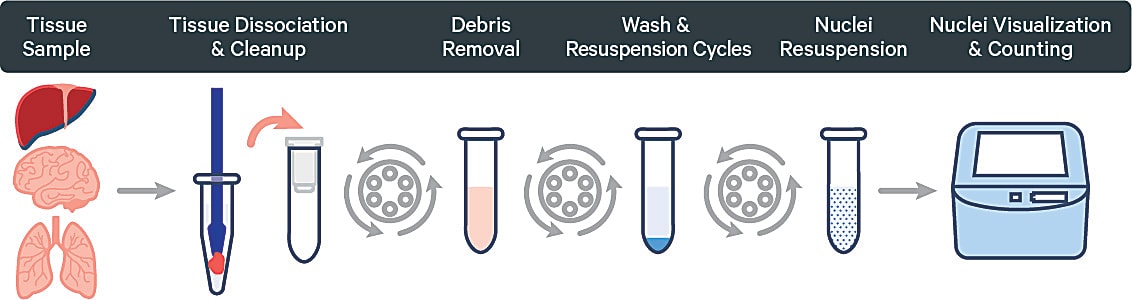
What are the considerations for nuclei sample quality?
Nuclei isolation requires optimization for time in the lysis buffer. Lysis should be as thorough as possible, with ideally less than 5% live cells remaining in the suspension after lysis. (This recommendation is, of course, contrary to the goals of single cell dissociation, where we’re trying to maintain as many live cells as possible!) While single nuclei sample isolation essentially destroys whole cells, you will still want to start the lysis with a high-quality sample of live, healthy cells.
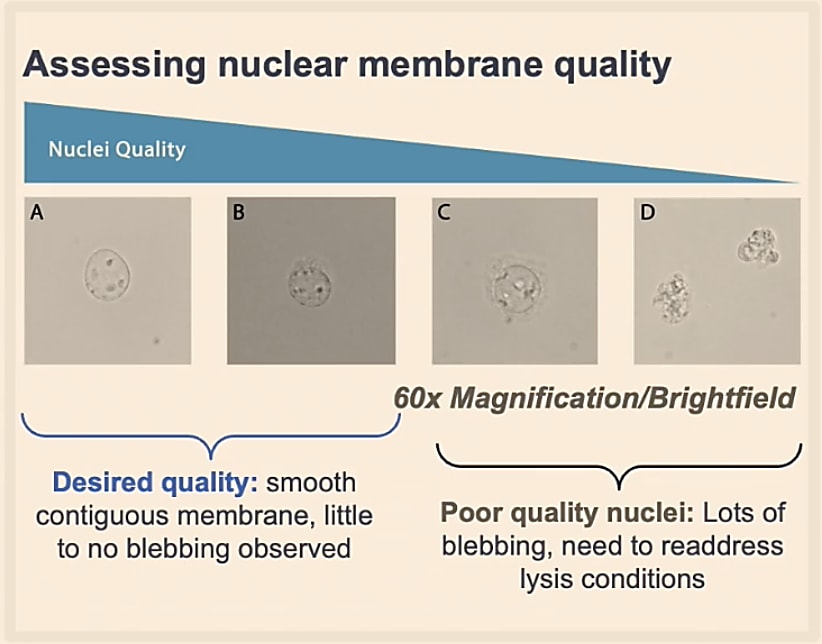
Additionally, you will want to ensure that your isolated nuclei are rounded with an intact nuclear membrane. If lysis goes on too long, the nucleus can “bleb,” meaning it will start to have a bubbling surface, irregular shape, and can clump together with other nuclei.
Counting will be different when working with nuclei too. All the nuclei will stain as dead cells. They are also very small compared to whole cells, and will be in a suspension with other debris. Therefore, counting with only Trypan Blue might be inaccurate. Given these conditions, we recommend that you use a fluorescent stain, like Ethidium Homodimer-1, for accurate counting.
Achieving a good quality single nuclei suspension can be particularly tricky with lysis optimization requirements. Our Nuclei Isolation Kit can take the guesswork out of this process, since the kit has been validated on a number of human and mouse samples. Learn how it can make single nuclei sample prep easy and reproducible →
Sample logistics matter for single cell prep
The logistics of your sample collection, preservation, and handling have a huge impact on sample quality and, ultimately, final data. In an ideal scenario you are able to process your sample immediately after collection, but this is often not the case. Having a plan for sample preservation is therefore incredibly important for success.
What are best practices for preserving cell cultures and cells in suspension?
Normally, cells in culture are fairly happy being frozen in their media with additional DMSO as a cryoprotectant. They should then be frozen slowly to –80oC and transferred to liquid nitrogen for long-term storage.
How should I store fresh tissues for single cell sample prep?
In the case that fresh tissue can be processed within a close proximity shortly after dissection or biopsy, the best practice is to store the tissue briefly on ice, then dissociate it into a single cell suspension. Dissociated cells can then be frozen in cell culture media with DMSO or a specialized cryopreservation solution to maintain cell viability until you’re ready to run the single cell assay.
When you cannot immediately process fresh tissue for single cell dissociation, there are some additional considerations before choosing an approach to sample preservation. Two considerations are how long you must wait before you can dissociate the tissue and whether you want to work with nuclei or cells. If the interval from sample collection to dissociation is less than 72 hours, then it may be a viable option to store the sample in a tissue storage solution at 4oC. This also allows you to work with cells, though pilot studies are recommended to ensure you can get live cells from this short-term sample storage method.
If you must wait longer than 72 hours, you can consider snap-freezing the whole tissue at –196oC. However, this treatment method only allows for nuclei isolation in later sample prep steps. Alternatively, if you must wait longer than 72 hours, you could consider storing the tissue at –80oC in a cryopreservation media, with the intention of keeping whole cells intact and preserving cell surface proteins. In both cases, pilot studies are recommended, as these storage methods have not been validated internally, and it is essential to test whether or not they arecompatible with the tissue of interest. (Find more details about sample preservation and logistics on our support site).
There are other methods of sample preservation, including fixation, that we will not cover in this blog article. Stay tuned for the next part in this single cell sample prep series, where we will provide an overview of the sample prep options available when using Chromium Single Cell Gene Expression Flex.
Want to keep learning about our single cell product offerings? Here’s a couple ways to do that!
For a one-stop shop on the full single cell portfolio, plus details on product specifications and potential applications, download our Single Cell Buyer’s Guide. Download here →
About the author: