In this tutorial, you will work through an example single cell analysis in Sentira, starting from data matrices output by Cell Ranger and ending with an exploration of disease biology. You will use a mouse spinal cord dataset, directing the agent in plain language at each step.
In this tutorial you will learn how to:
- Create samples and load data.
- Create prompts and see the bioinformatics packages available for your analysis.
- Understand how each prompt is sealed off in its own workspace, so separate lines of inquiry stay independent and reproducible.
- Find and use example prompts to direct the analysis.
- Review the analysis and iterate with the agent in Chat.
- Apply tips for success to get the most out of Sentira.
Because Sentira runs on 10x Cloud, everything happens in your web browser. There is nothing to install and no infrastructure to manage.
This tutorial assumes you have a 10x Genomics account and access to Sentira Single Cell. The pages below cover everything you need to get set up:
- Account and login: Create a 10x Genomics Cloud account.
- Billing and credits: How credits are priced and consumed.
- Terms of use: Use of Sentira is governed by the 10x Genomics Cloud Services Terms.
This tutorial uses a Universal 3' v4 mouse spinal cord dataset generated with the Chromium X instrument. This dataset features amyotrophic lateral sclerosis (ALS) mouse models containing the SOD1-G93A mutation and their non-carrier littermates.
Go to the dataset page and download the filtered feature-barcode matrix (HDF5) file for each of the six mouse specimens (three wild type and three mutants).
Alternatively, download all six files from the command line:
curl -O https://cf.10xgenomics.com/samples/cell-exp/10.0.0/SOD1_G93A_mouse_spinal_cord_P112_specimen_1_SOD1_G93A_mouse_spinal_cord_P112_specimen_1/SOD1_G93A_mouse_spinal_cord_P112_specimen_1_SOD1_G93A_mouse_spinal_cord_P112_specimen_1_sample_filtered_feature_bc_matrix.h5
curl -O https://cf.10xgenomics.com/samples/cell-exp/10.0.0/SOD1_G93A_mouse_spinal_cord_P112_specimen_2_SOD1_G93A_mouse_spinal_cord_P112_specimen_2/SOD1_G93A_mouse_spinal_cord_P112_specimen_2_SOD1_G93A_mouse_spinal_cord_P112_specimen_2_sample_filtered_feature_bc_matrix.h5
curl -O https://cf.10xgenomics.com/samples/cell-exp/10.0.0/SOD1_G93A_mouse_spinal_cord_P112_specimen_3_SOD1_G93A_mouse_spinal_cord_P112_specimen_3/SOD1_G93A_mouse_spinal_cord_P112_specimen_3_SOD1_G93A_mouse_spinal_cord_P112_specimen_3_sample_filtered_feature_bc_matrix.h5
curl -O https://cf.10xgenomics.com/samples/cell-exp/10.0.0/WT_mouse_spinal_cord_P112_specimen_1_WT_mouse_spinal_cord_P112_specimen_1/WT_mouse_spinal_cord_P112_specimen_1_WT_mouse_spinal_cord_P112_specimen_1_sample_filtered_feature_bc_matrix.h5
curl -O https://cf.10xgenomics.com/samples/cell-exp/10.0.0/WT_mouse_spinal_cord_P112_specimen_2_WT_mouse_spinal_cord_P112_specimen_2/WT_mouse_spinal_cord_P112_specimen_2_WT_mouse_spinal_cord_P112_specimen_2_sample_filtered_feature_bc_matrix.h5
curl -O https://cf.10xgenomics.com/samples/cell-exp/10.0.0/WT_mouse_spinal_cord_P112_specimen_3_WT_mouse_spinal_cord_P112_specimen_3/WT_mouse_spinal_cord_P112_specimen_3_WT_mouse_spinal_cord_P112_specimen_3_sample_filtered_feature_bc_matrix.h5
When you create a new analysis, Sentira guides you through four steps before any code runs.
To begin, navigate to cloud.10xgenomics.com/sentira/singlecell.
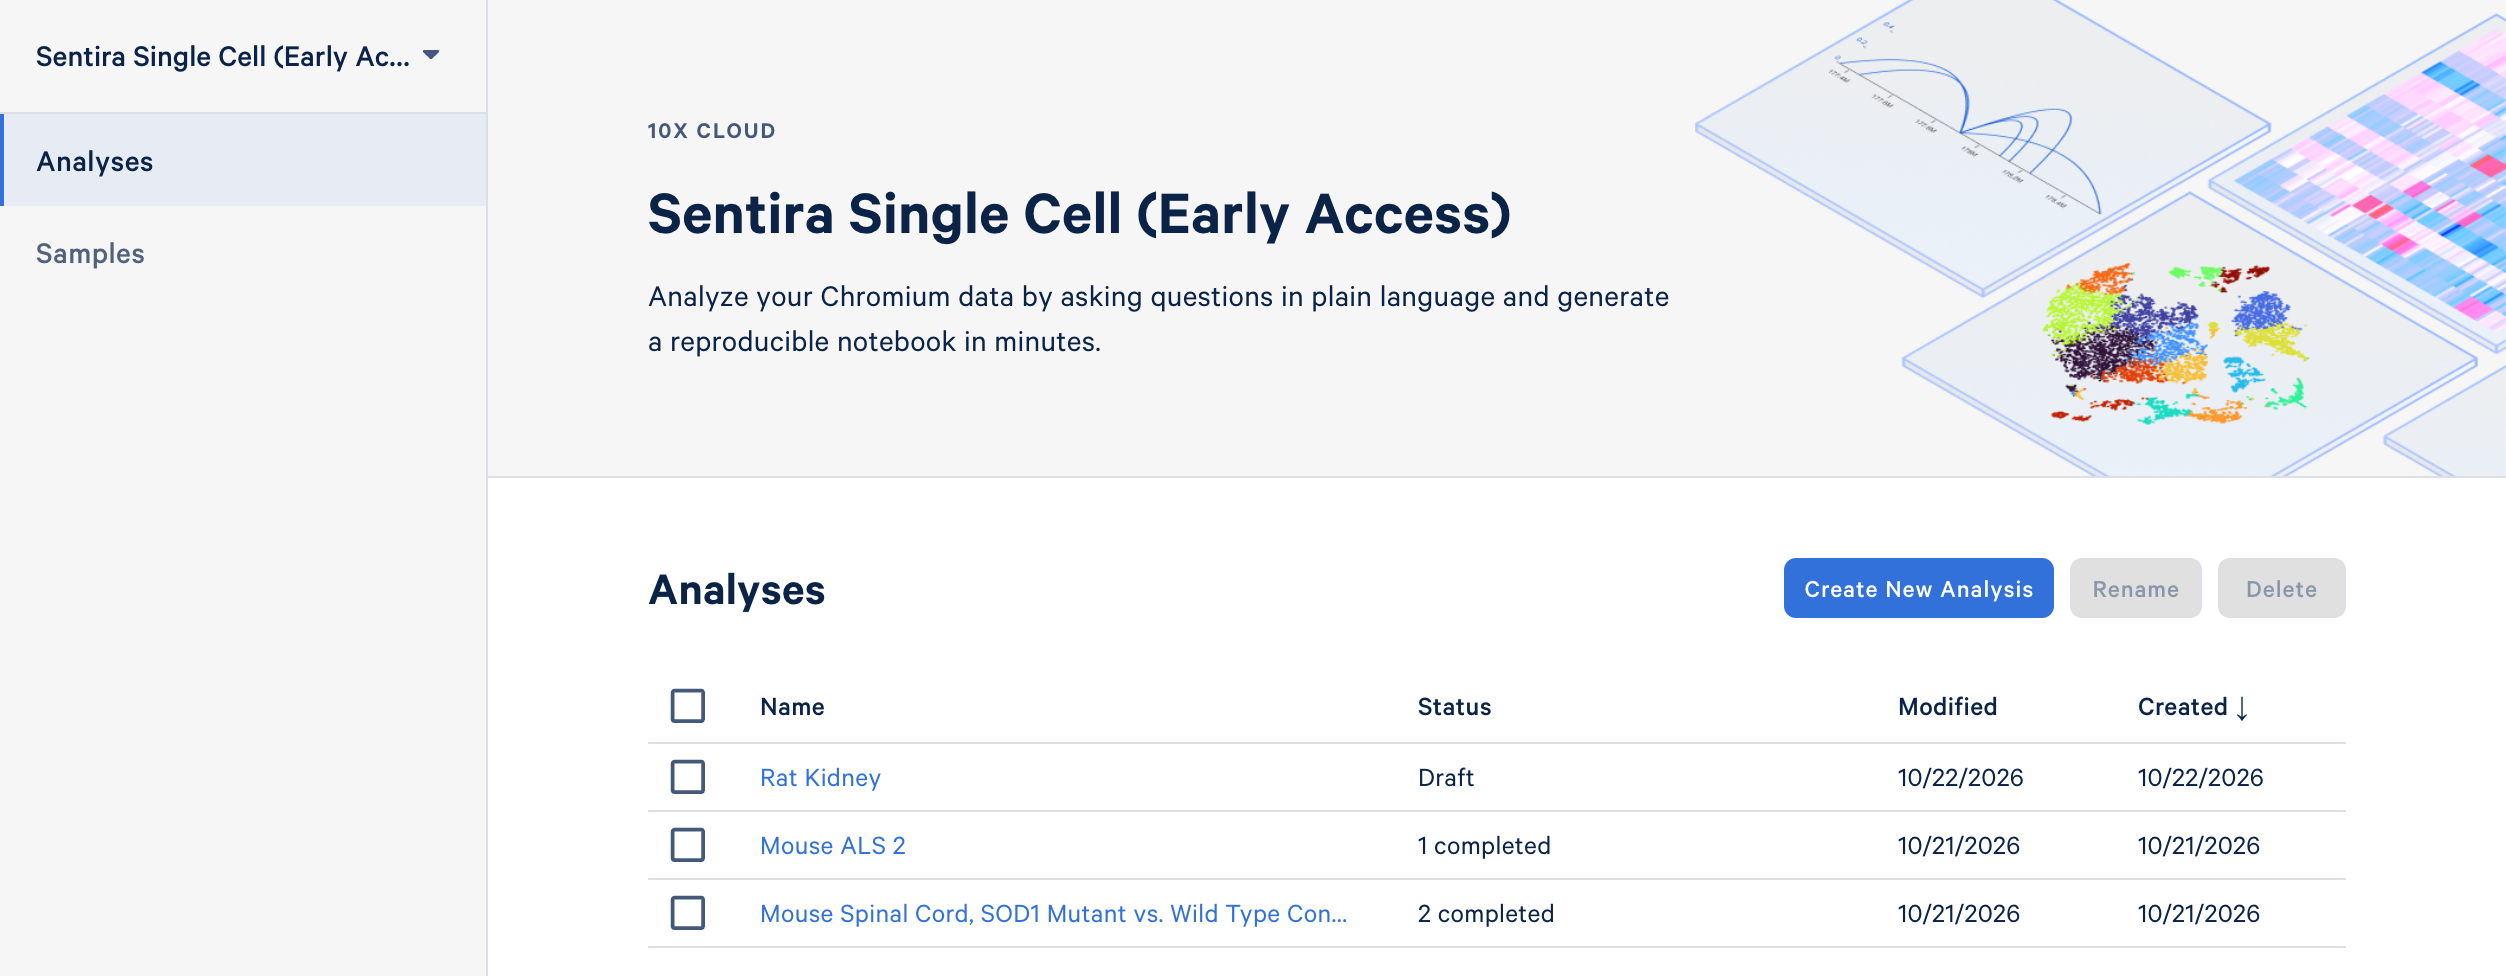
Next, click Create an Analysis.

When you create a new sample, specify the sample name, assay type, species, tissue, and optionally other metadata.
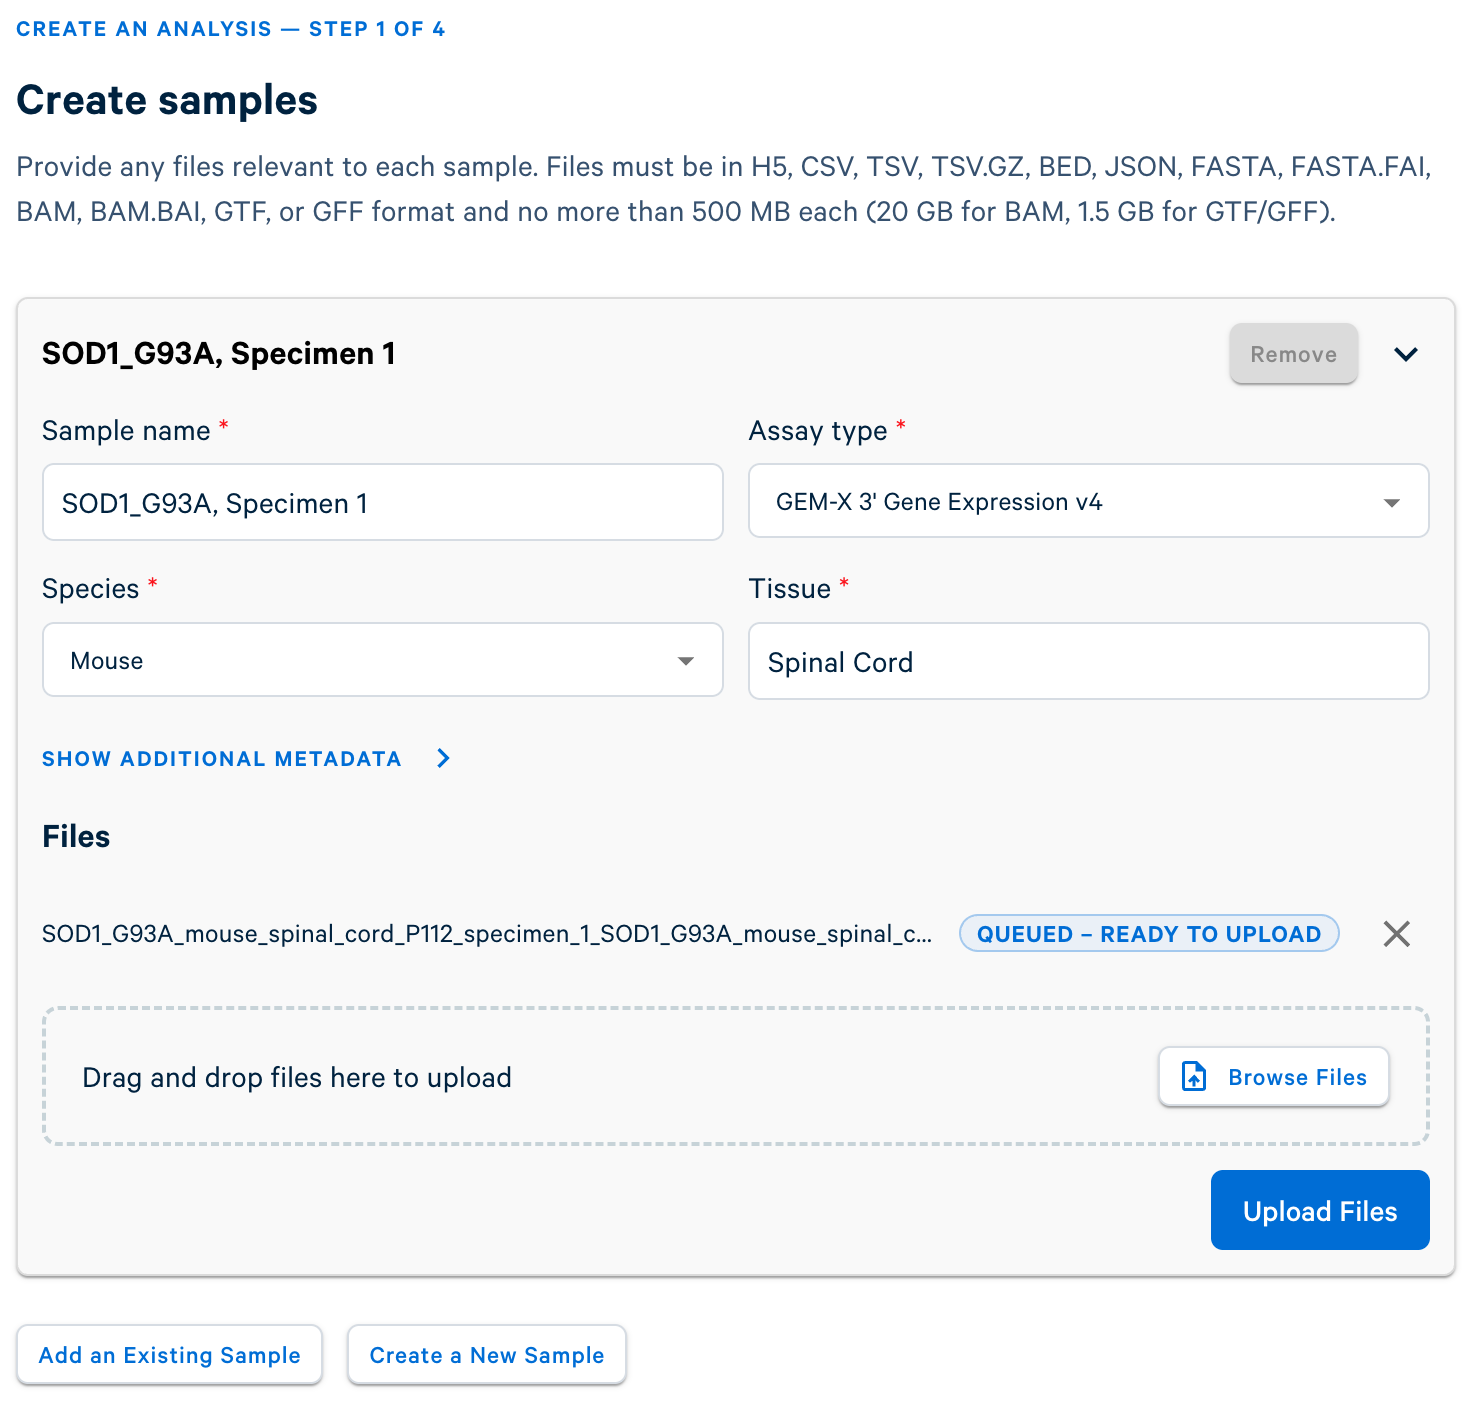
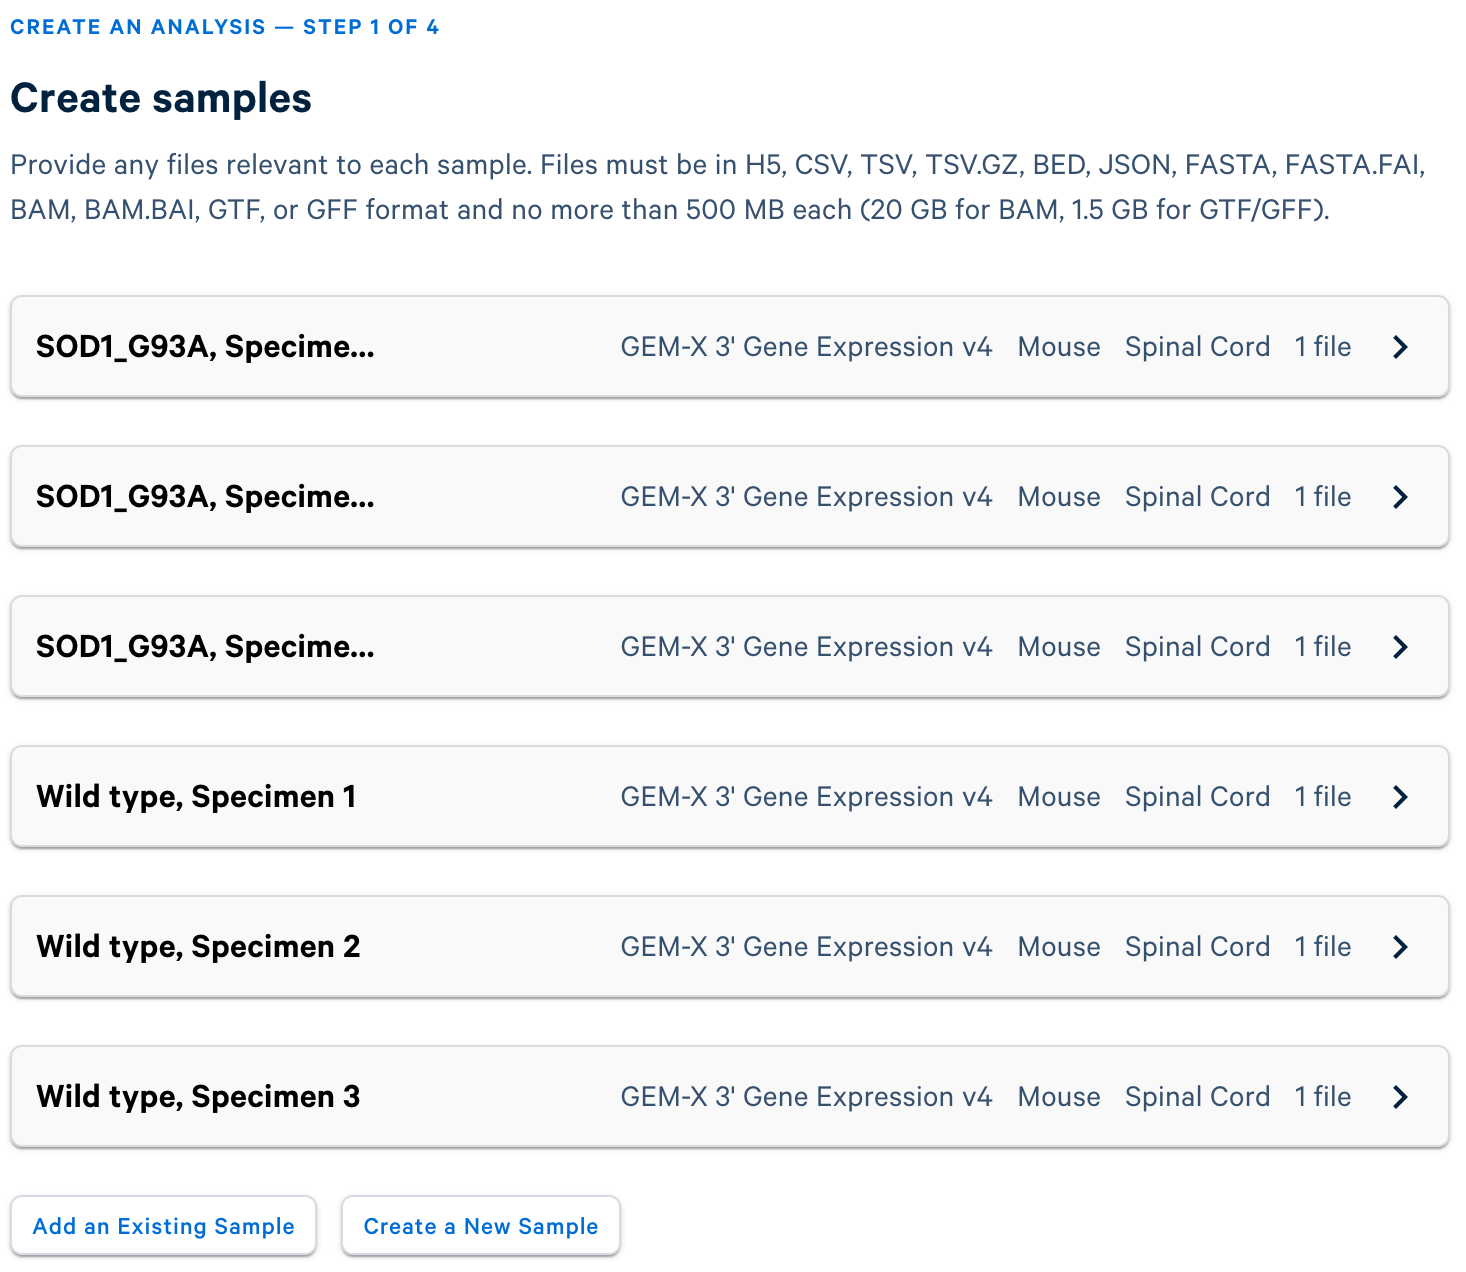
Continue by creating six samples (one per specimen), uploading the corresponding .h5 file to each.
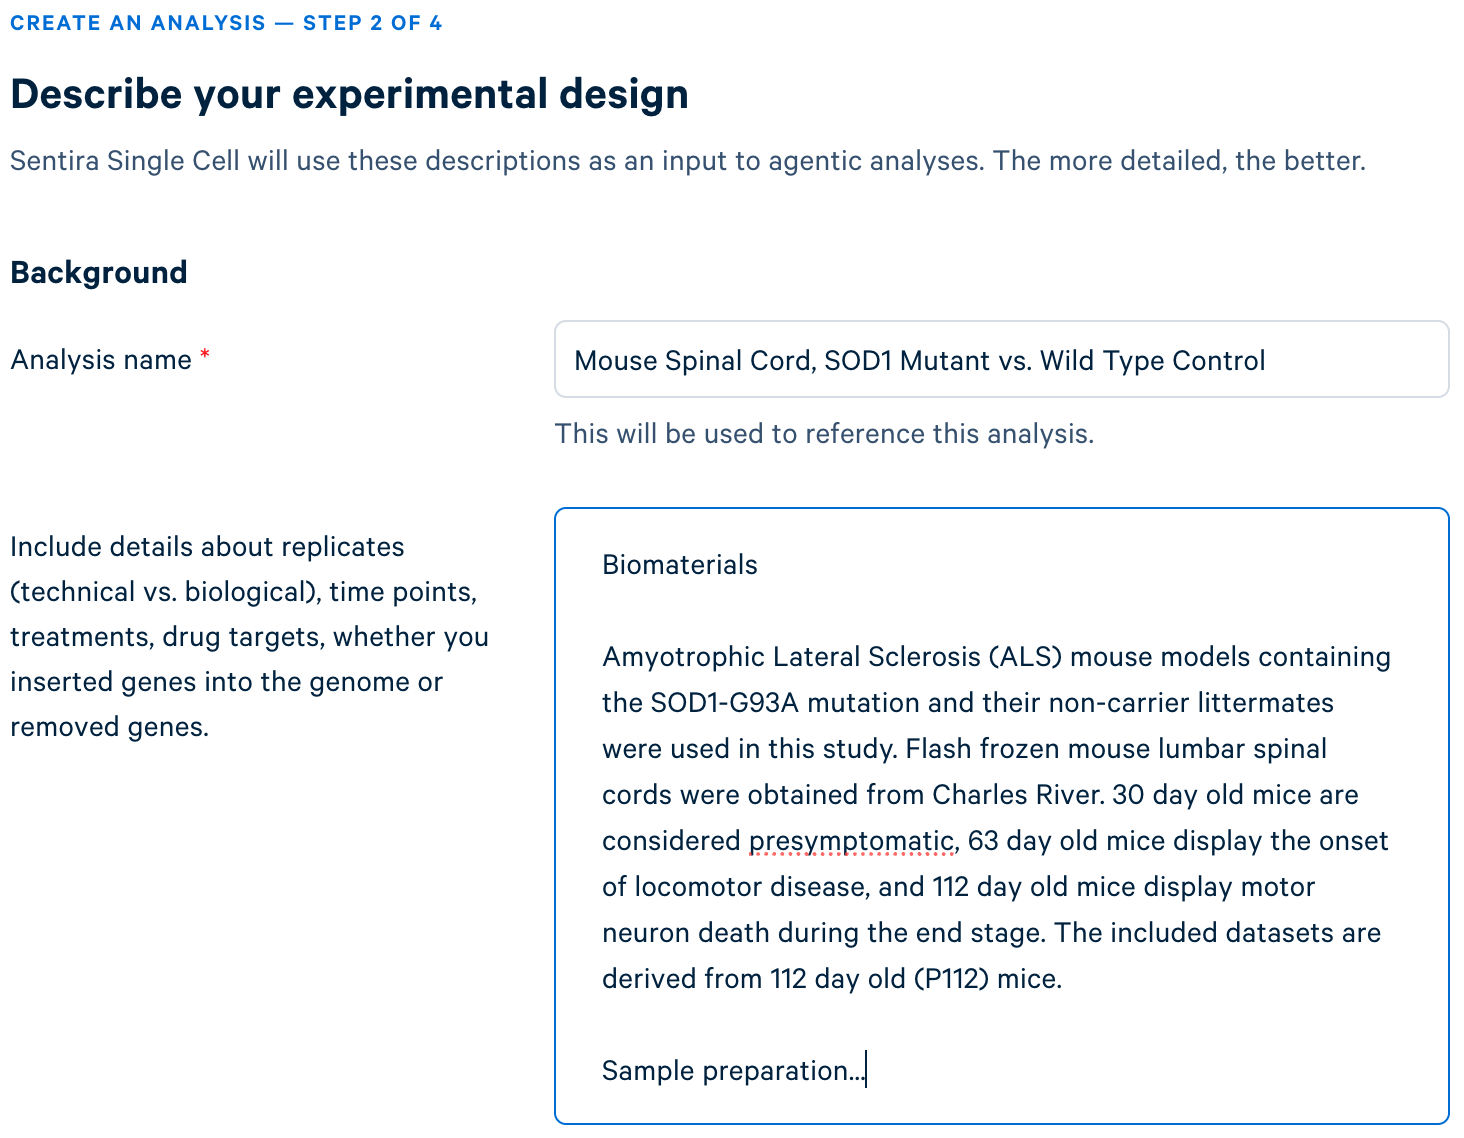
Give Sentira the context of your experiment so the agent can plan an appropriate analysis. The more relevant context you provide, the better the agent can tailor its approach to your data.
In this example, copy and paste the description from the dataset page, from "Biomaterials" through "Analysis".
Describe what you want to investigate as one or more prompts. A prompt can either be written in the form of a scientific hypothesis that you want to test with the provided data or as an analysis task. Each prompt becomes its own isolated analysis workspace.
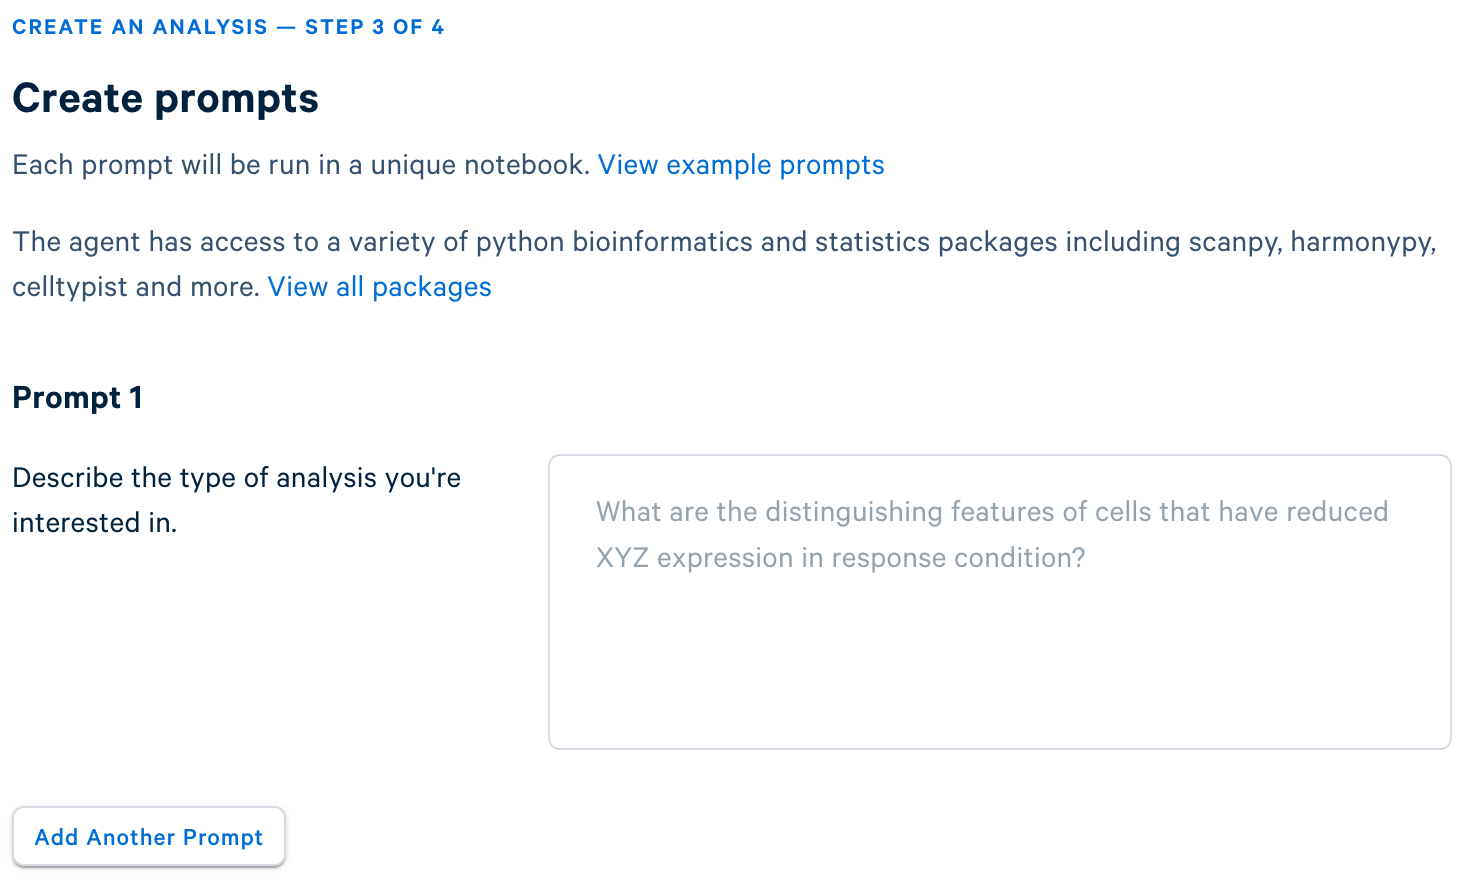
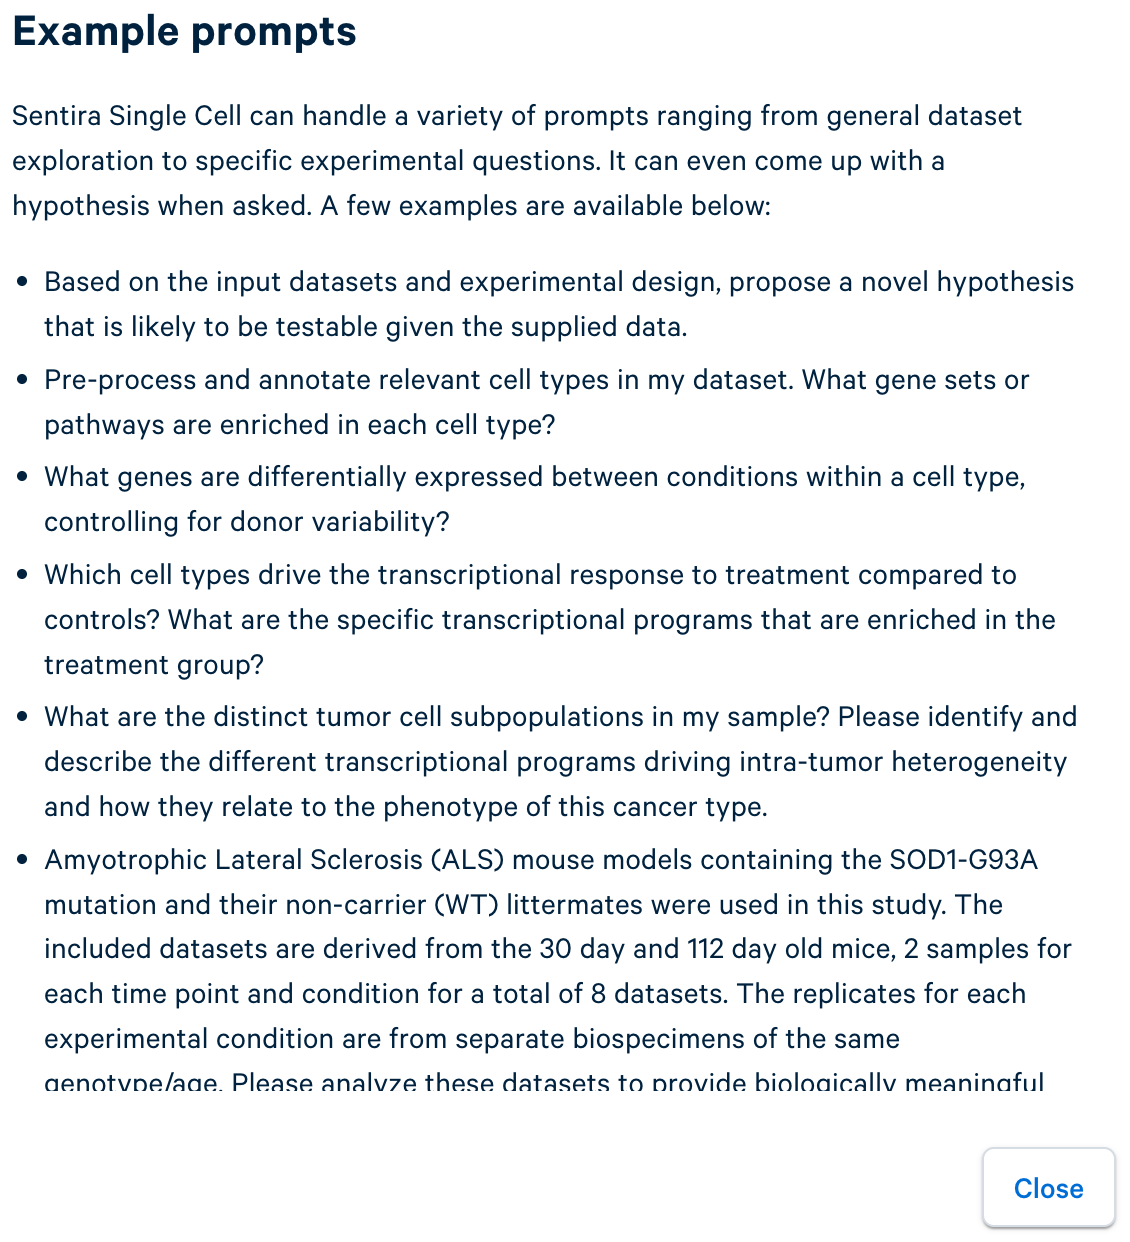
If you are not sure how to start, click View example prompts.
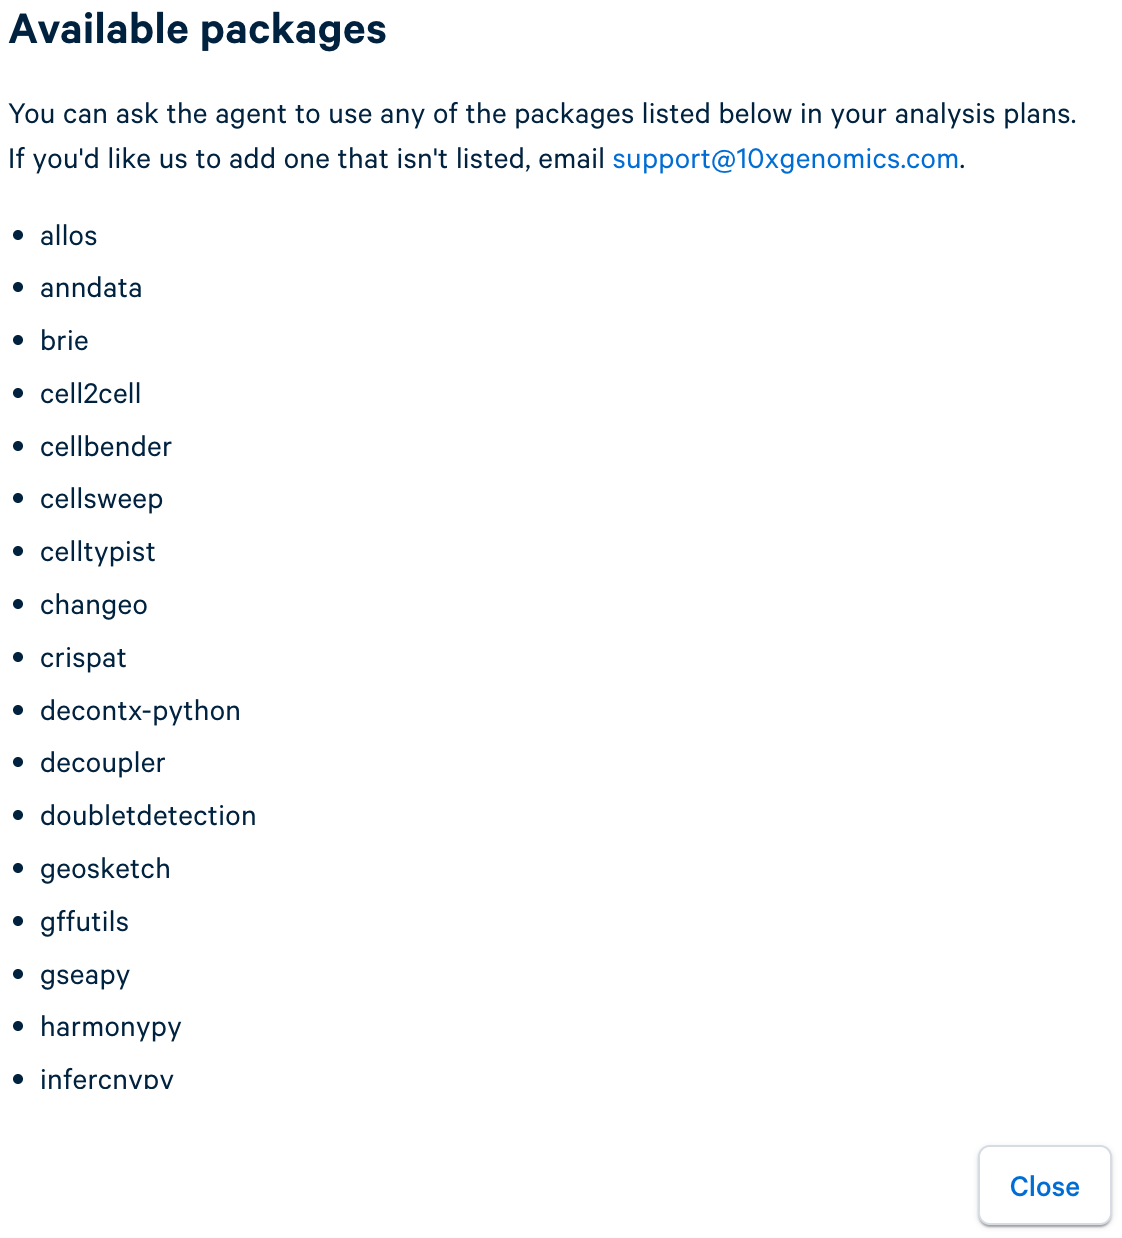
Click View all packages to see the python bioinformatics and statistics packages that Sentira can draw on for the analysis.
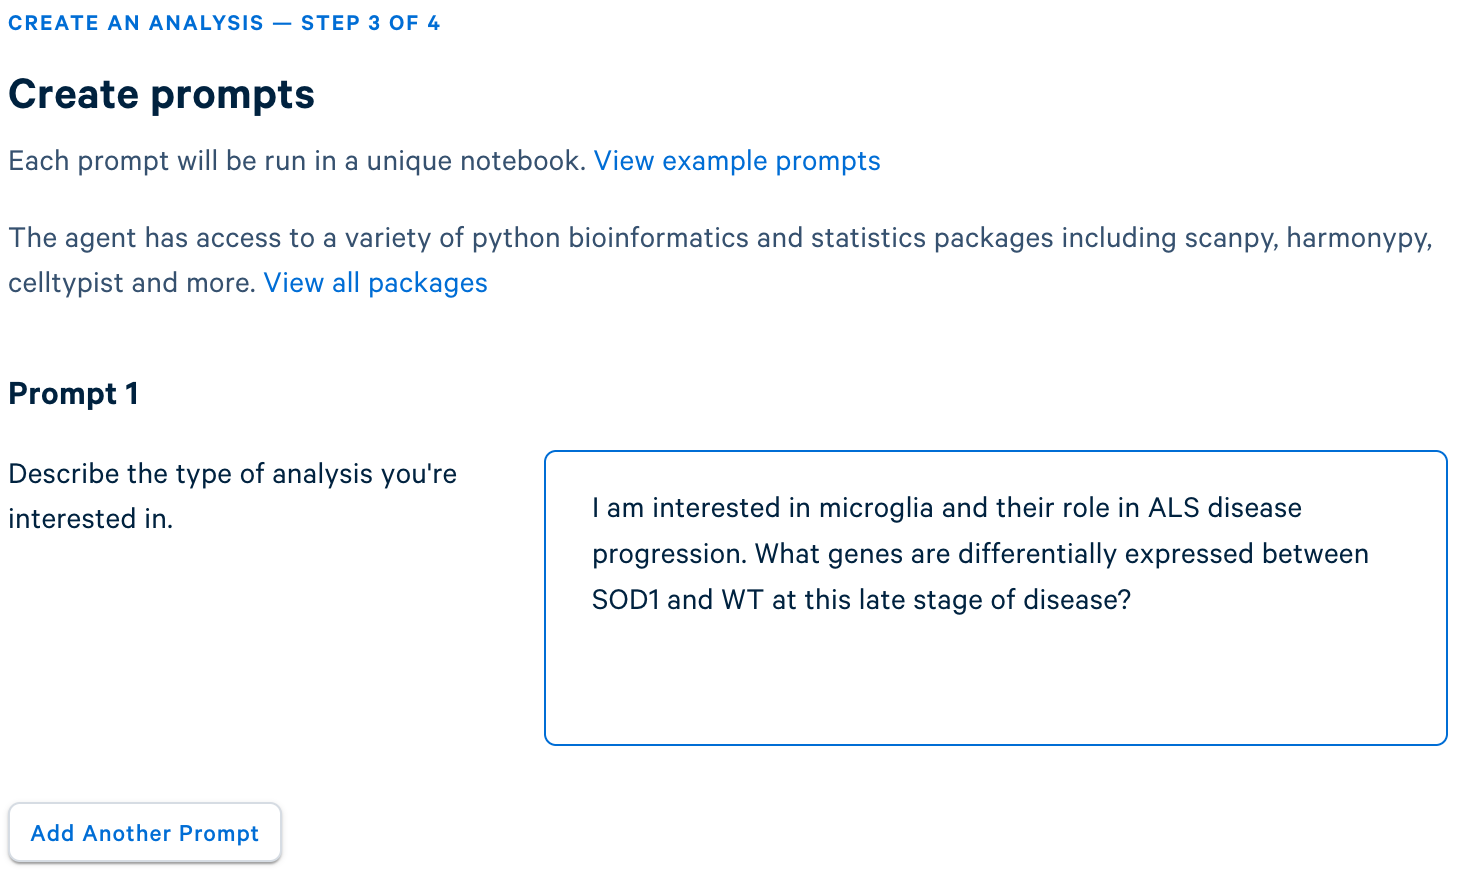
In this example, you can choose one of the pre-populated prompts, but customize it to reflect the six samples uploaded (three SOD1-G93A mutants and three wild-type controls).
Before running, Sentira proposes a plan. Review it, adjust anything you want to change, and approve it to begin. In this case, modify the plan to evaluate whether batch effects exist before implementing correction.
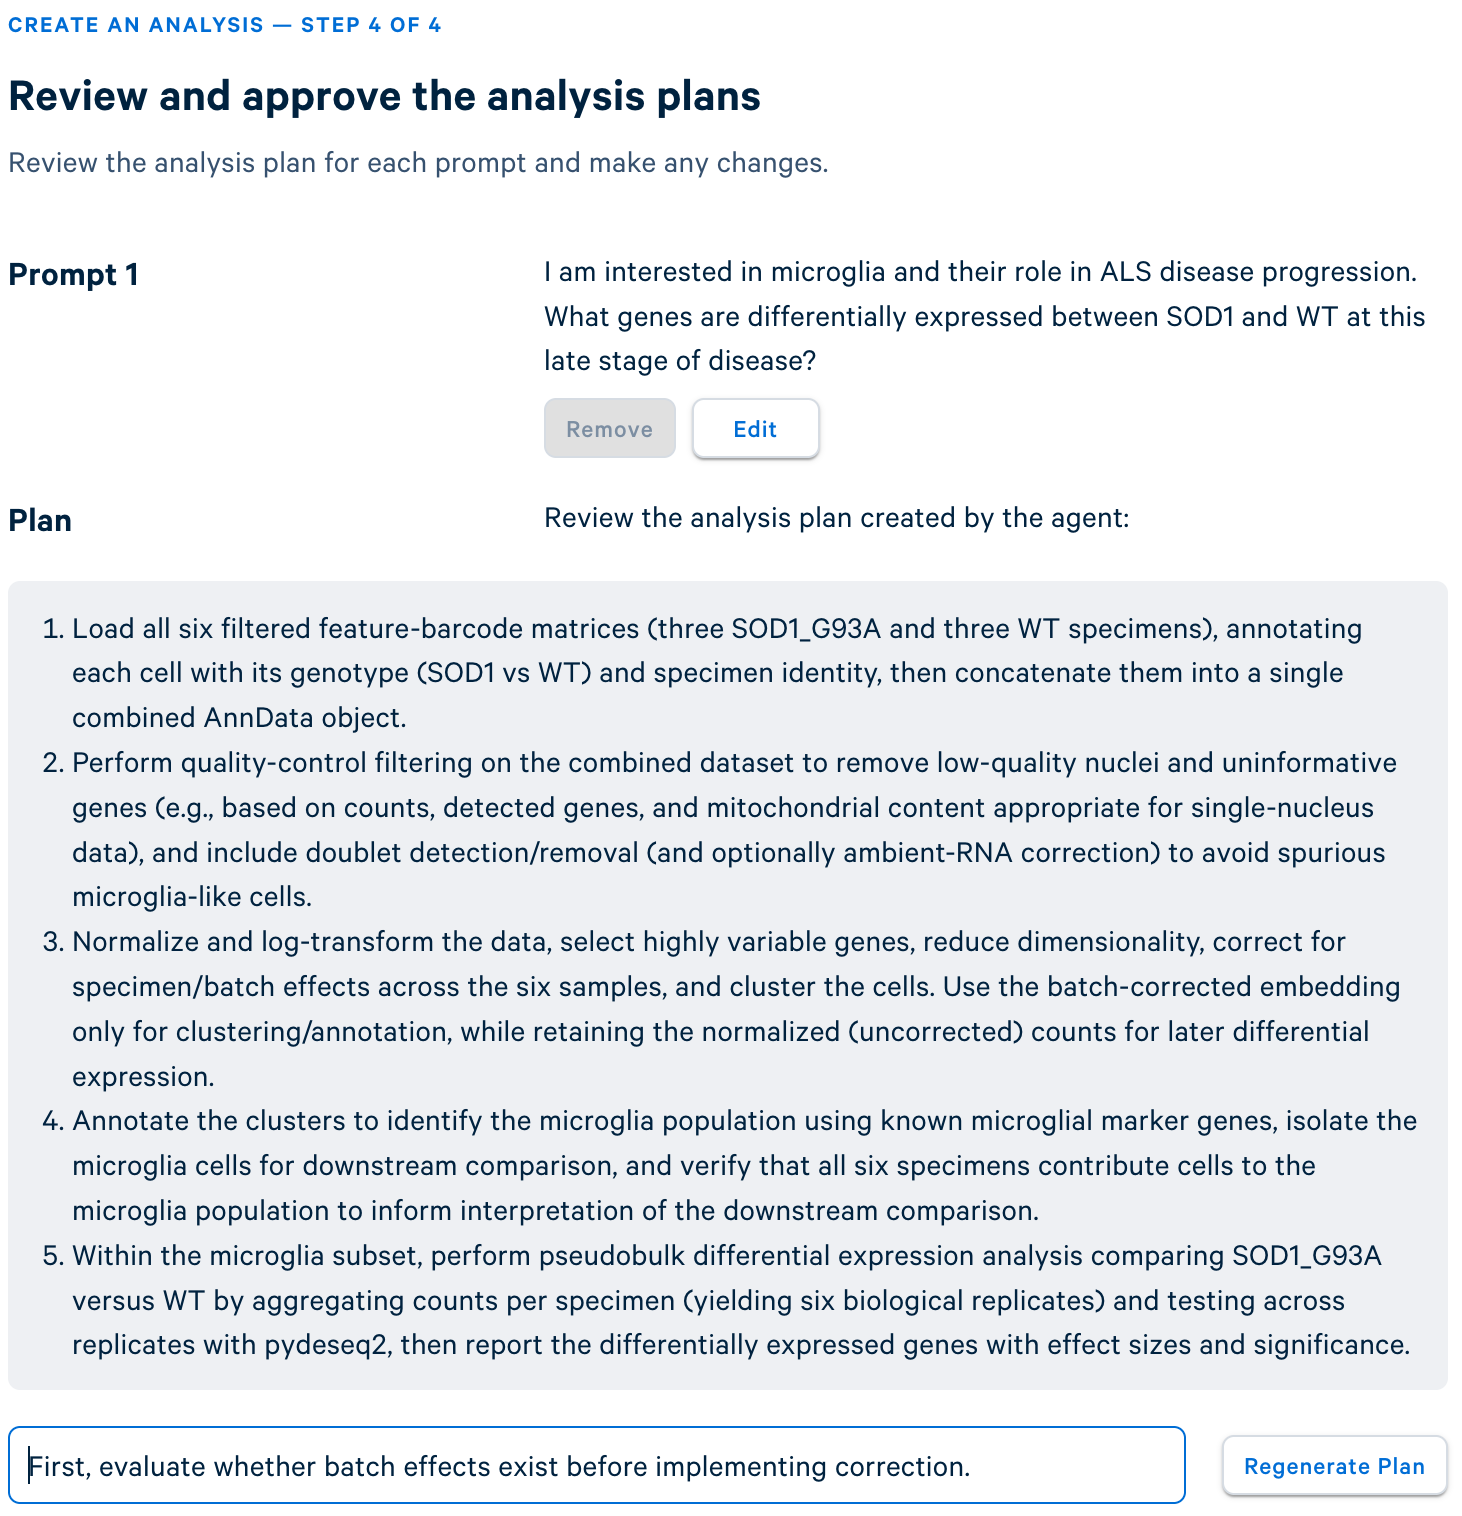
Now you are ready to run the analysis. Click Approve Plan and Run Analysis to continue.
When it completes, you can explore both the Jupyter notebook and download the output files.
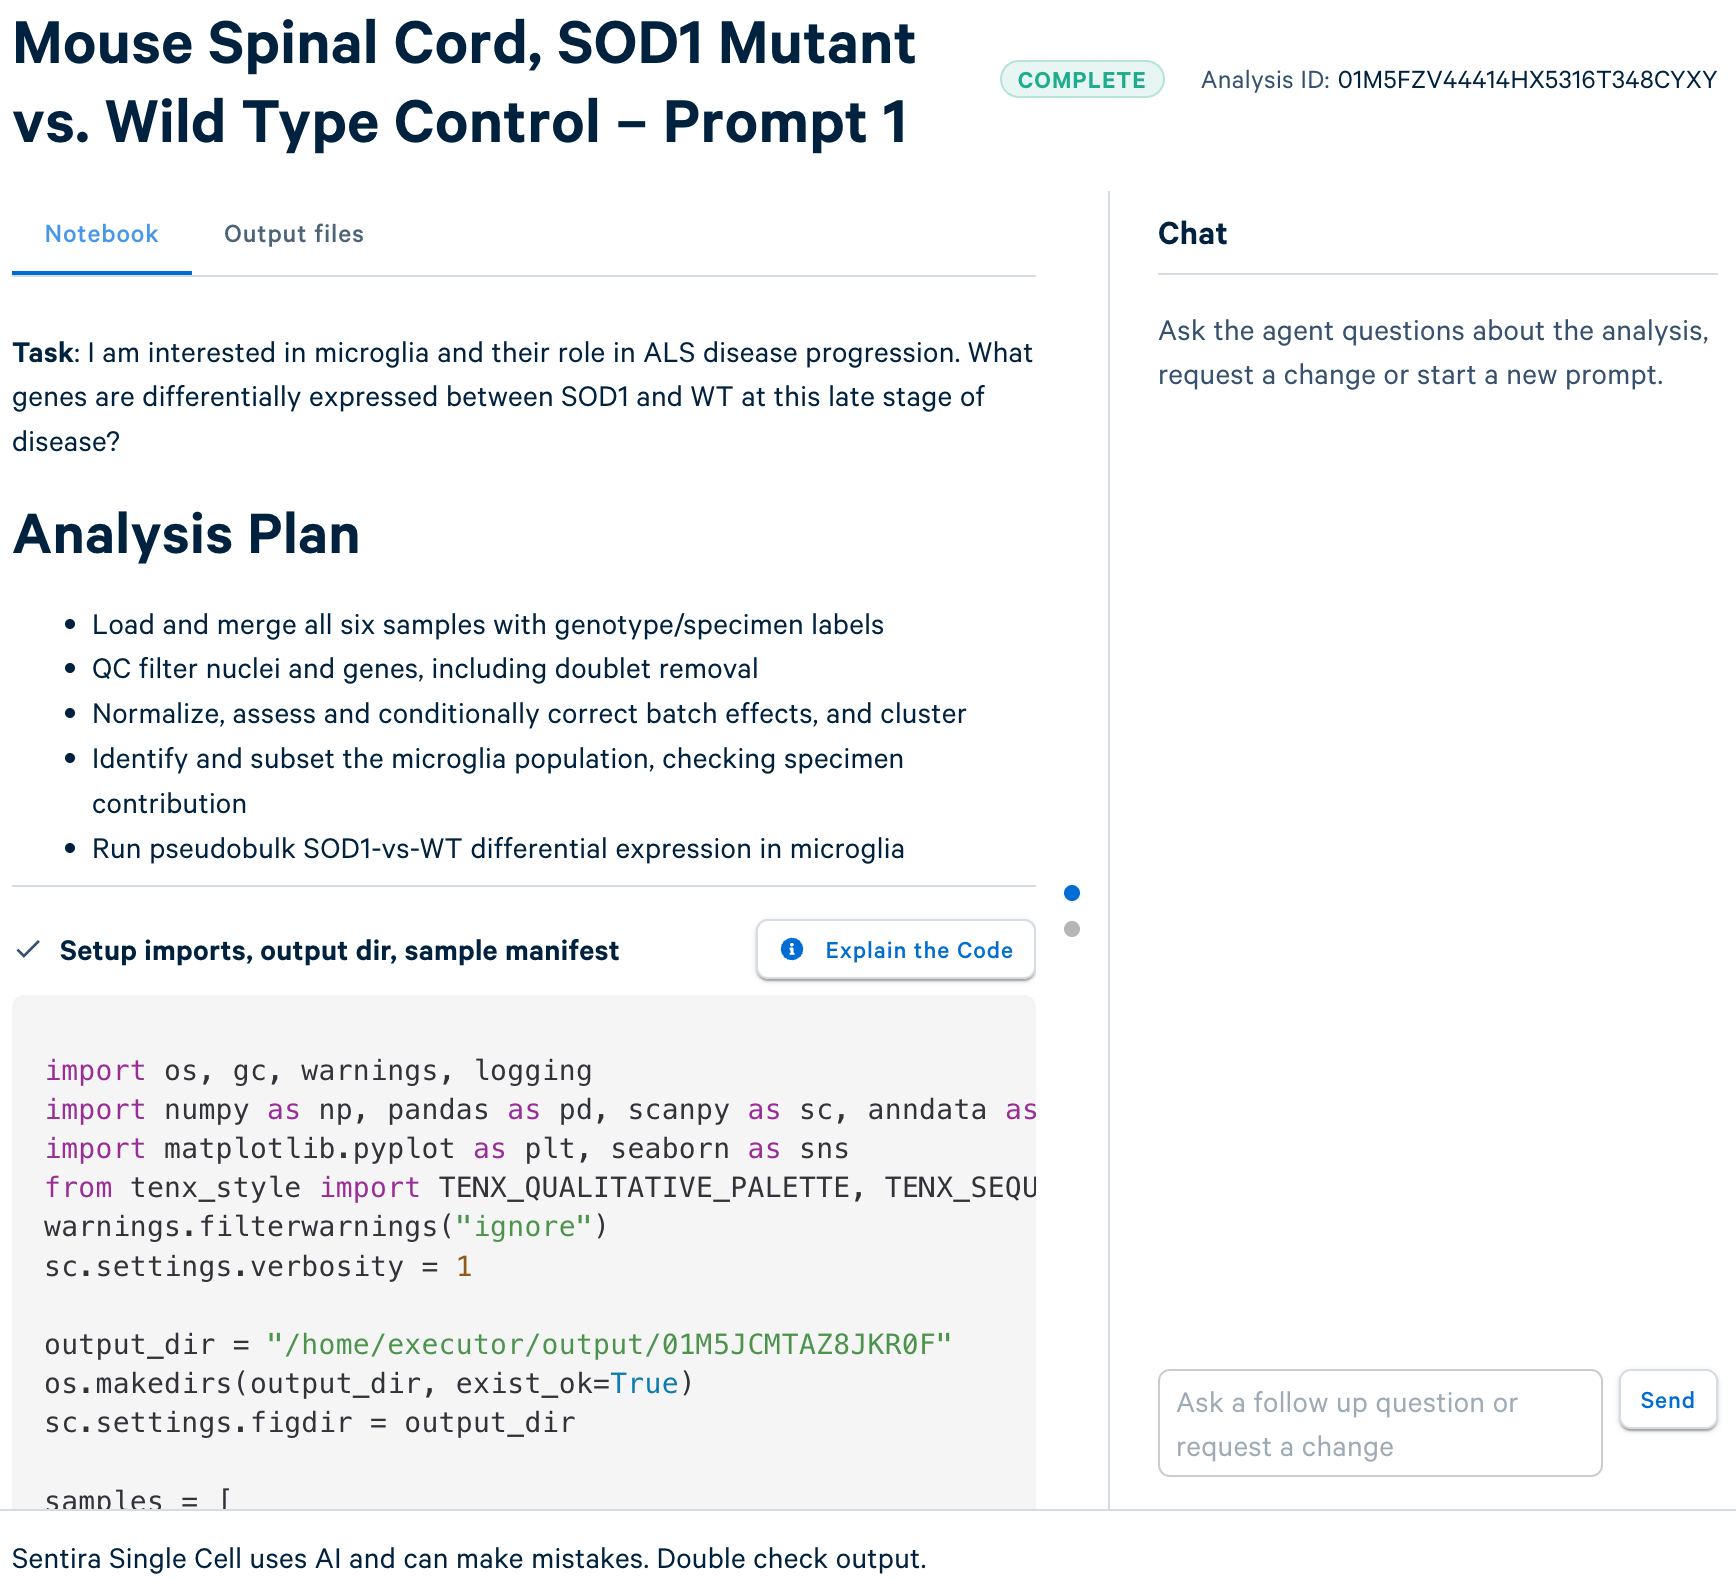
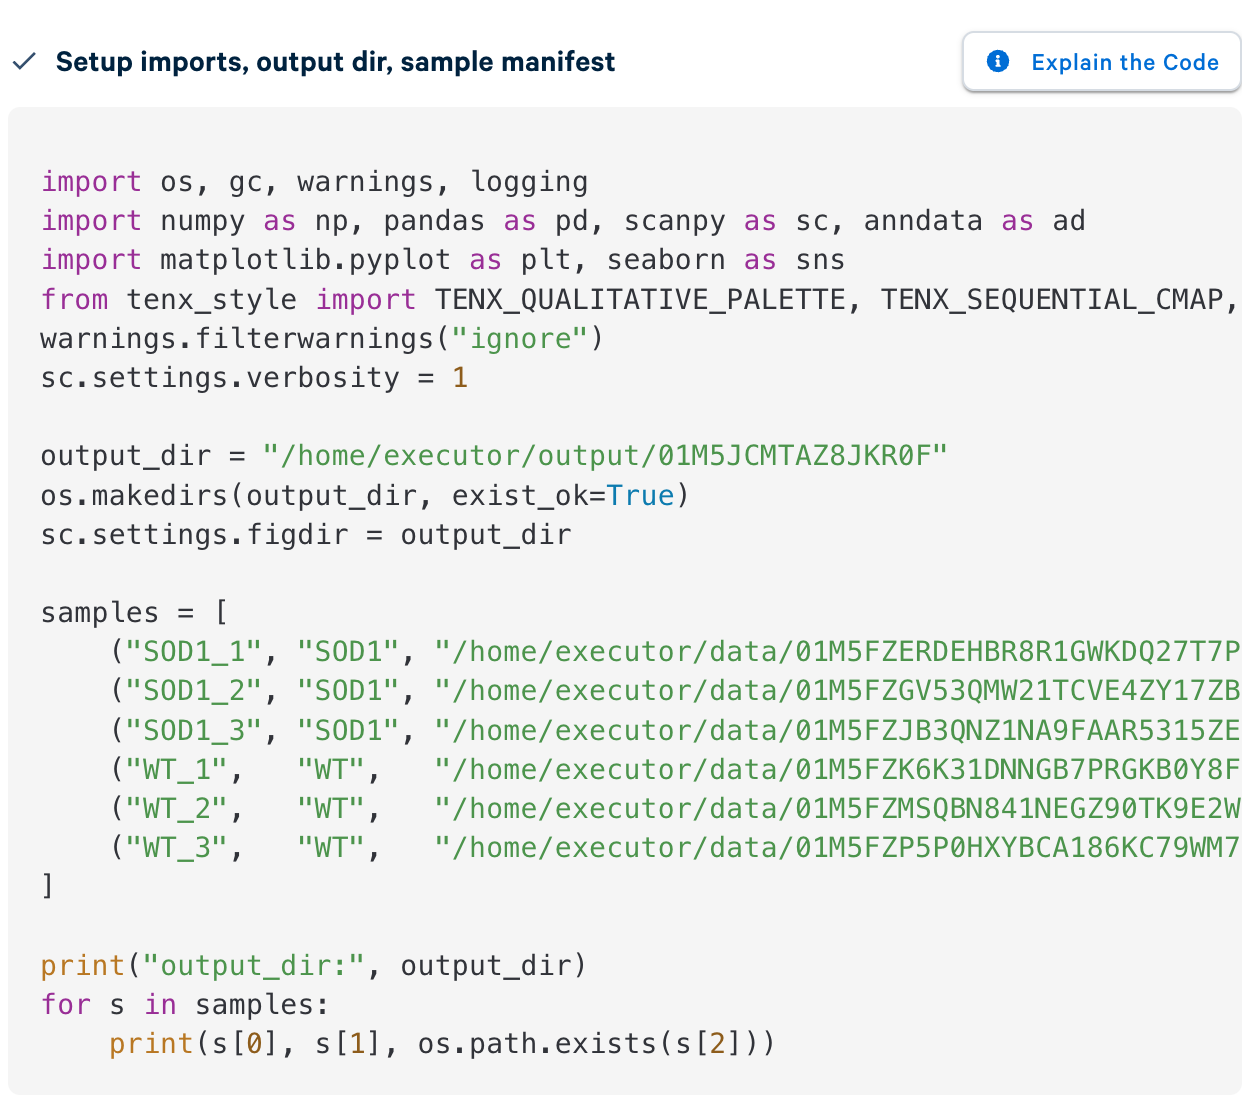
The Jupyter notebook is divided into discrete code blocks for each portion of the analysis.
For explanation of each code block, click Explain the Code.
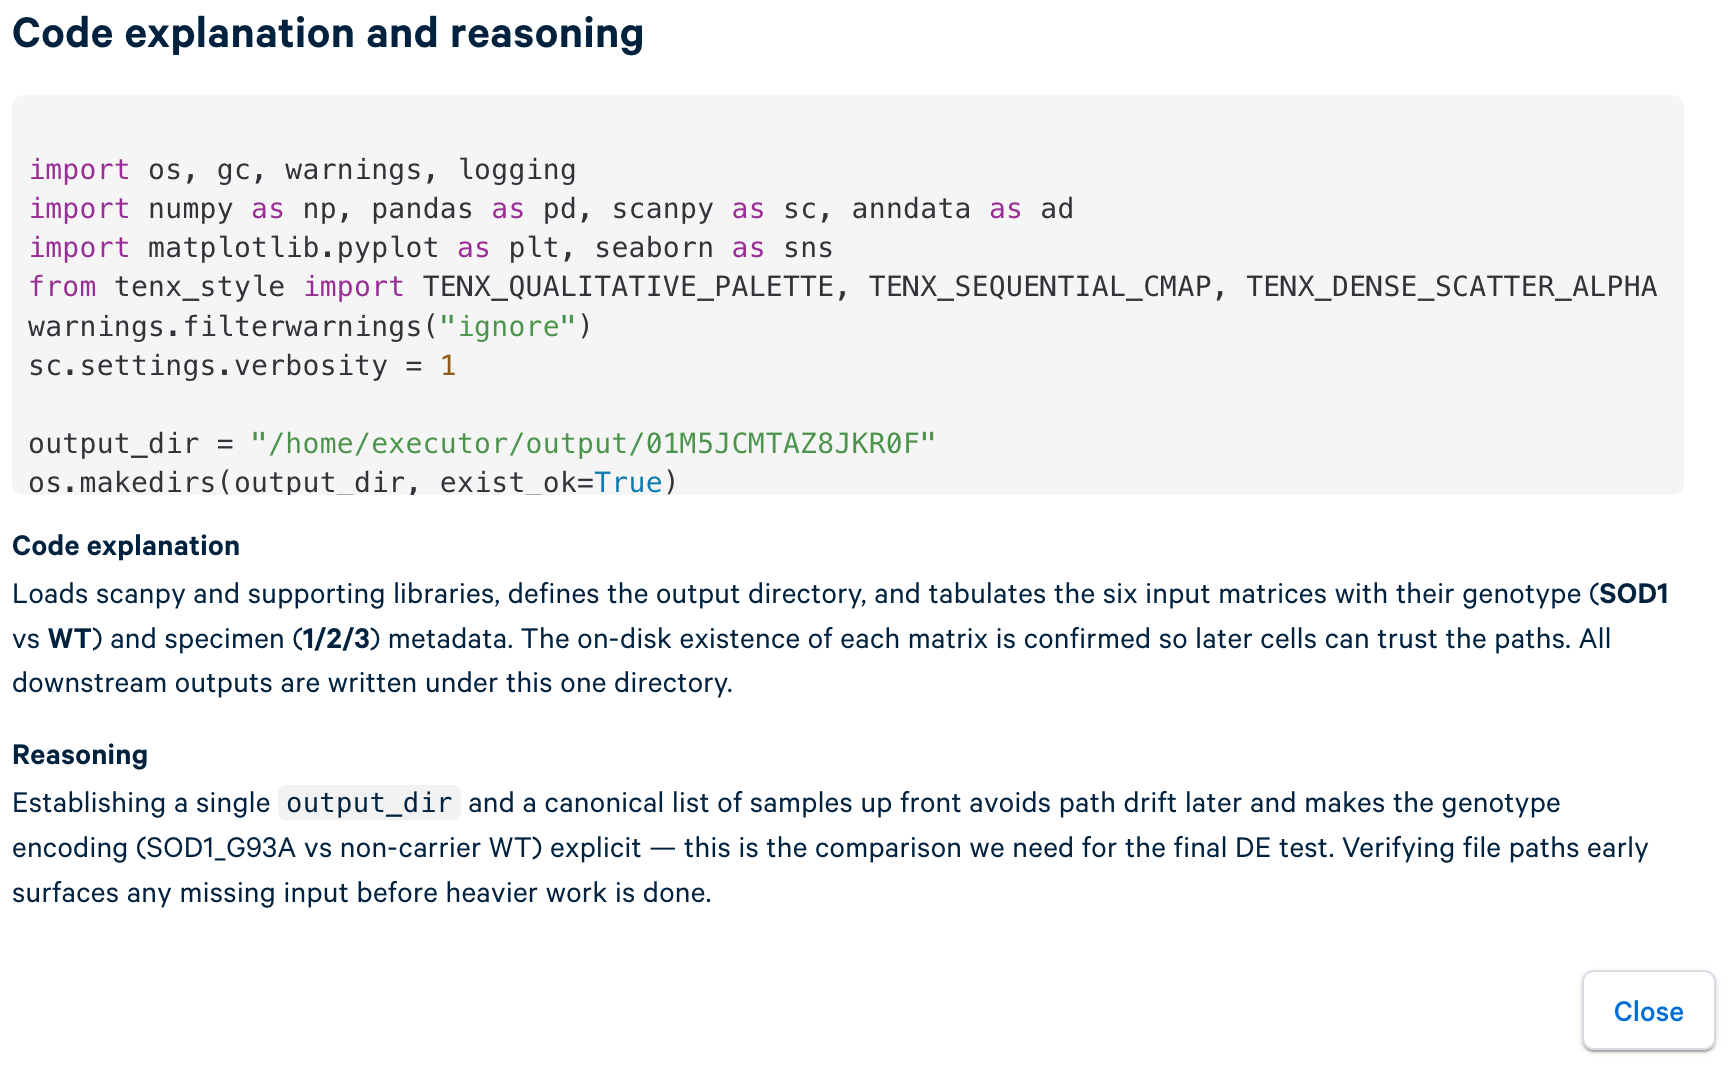
As you review the code and outputs, you can prompt the agent in the Chat window.
As you work, you will notice that the agent responds differently depending on what you ask:
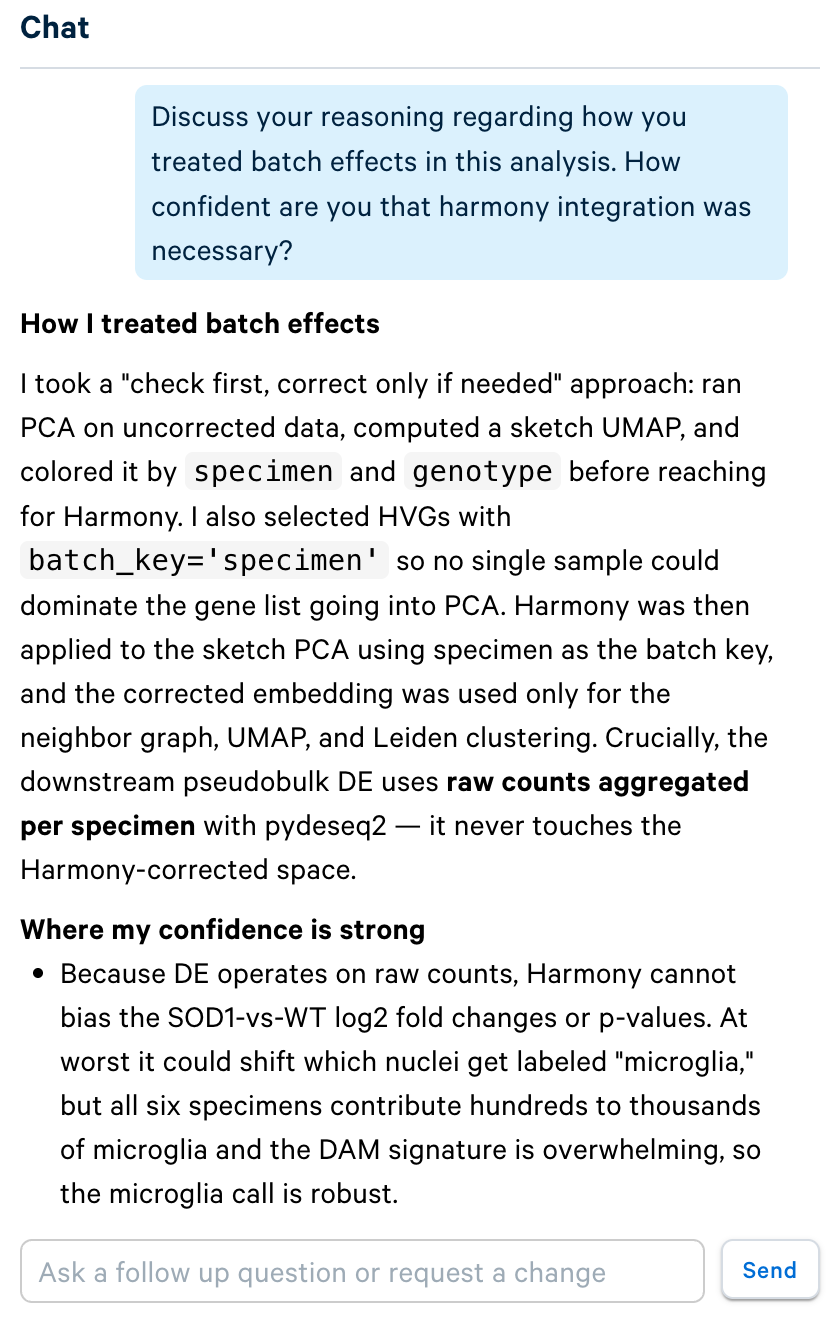
Asking a question or requesting a justification returns a direct answer and does not change your notebook. For example, ask: "How confident are you that harmony integration was necessary?" The agent explains its reasoning without editing any analysis blocks.
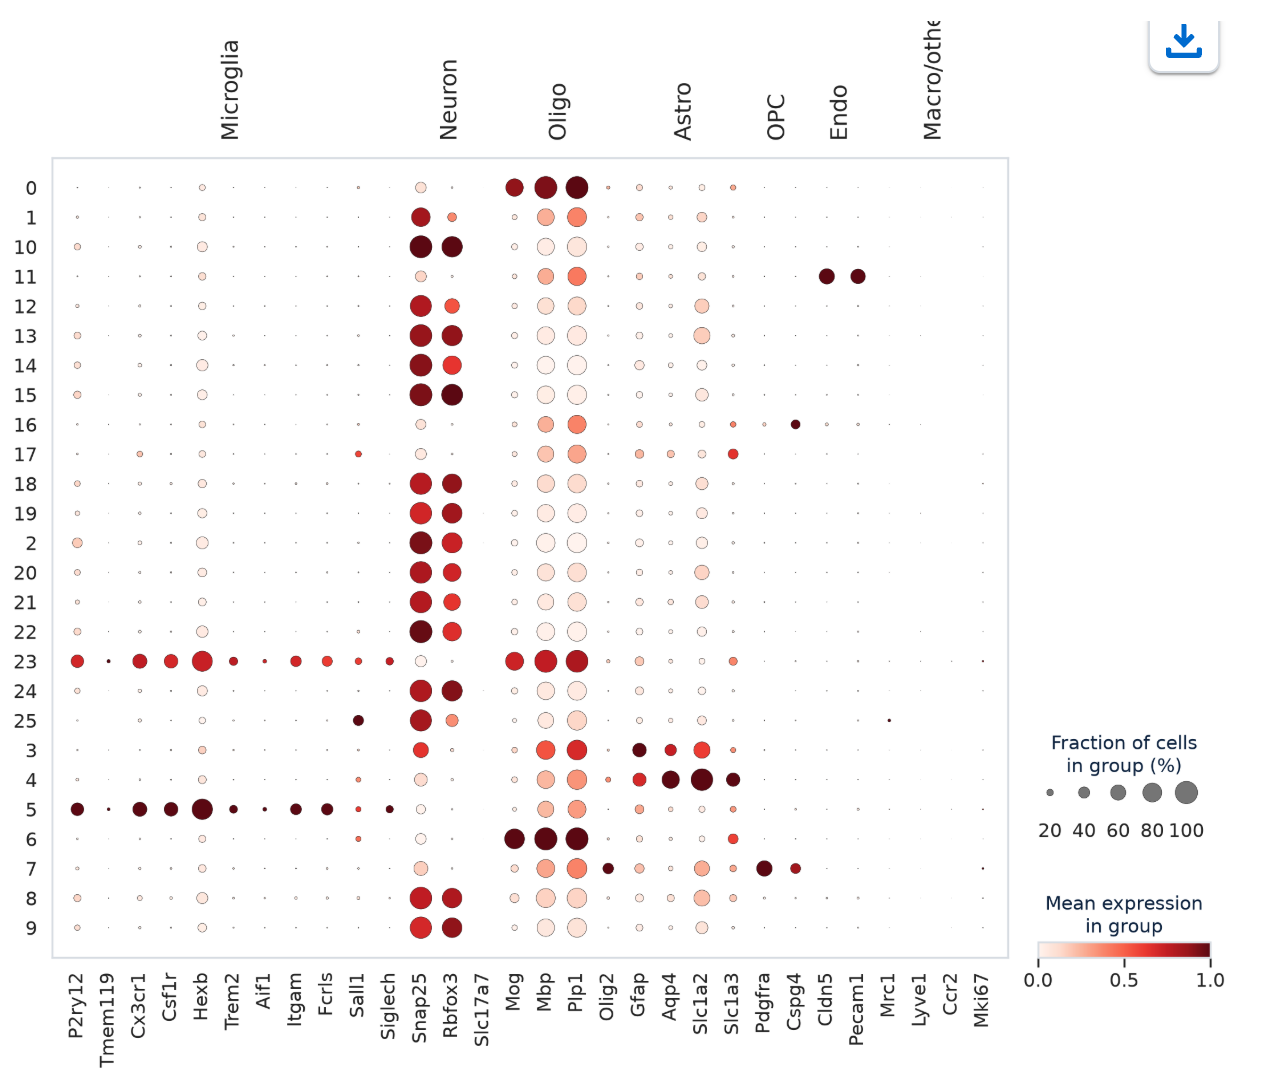
Adding a new request appends a new block. For example: "Add a dot plot of marker genes." The agent adds a new analysis block without disturbing the earlier steps.
Requesting a change edits an existing block and reruns it. For example: "Run the analysis again without batch correction." The agent revises the QC block and re-executes it.
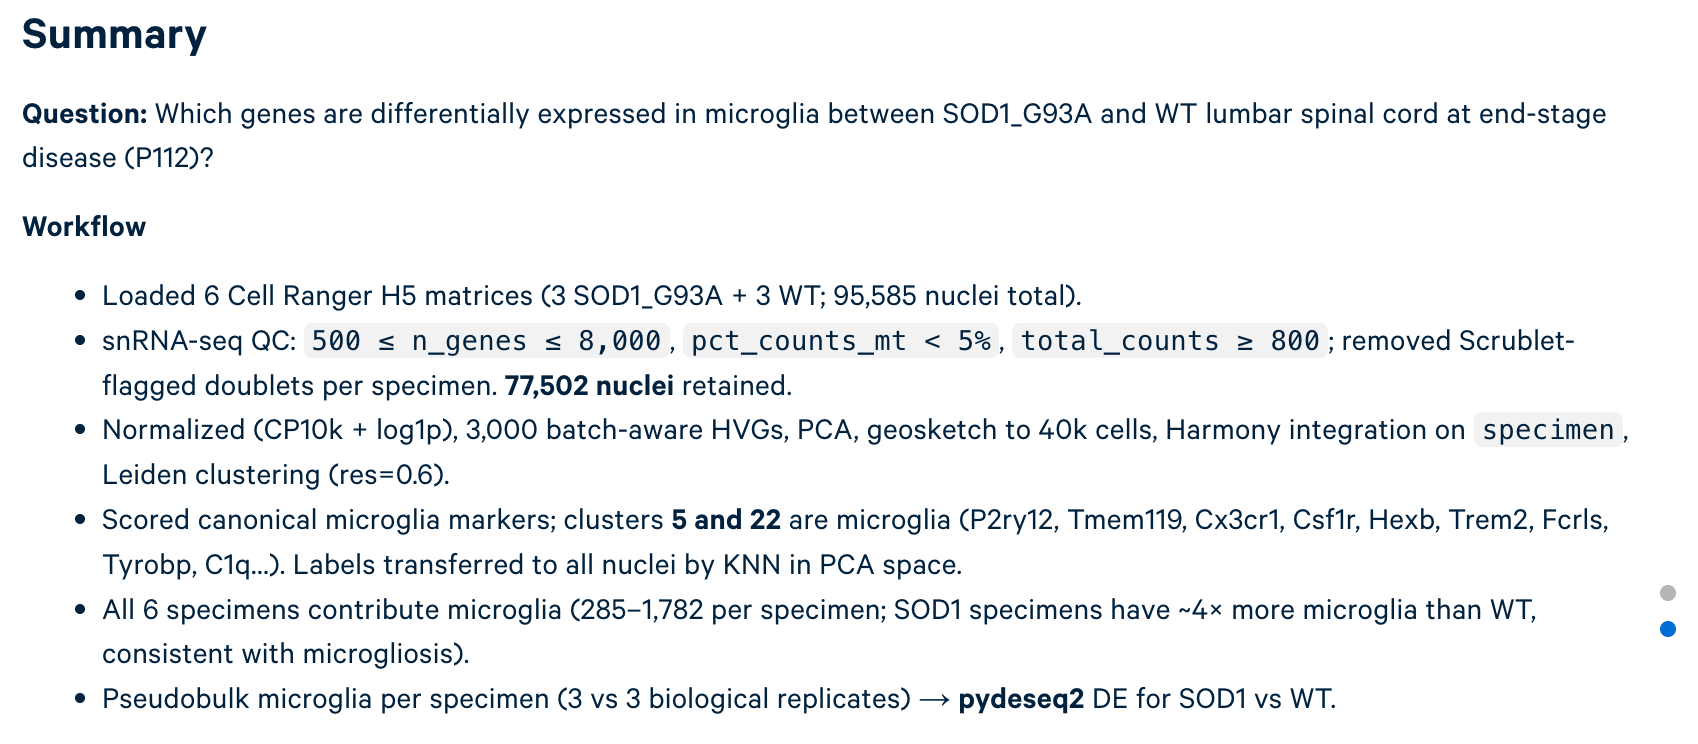
A summary is provided for your convenience at the end of the notebook.
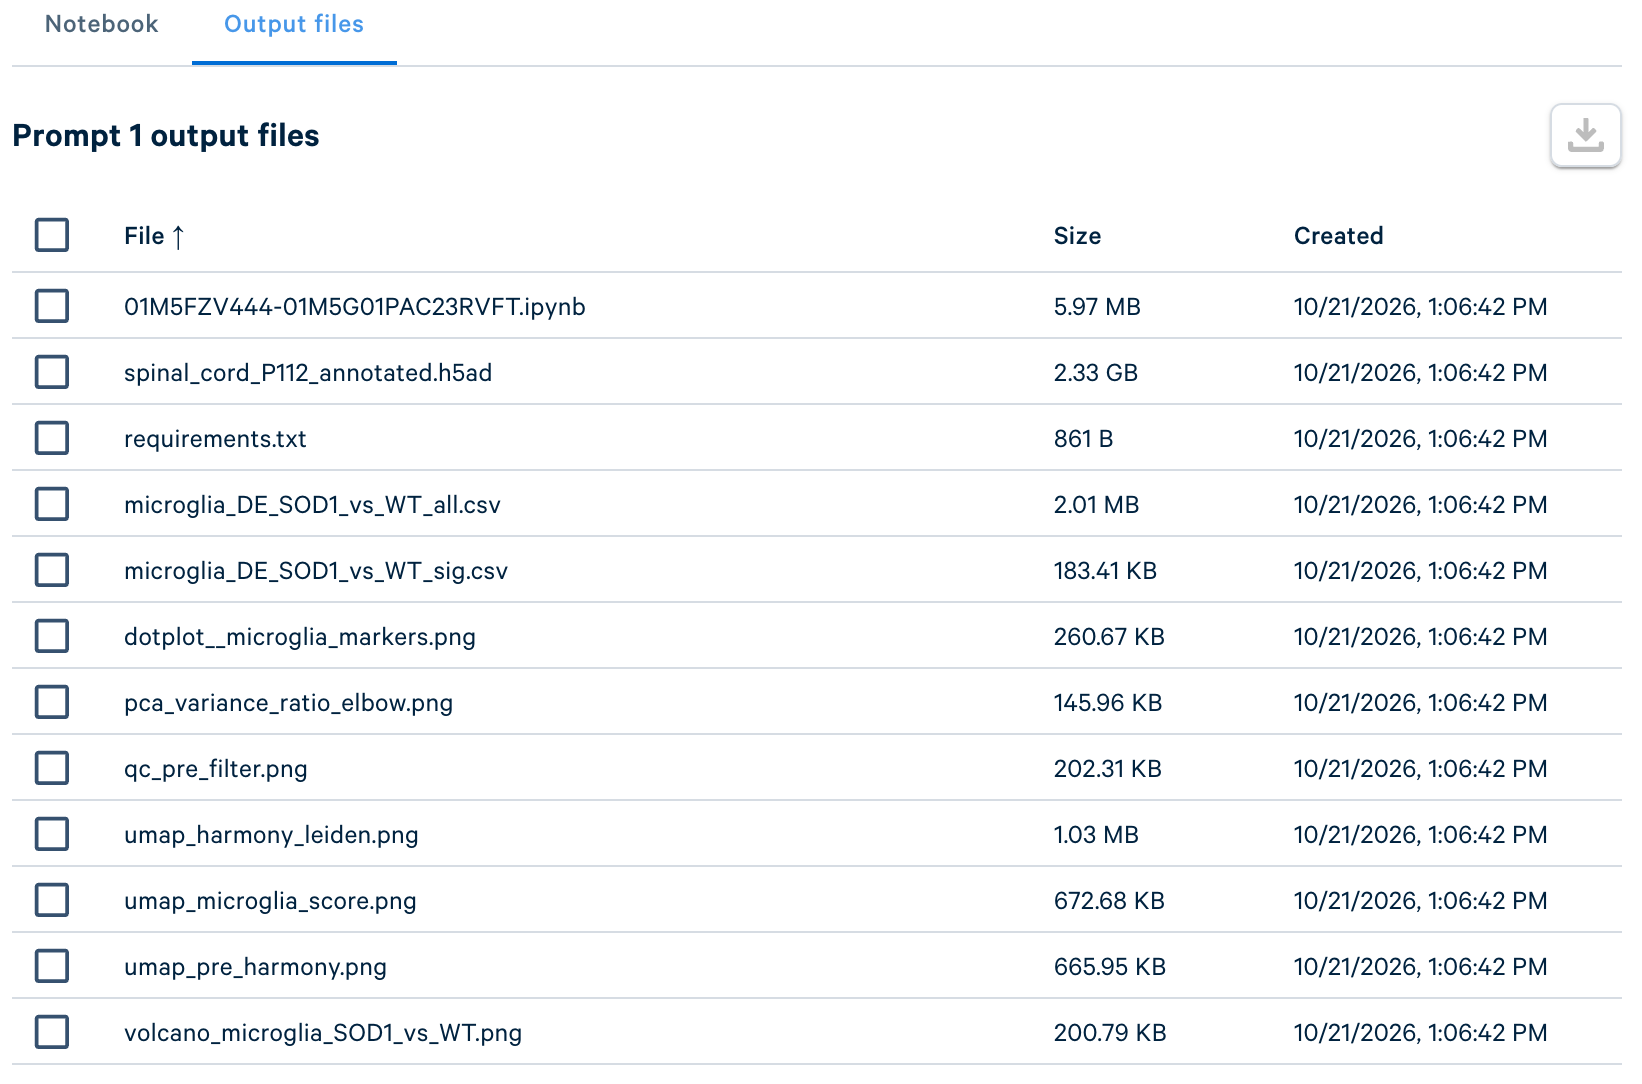
Output files for your prompt, including the notebook (.ipynb) file, are listed under a separate tab.
Sentira lets you quickly reach meaningful insights from your 10x Chromium data without bioinformatics expertise. As you take those results further toward publication or other uses, pairing Sentira with expert review and QC helps you get the most out of the platform. Keep these tips in mind:
- Provide relevant experimental context. The more relevant detail you give in the experimental design step (species, tissue, assay, conditions, and biological question), the better the agent can tailor its plan to your data.
- Write focused prompts. Because each prompt runs in its own isolated workspace, keeping them specific makes results easier to interpret.
- Review the plan before running. Read the proposed plan carefully and adjust it before approving.
- Stay in the loop on the code. Use Explain the Code to understand each block, then read the generated code and outputs yourself. Confirm the methods and parameters are appropriate before you publish a result.
- Iterate in plain language. Use the Chat window to question assumptions, ask for justifications, add new analysis blocks, or revise existing ones rather than starting over.
- Verify results against known biology. Check results against established markers and the literature.
- Know the applicable AI policies. Before publishing or submitting work, consult the AI use and disclosure policies of your target journal, database, company, or institution.
You are now ready to experiment further with Sentira. You could try one of the following:
- Create a new prompt of your choosing, for example, comparing cell type composition or expression profiles of specific cell types across the six samples.
- Explore other 10x Chromium datasets.
- Upload and analyze your own data!