10x Genomics Support/Loupe Browser/Tutorials/

Protein Expression Visualization and Thresholding with Loupe Browser

Loupe Browser v6.5 introduces the ability to filter barcodes based on the detected level of specific antibodies included in your Visium CytAssist Spatial Gene and Protein Expression workflow. Additionally, Loupe Browser's feature thresholding functionality helps further filter these barcodes based on their level of antibody (protein) expression. Antibody expression-based filtering and thresholding can help better identify and classify cell types per your criteria of interest.

In this tutorial, we will use a human breast cancer dataset to highlight the advantages of including an antibody panel in your workflow.

Use protein expression to identify and classify cell types, especially where mRNA markers have low expression.

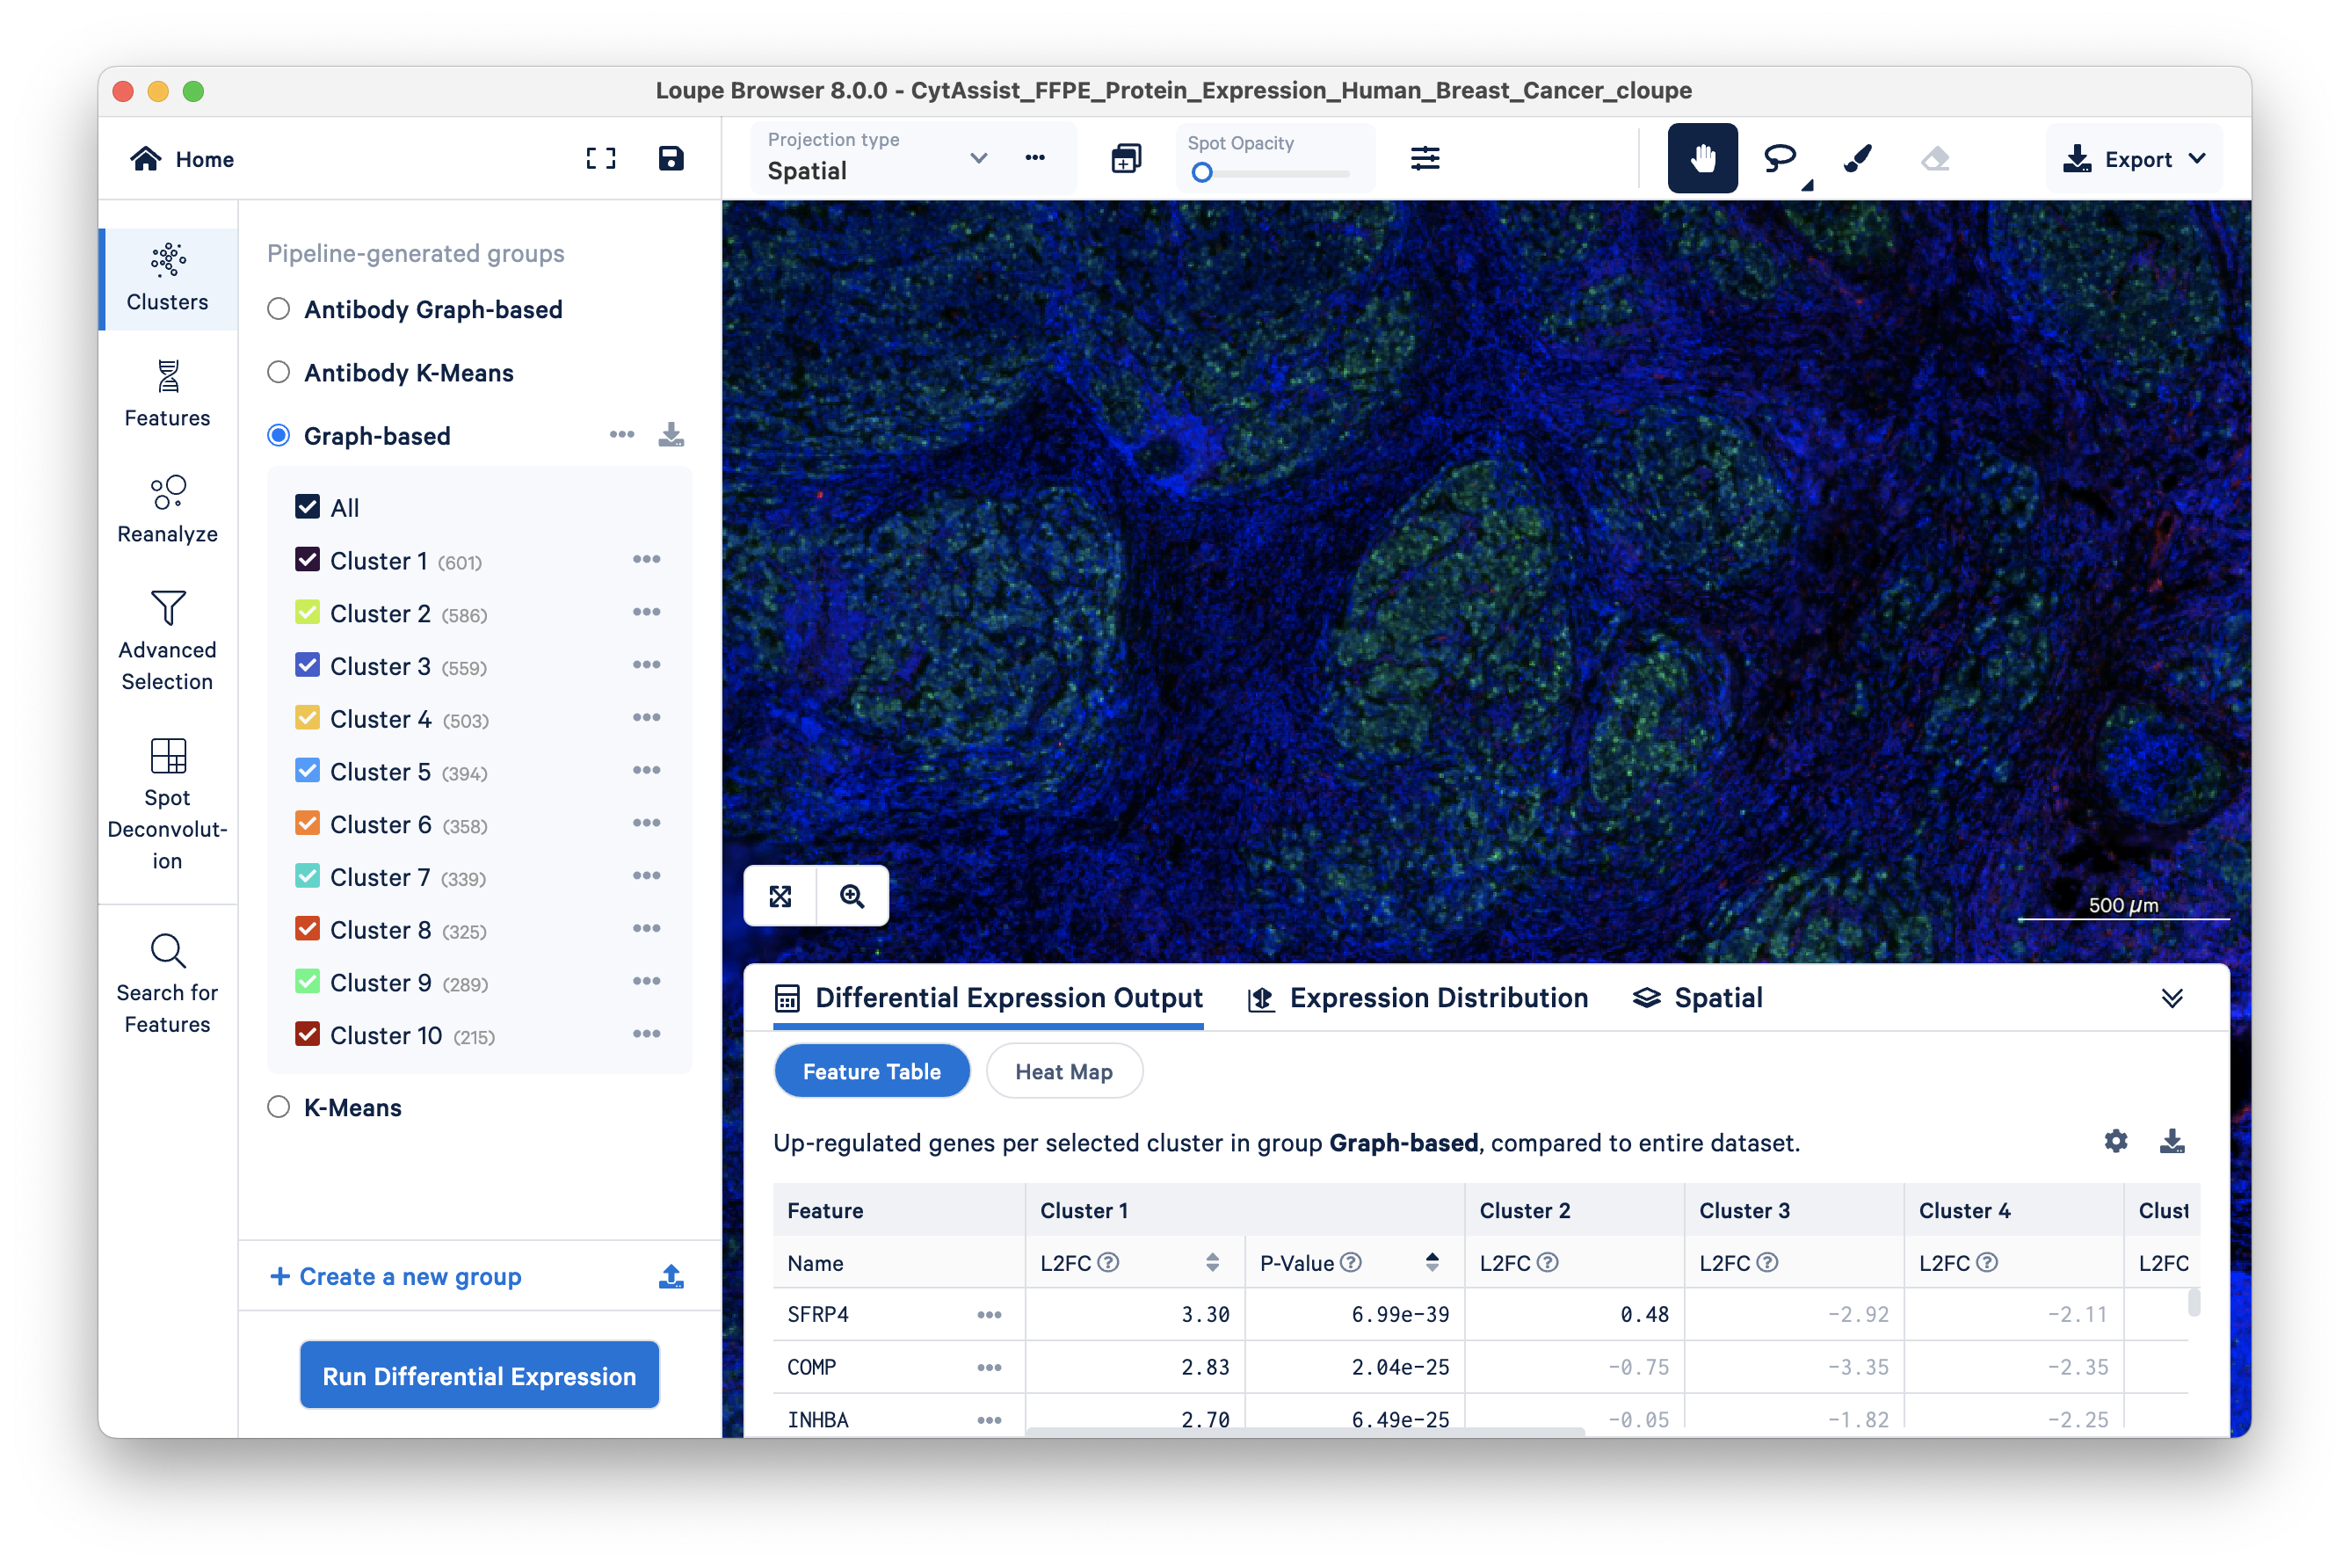
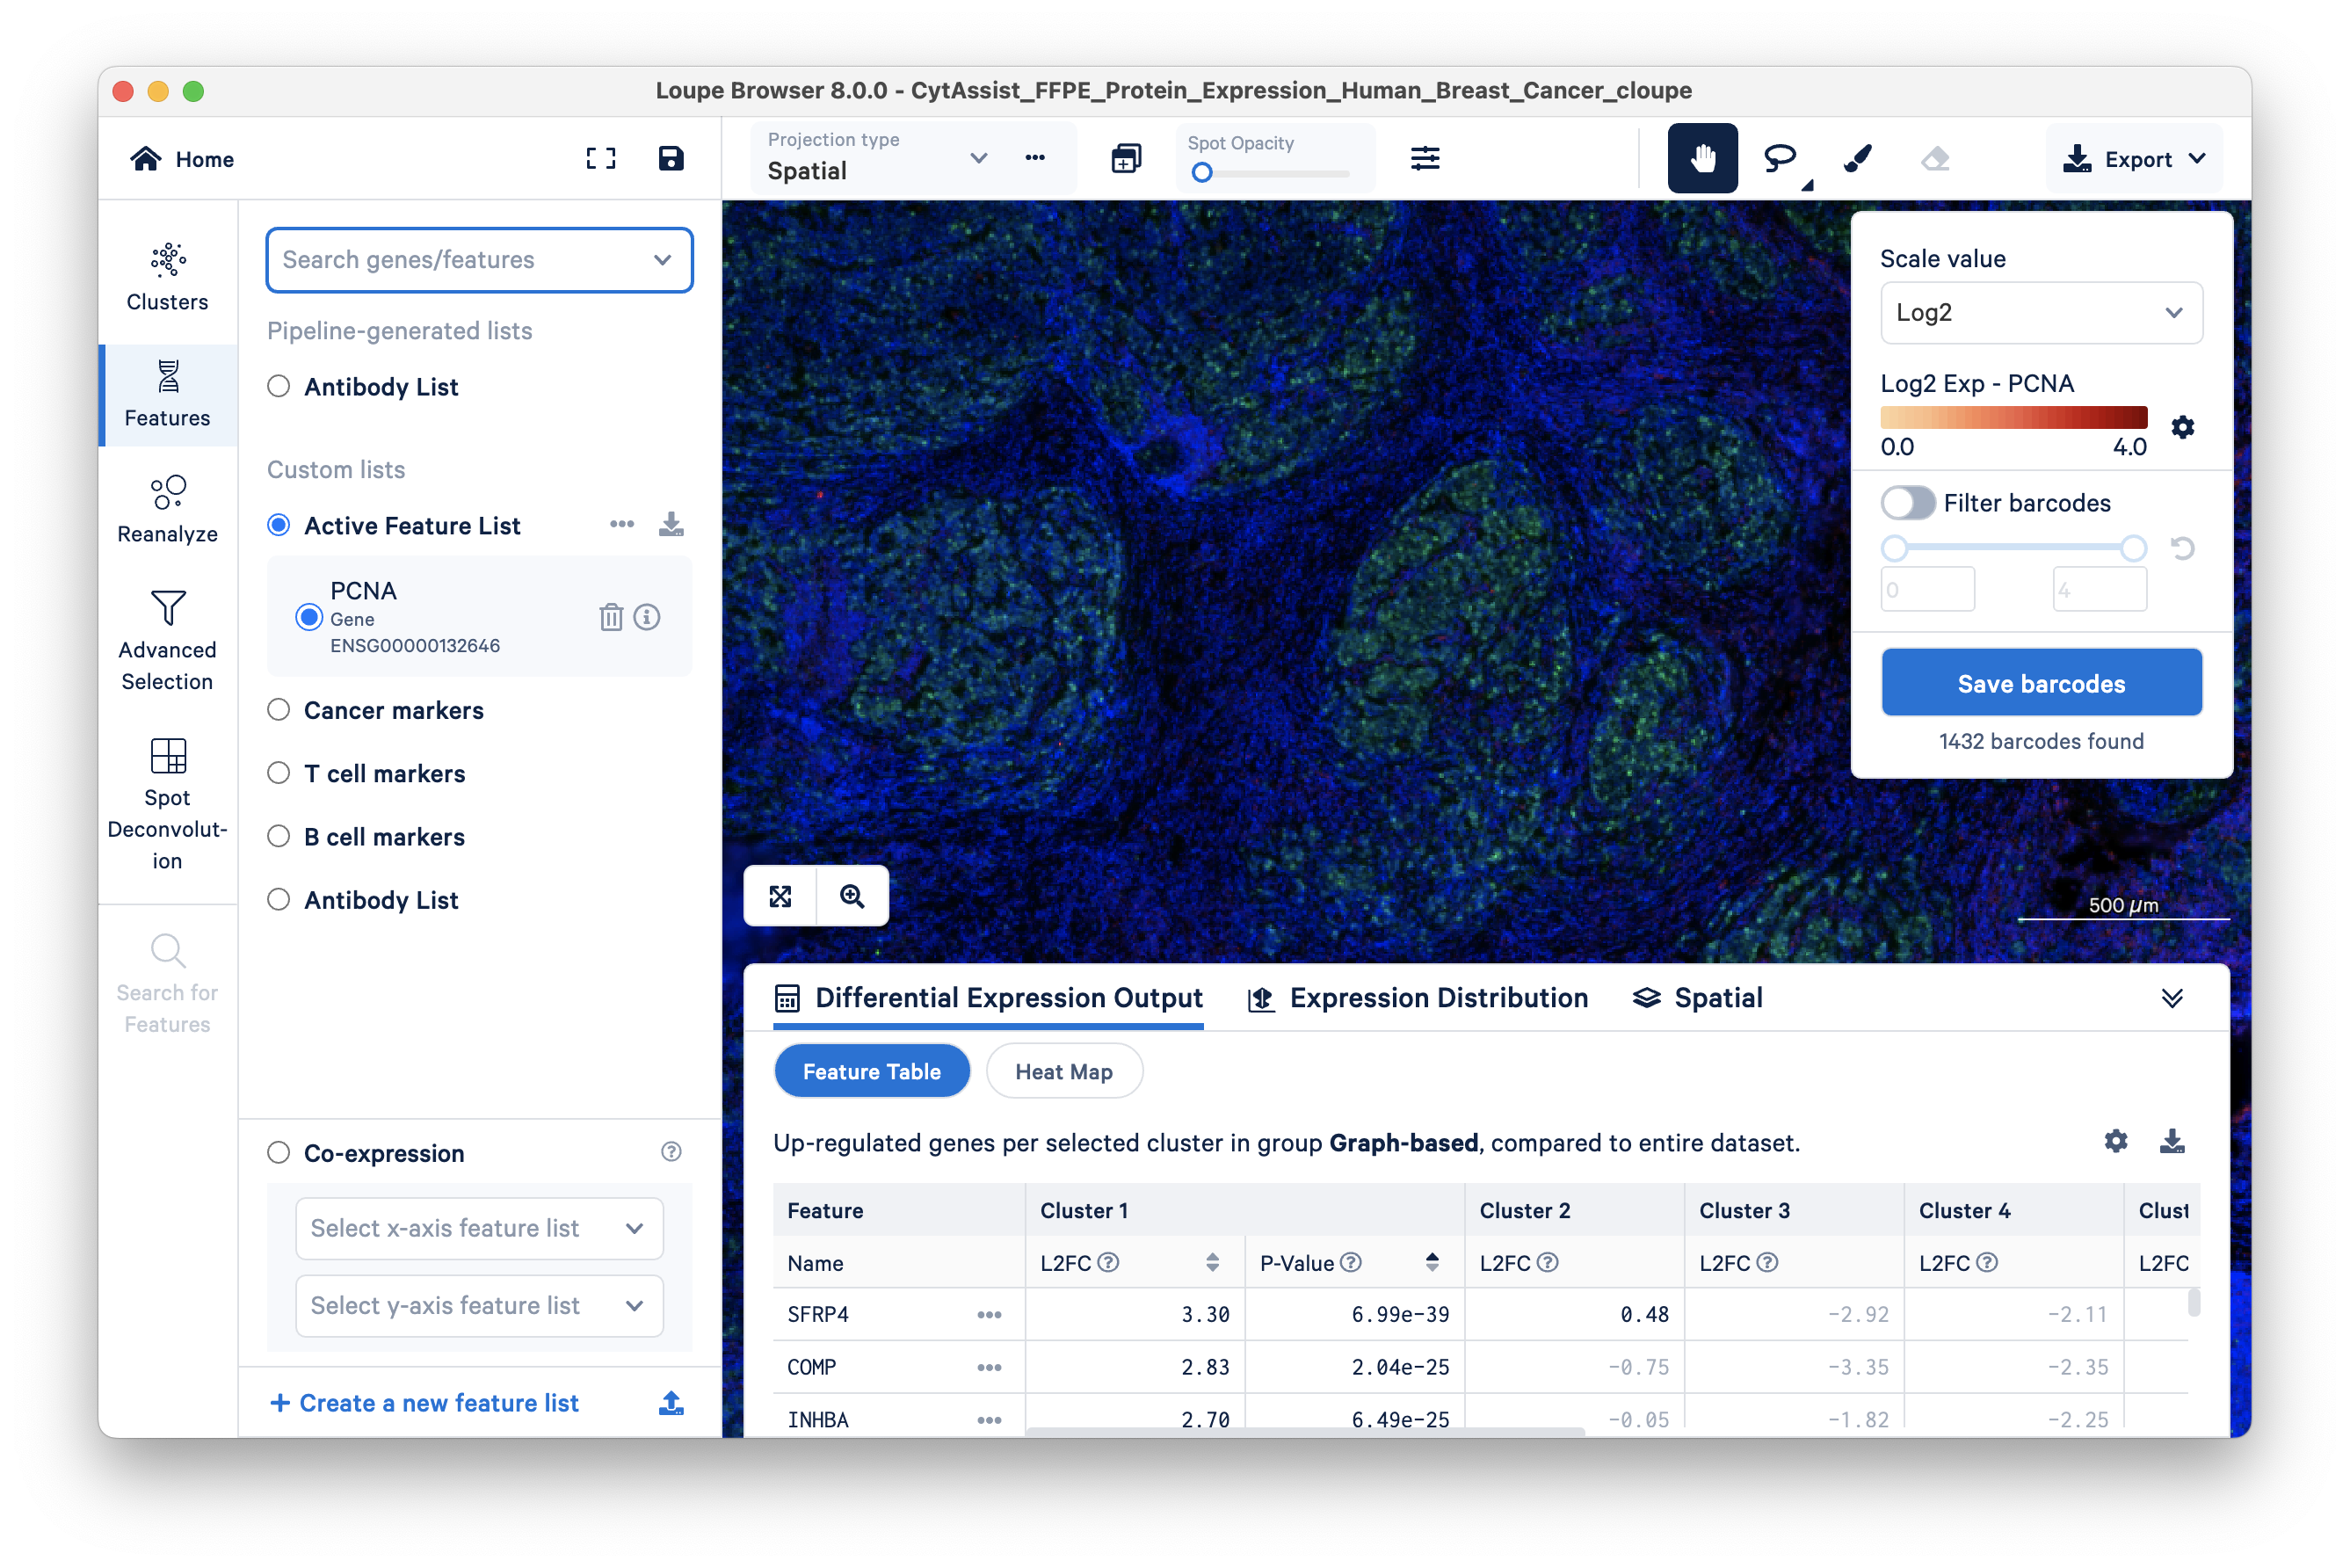
Begin by setting the Spot Opacity slider (top-left corner) at zero to visualize the image without overlaid spots. You may also wish to increase the brightness and contrast for each stain using the setting button located next to the Spot Opacity sliding scale.

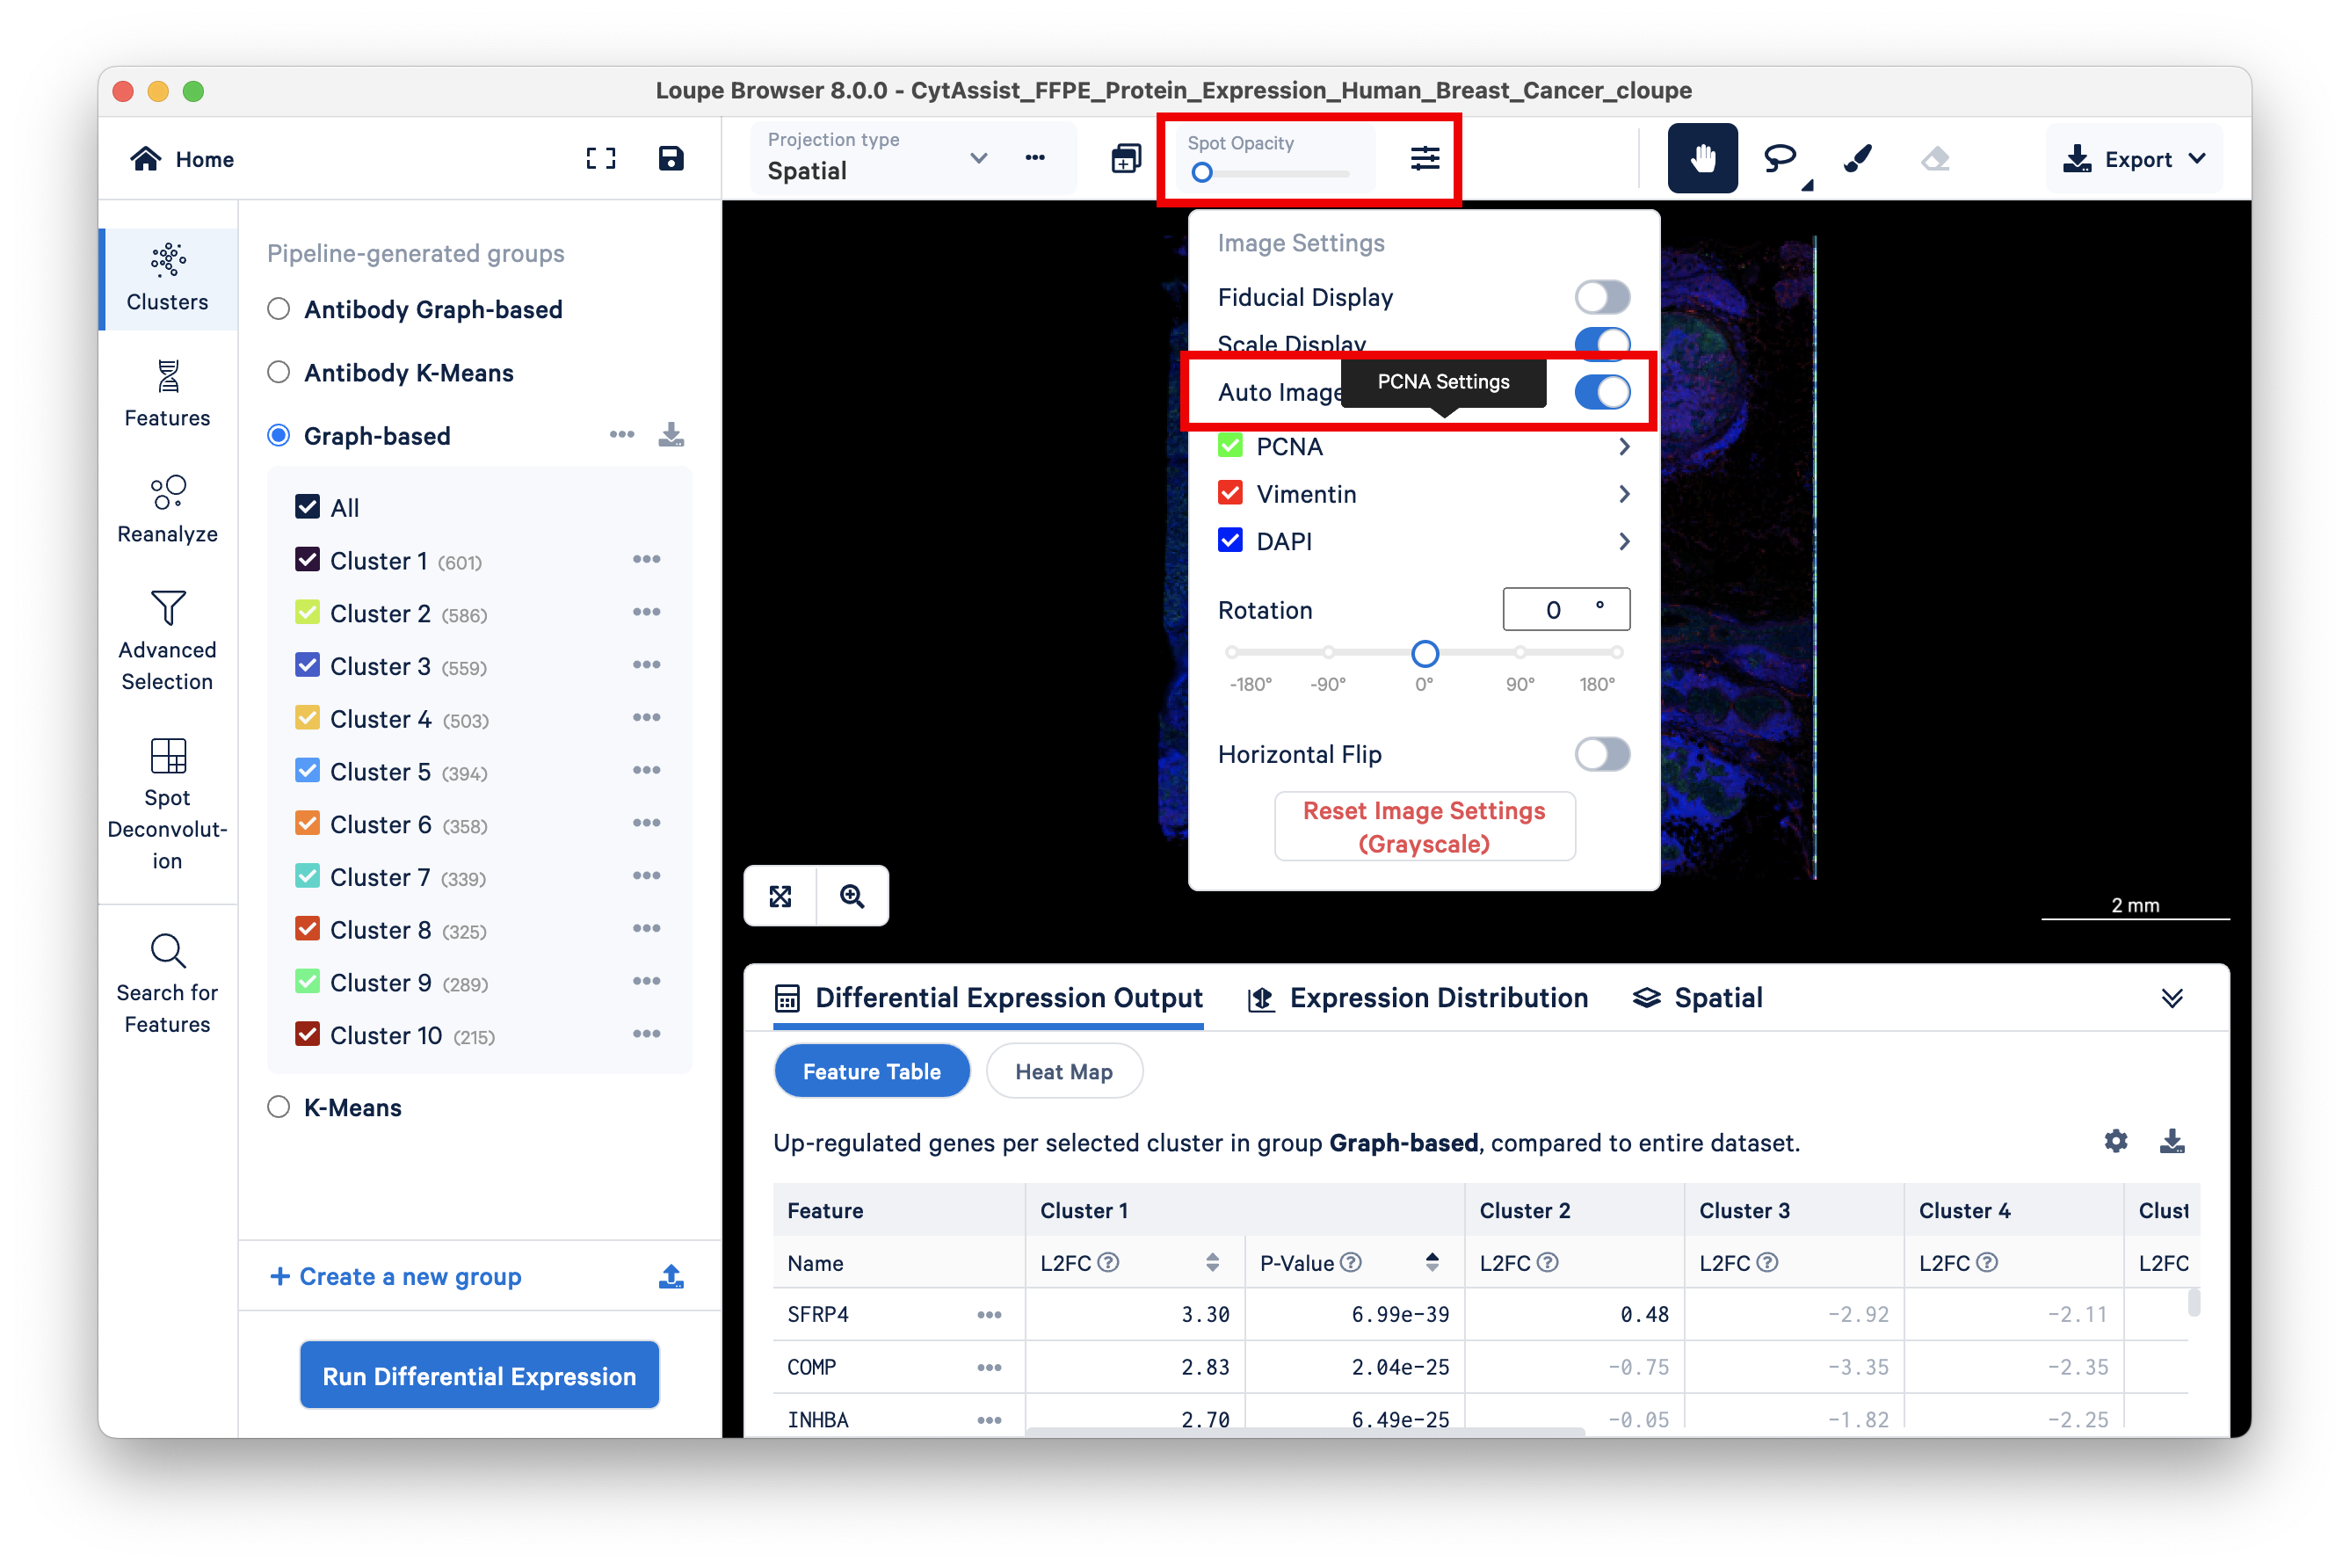
Green cells are stained with PCNA, an antibody stain that labels rapidly proliferating (potentially cancerous) cells. Areas on the tissue slice with high expression of PCNA have a larger number of green cells, as seen by setting the Spot Opacity scale to zero:

Loupe Browser v6.5 and later allows you to search for PCNA-expressing barcodes and color code them by the number of UMI counts (heat maps). To do this, click on the Categories drop-down menu and select Gene/Feature Expression. Select the Active Feature list and type in PCNA in the 'Search for a feature...' box. One option for the Gene feature and one for the Antibody Capture (Protein) feature should appear.

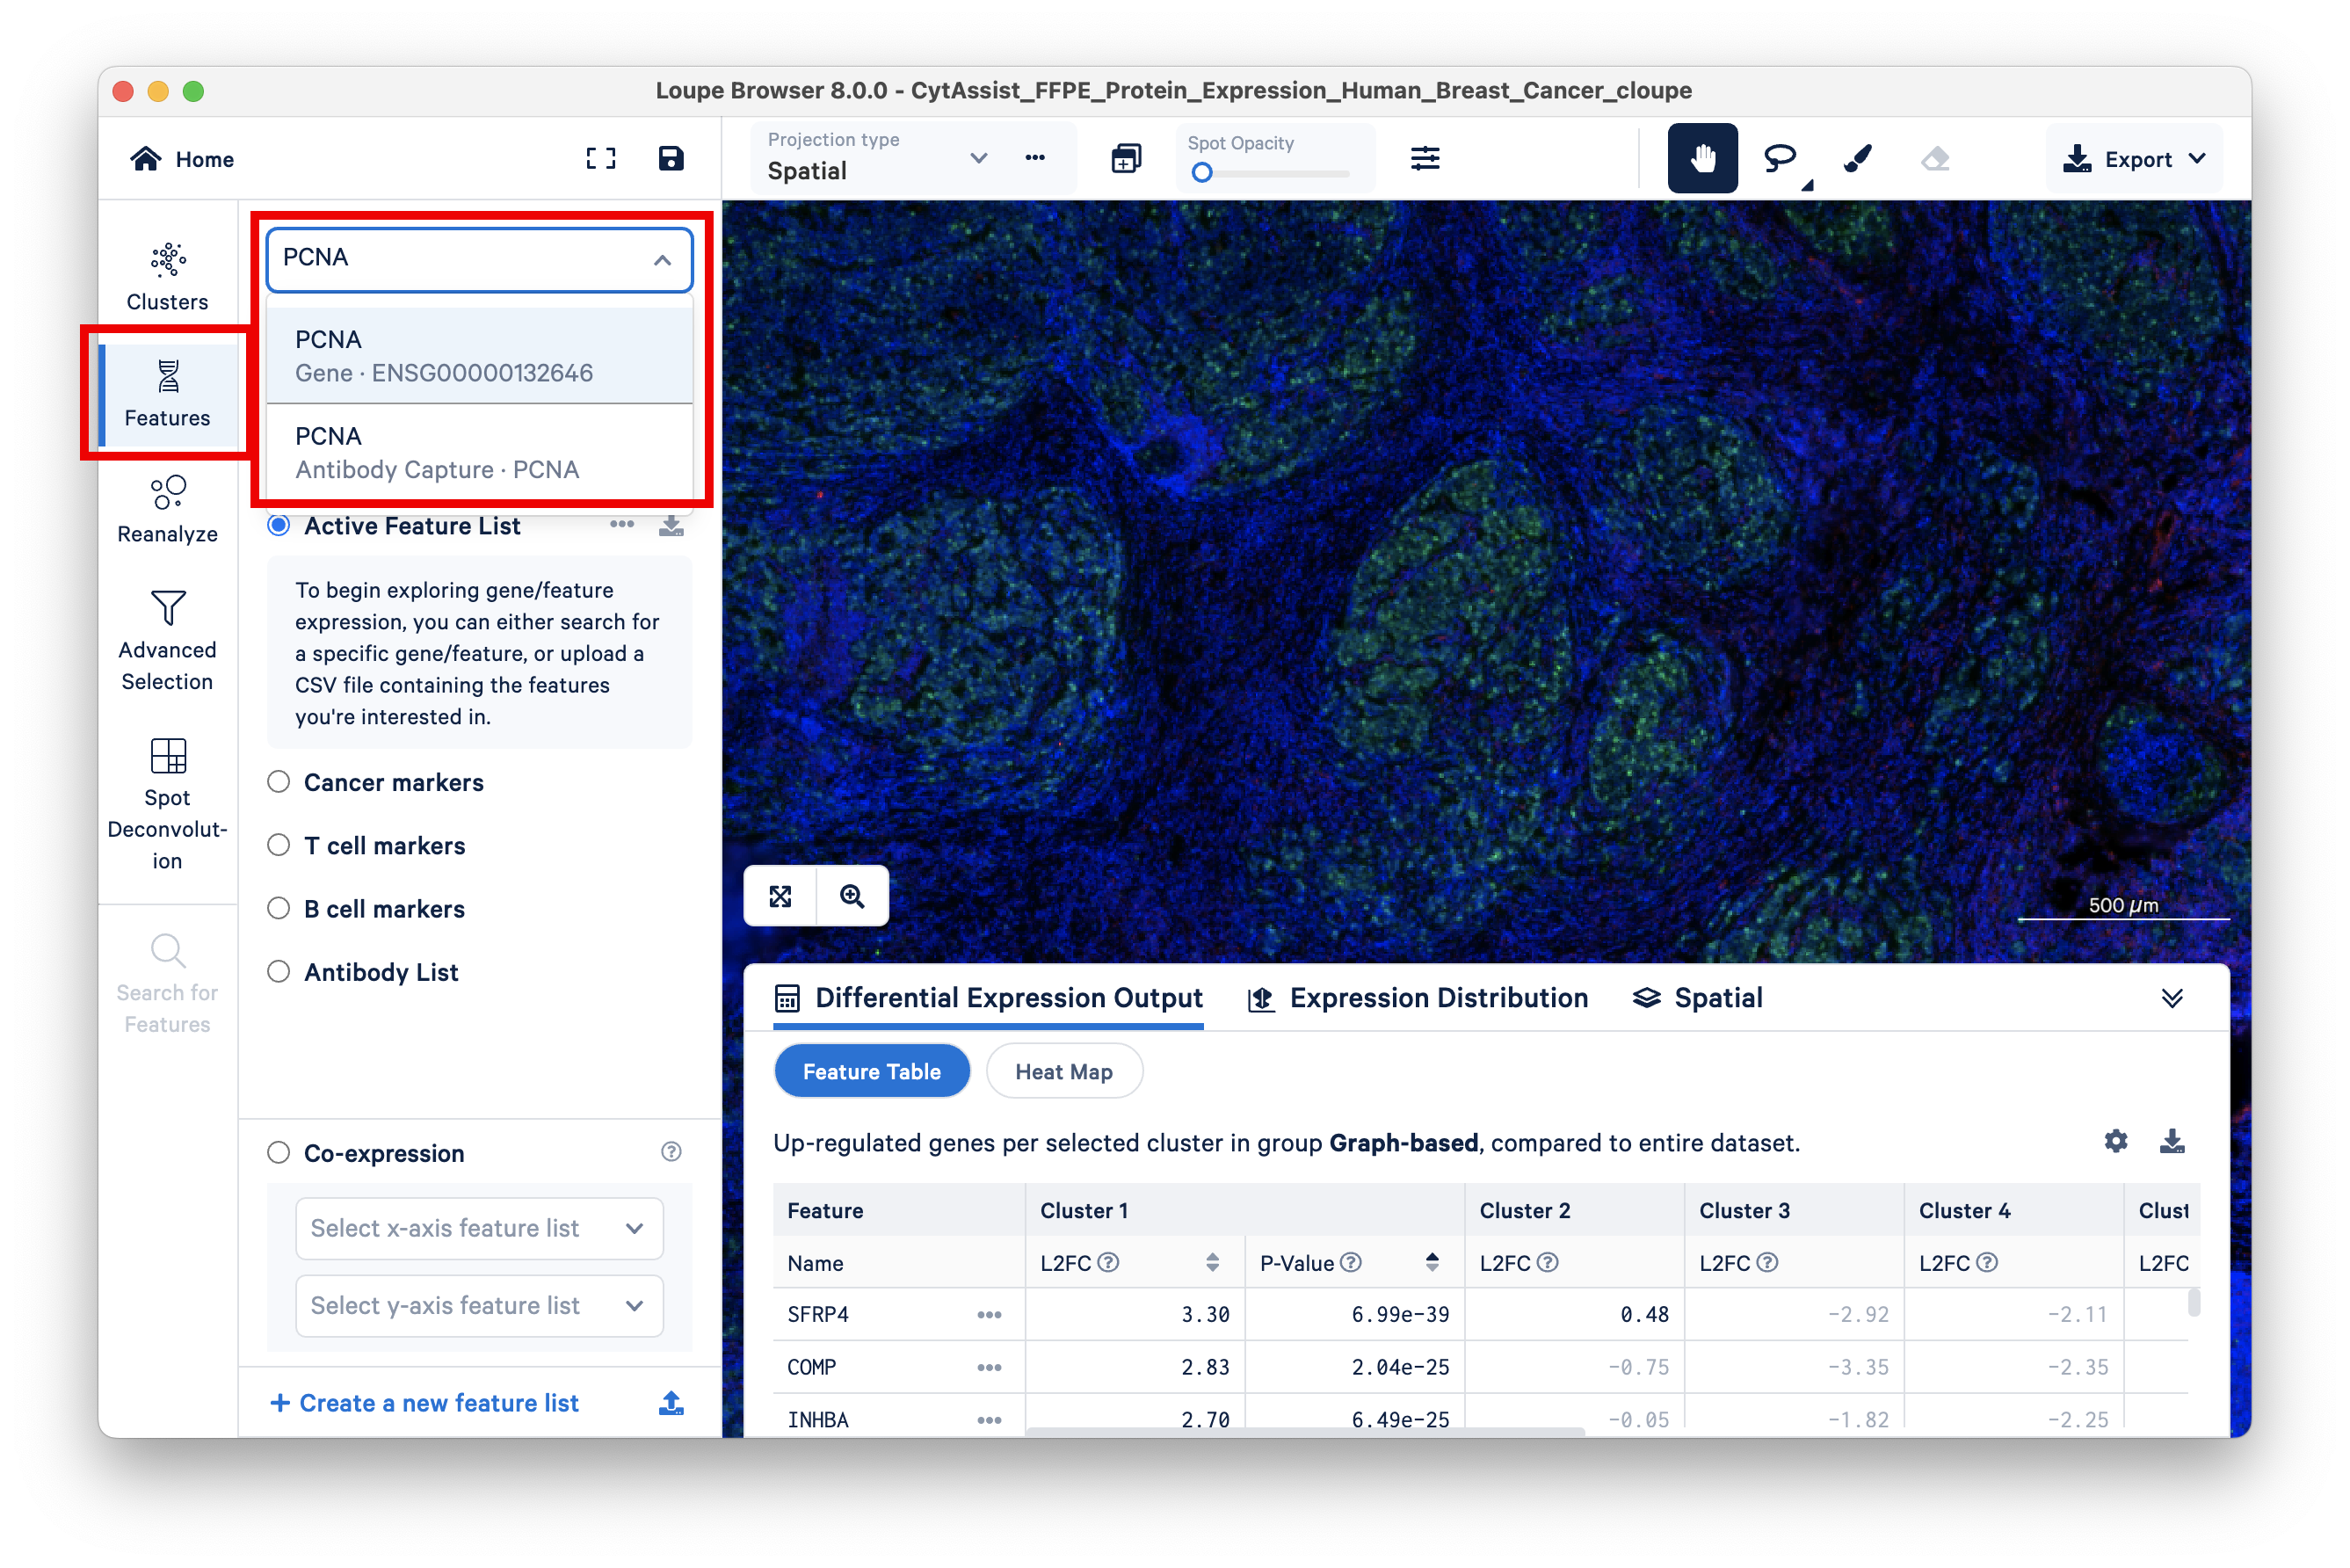
First, select the Gene feature. This action populates the PCNA Gene feature on the right-side panel; click it to select.

Gradually increase Spot Opacity using the sliding scale, and use the dropdown menu in the Scale & Attribute section to change Log to Linear. By sliding the Spot Opacity scale from left to right, find the appropriate opacity to visualize both the spots and the stained tissue in the background.

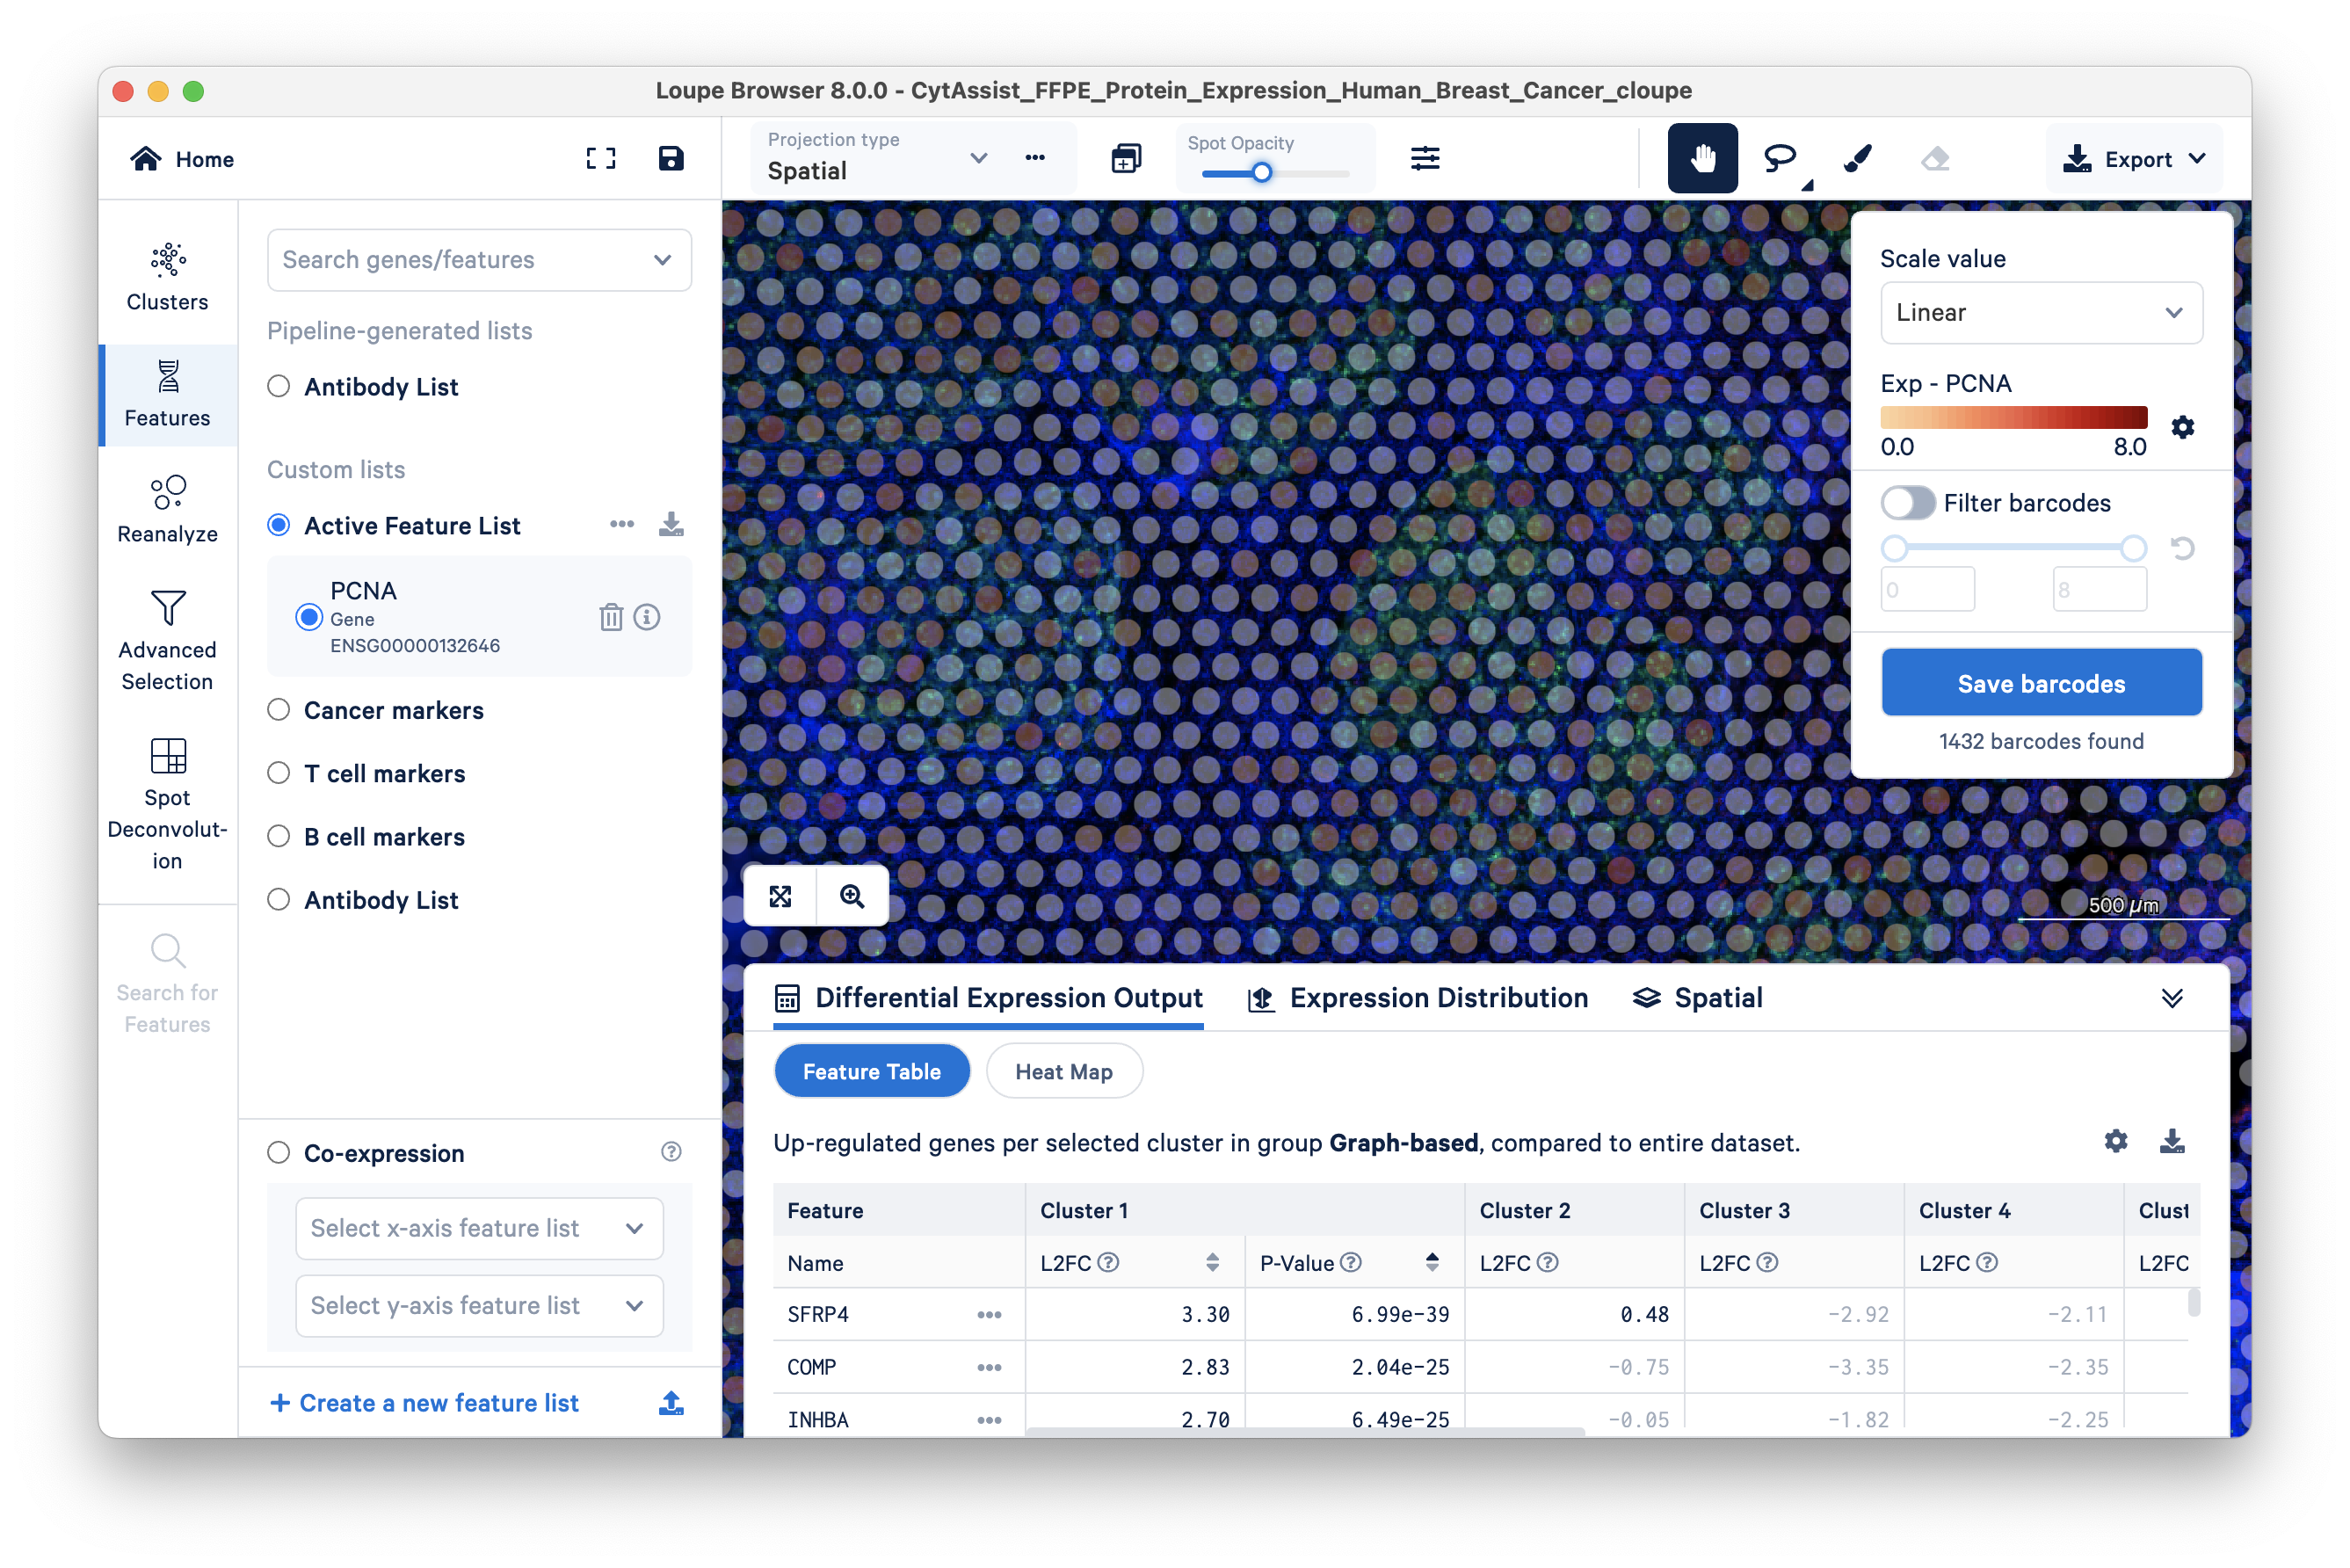
You can see that some areas with green cells have transparent barcodes (spots). This poor sensitivity is due to low mRNA expression; there is insufficient mRNA for the RTL probe-based capture, resulting in dropouts.

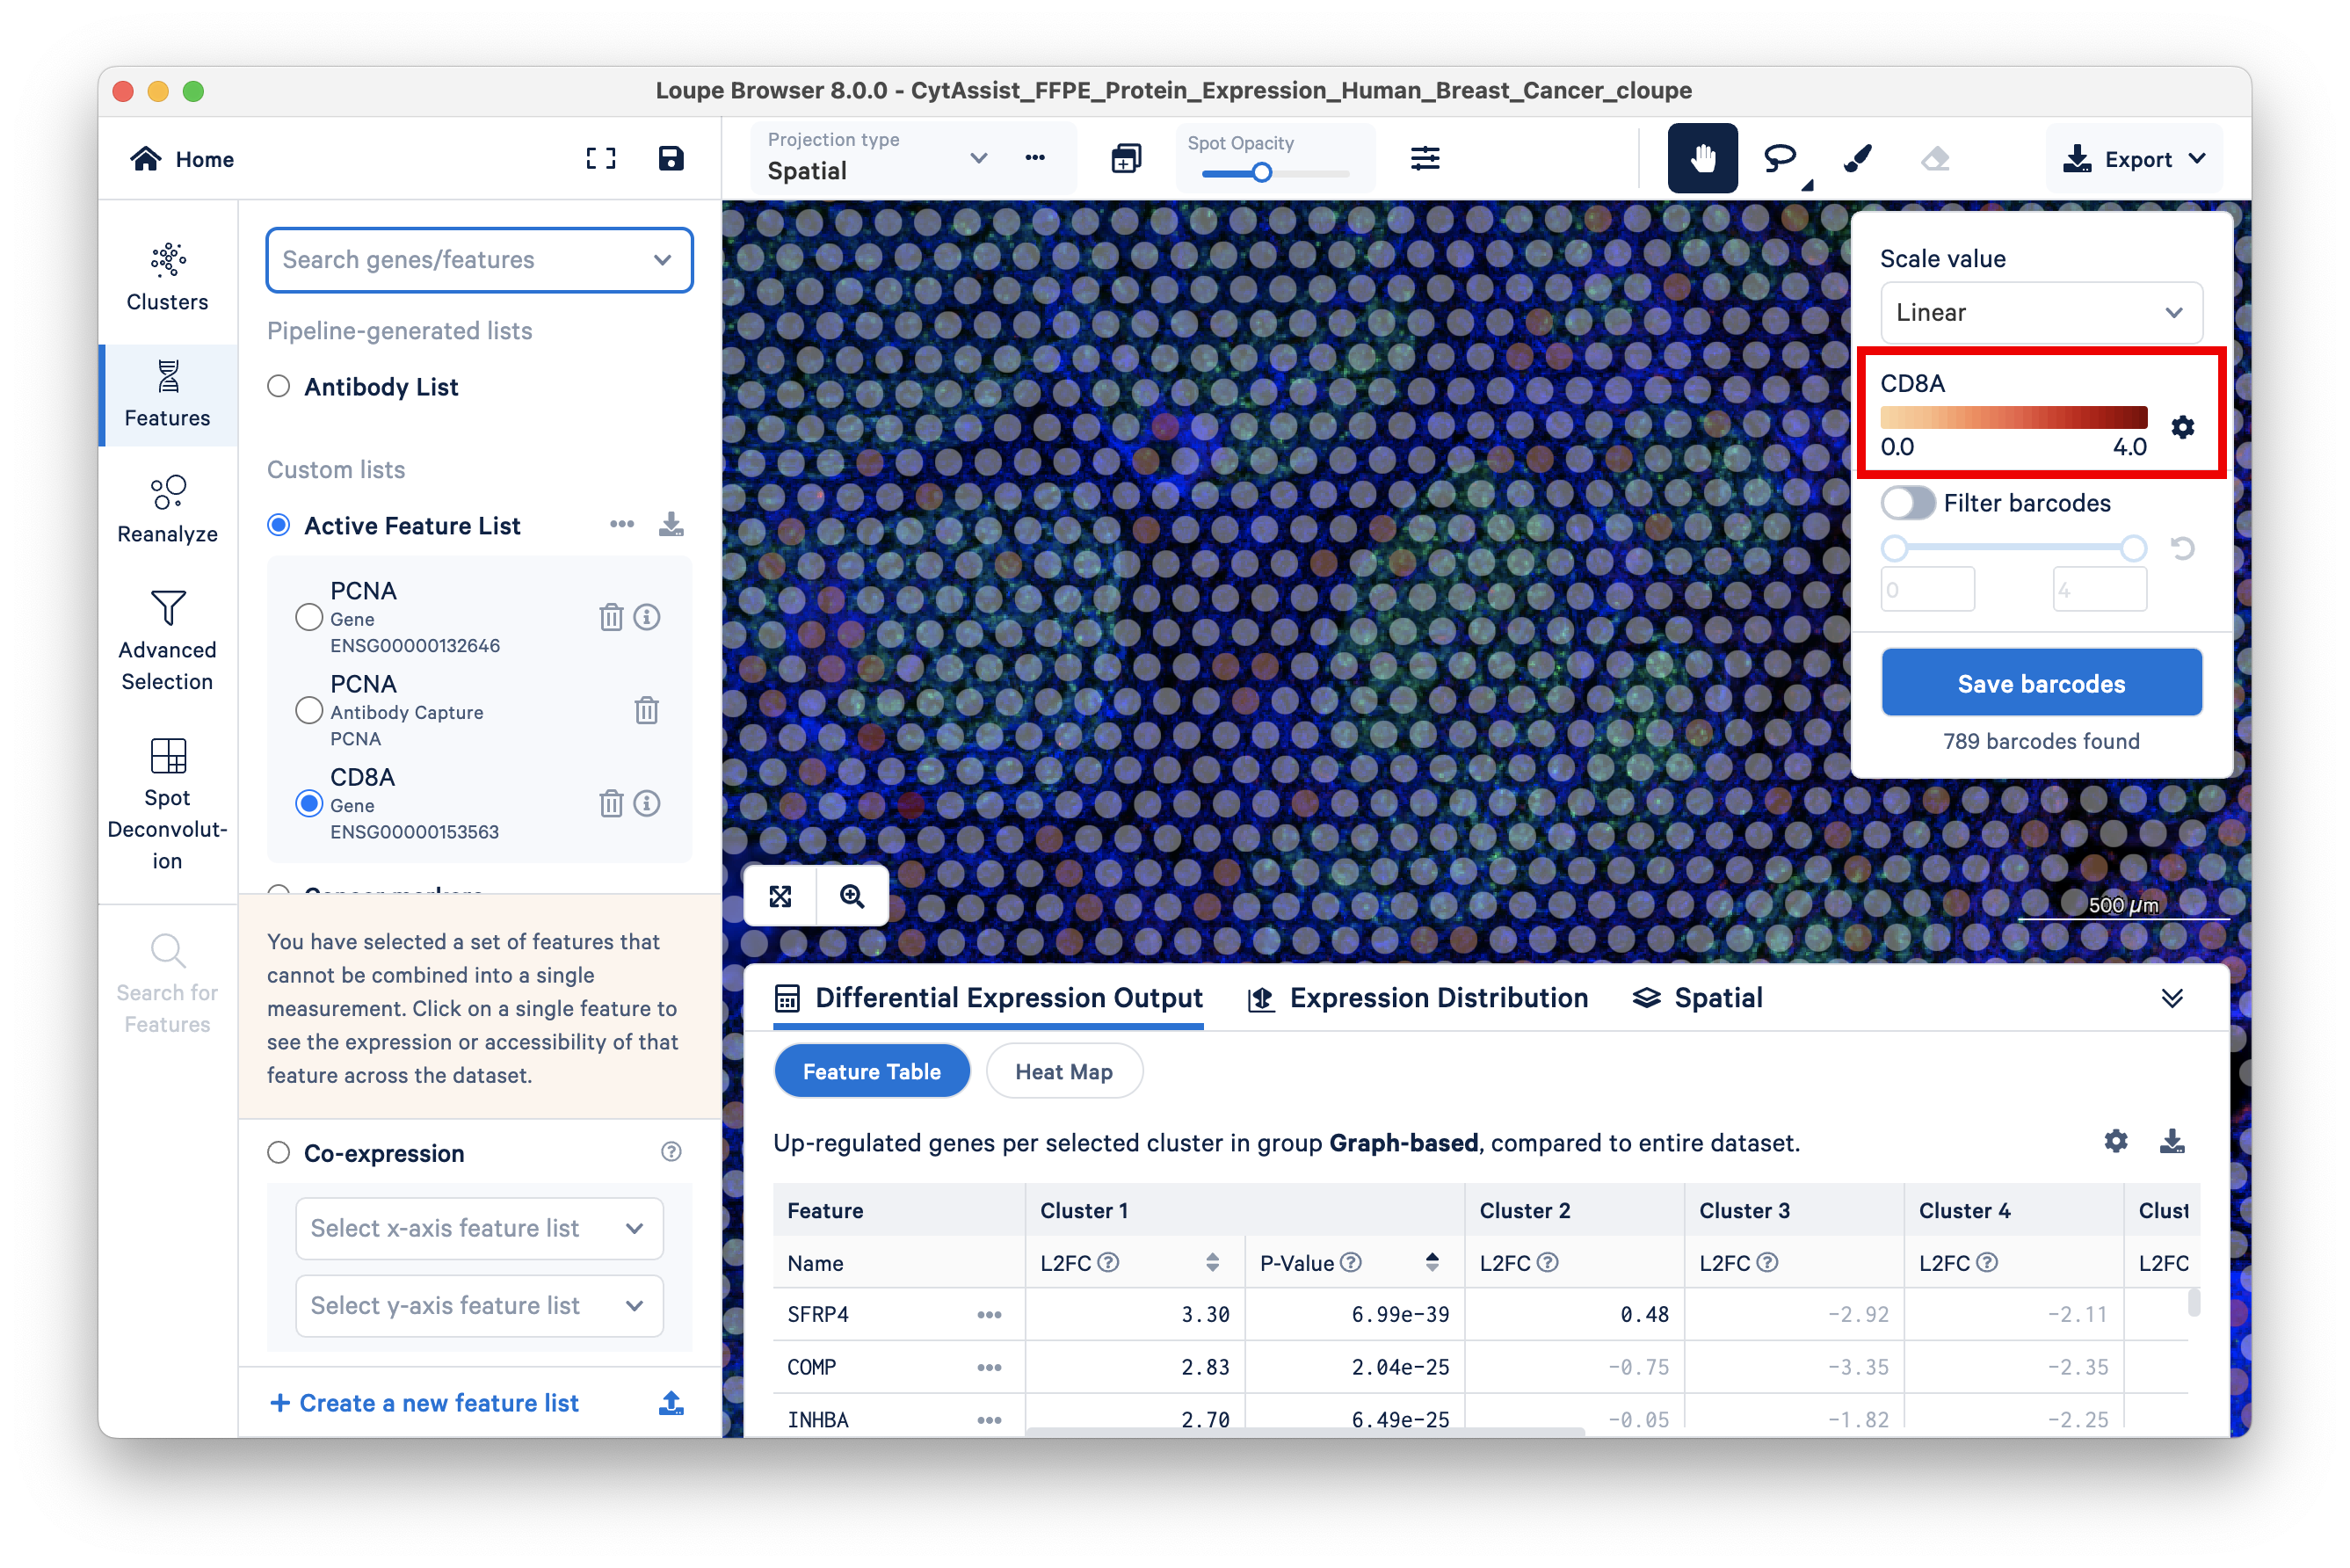
To check the performance of the PCNA antibody (versus the PCNA gene), use the 'Search for a feature...' box again to search for PCNA. This time select the Antibody Capture feature.
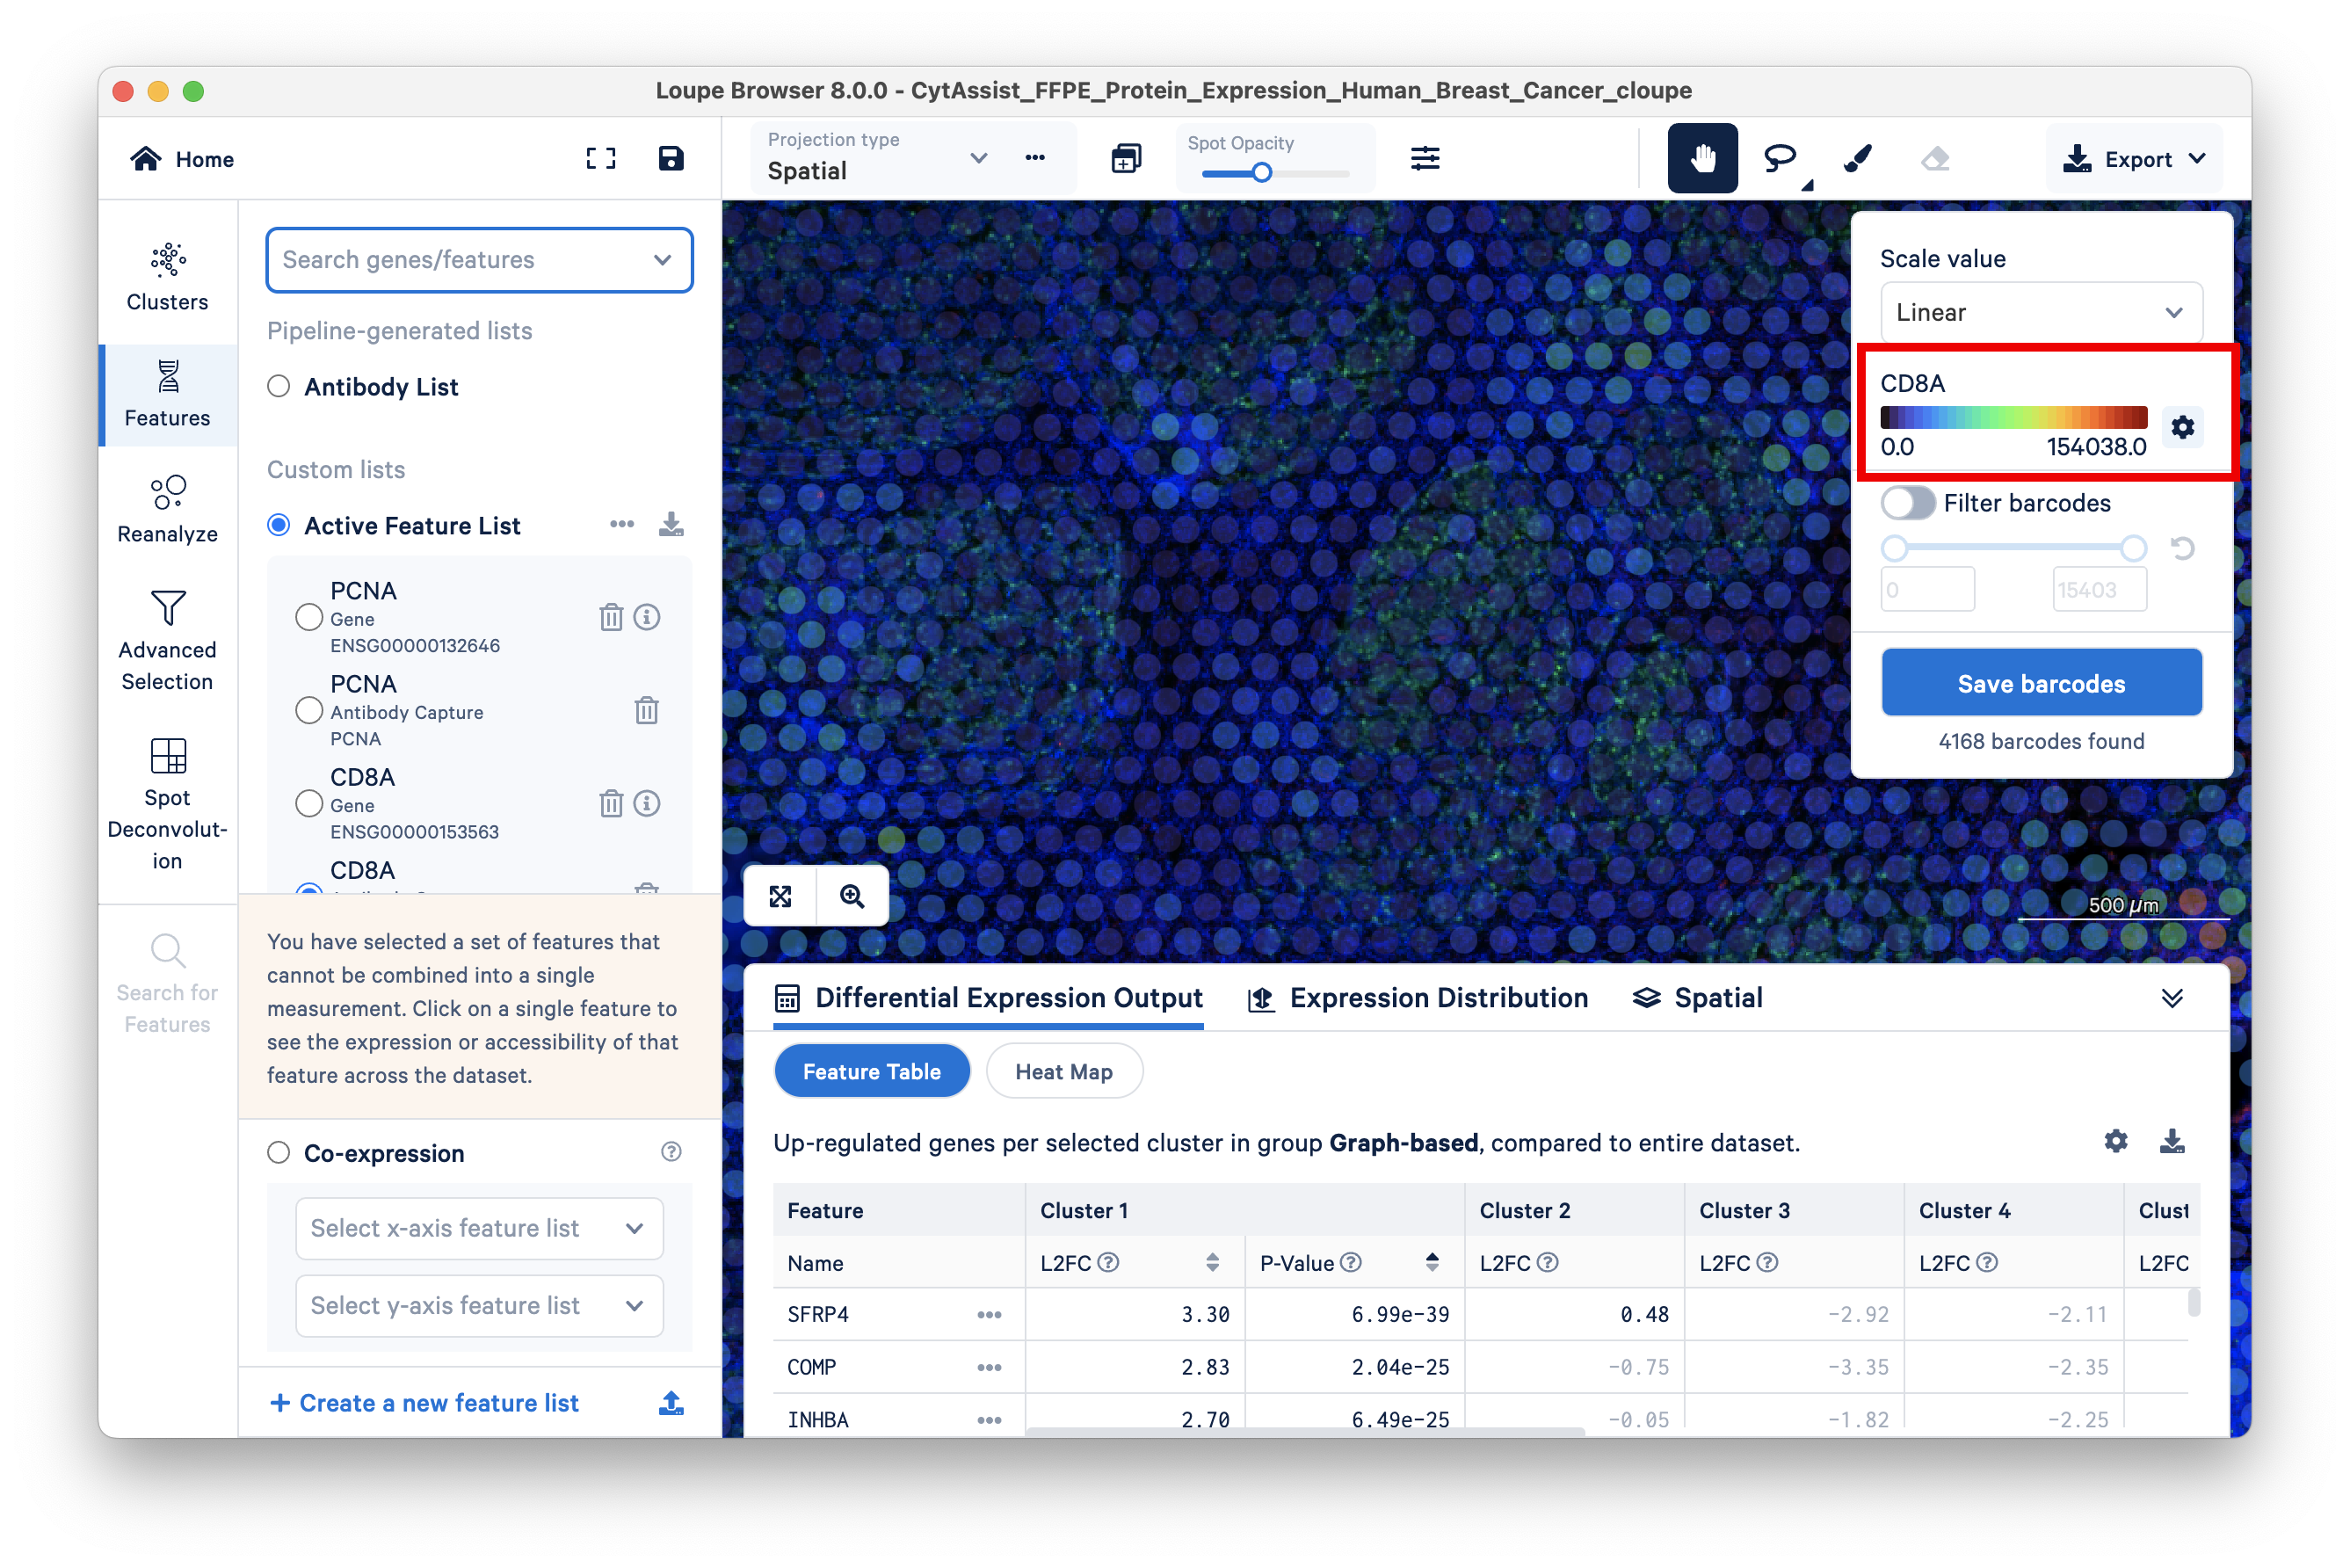
The Antibody Capture feature is more sensitive than the Gene feature. Given this greater sensitivity, protein expression data can be particularly helpful for classifying cells that have low RNA expression, e.g., immune T and B cells. To demonstrate this, a comparison of the expression pattern of T cell marker CD8A gene feature vs antibody feature is shown below:

Gene feature: Antibody feature:

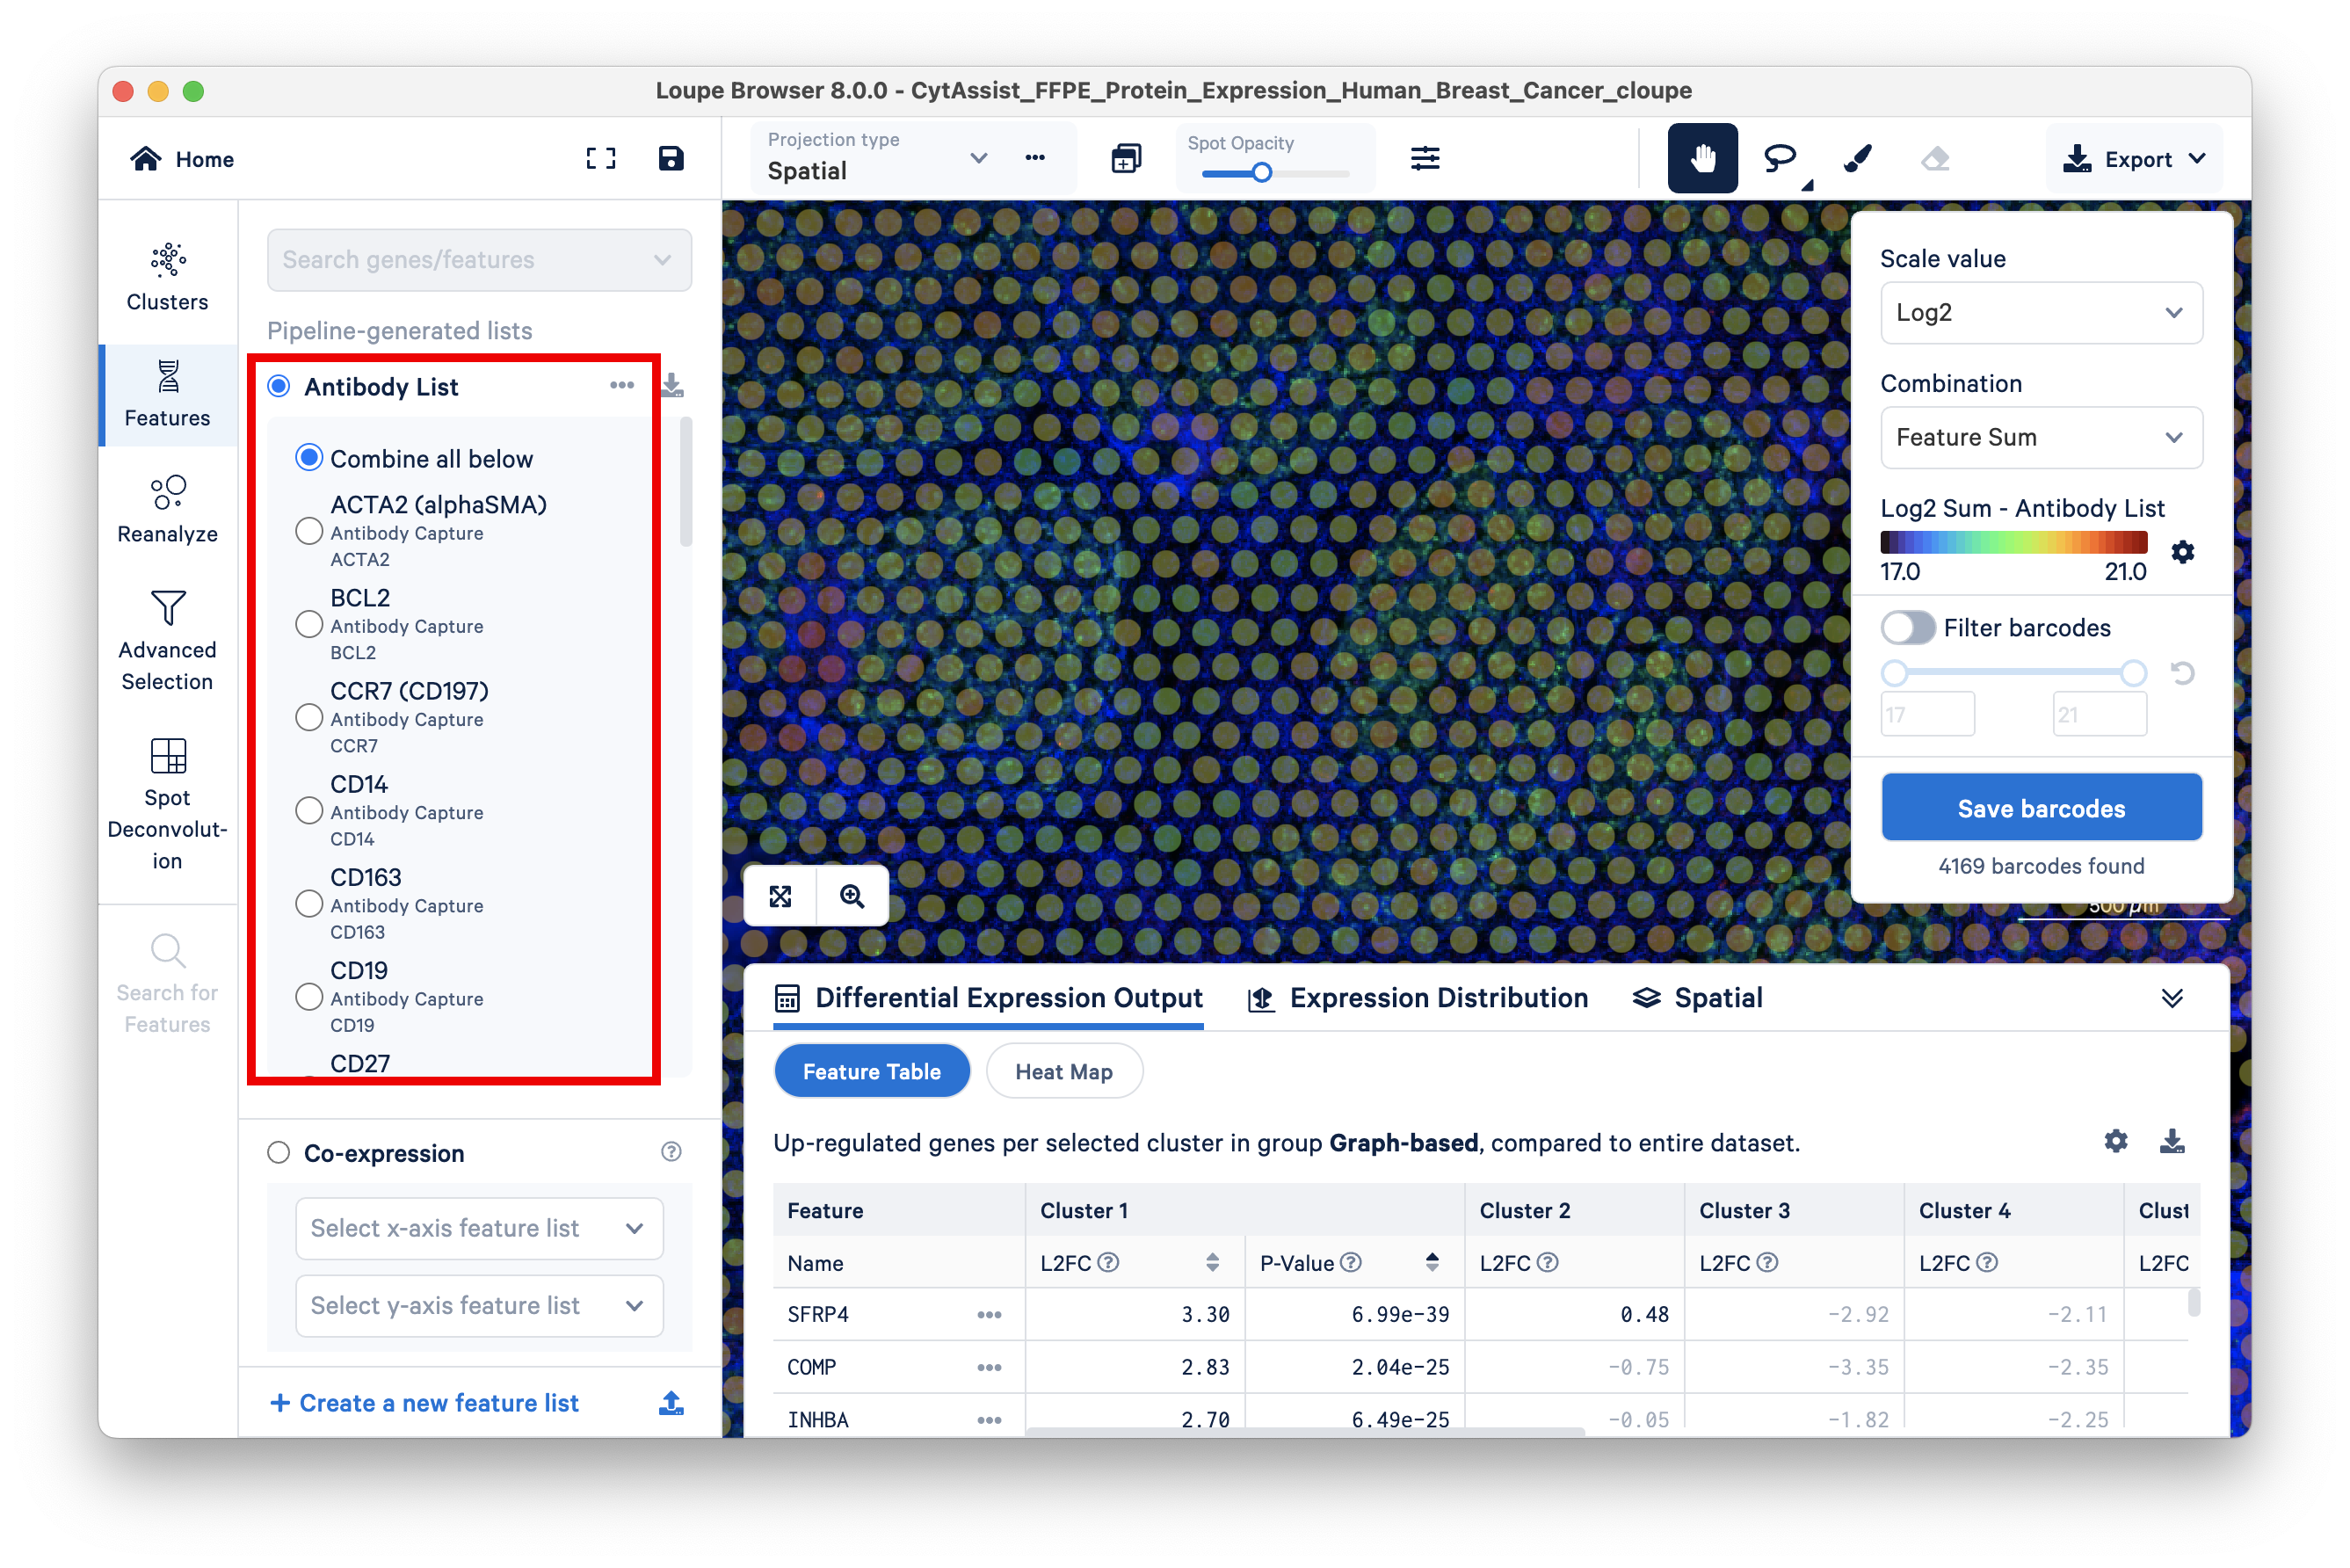
To view the list of antibodies included in the experiment, click on the Categories drop-down menu and select Gene/Feature Expression.

The Active Feature List dropdown menu has the option to display your Antibody List.

We will make a new category called 'Cancer Markers' with barcodes having high expression of three well-known cancer markers, PCNA, BCL2, and SDC1.

Click on the Categories tab, select Antibody List, and scroll through the list for the first marker gene (PCNA). Click on the gene of interest and make sure the Scale & Attribute section is set to "Linear". Then click on the 'Start selecting' button located in the 'Select Barcodes by Count' section on the bottom right.

Adjust the range to remove very low expression barcodes (background PCNA expression) as well as outliers that have very high expression of PCNA. The sliding scale helps you make a visual assessment of the range that is best suited for your experiment. For this tutorial, we chose the range 80000-130000.

After changing the range, click 'Assign Barcodes'. Make a new category called 'Cancer Markers' and name the cluster 'PCNA+'.

Repeat these steps for BCL2 and SDC1, using the ranges 160000-350000 and 20000-50000, respectively. Please note that each barcode can only be assigned to one cluster. If a barcode expresses more than one of the cancer markers (PCNA, BCL2, and SDC1), that barcode will belong to the last cluster it was assigned to. Therefore, the order in which barcodes are assigned to clusters can affect cluster identity and visualization.

At the end of this exercise, the Cancer Marker category should have three assigned clusters.

You can click through individual clusters to highlight barcodes and easily identify genes that distinguish these clusters by performing a differential gene expression analysis (using the bottom-right panel).

Similar to what we did with cancer markers, we can use the protein thresholding functionality to identify and co-visualize barcodes expressing T cell versus B cell marker genes.

In the antibody list, find each of these three T cell markers: CD3E, CD8A, PTPRC (CD45R0), and PTPRC (CD45RA). Use the thresholding feature on them individually. Create a new category called 'Immune Cells' and a new cluster called 'T cells' for the first marker. Then, assign the other two markers to the same category and clusters.

Repeat these steps with B cell markers: MS4A1, PAX5, and CXCR5. Use the same category but assigned them to a cluster called 'B cells'.

At the end of this exercise, you should be able to co-visualize T and B cells barcodes: