The Xenium In Situ workflow is non-destructive, which enables post-Xenium Analyzer staining and imaging on the same tissue section (e.g., Hematoxylin & Eosin (H&E) images and immunofluorescence (IF) images). To maximize the viewing performance experience, Xenium Explorer v1.2 and later accept post-Xenium images in a pyramidal, tiled, OME-TIFF format. Below, we provide instructions for three methods to convert an H&E image from its native format to a format compatible with Xenium Explorer. This format is required for post-Xenium image alignment with the DAPI morphology image in Xenium Explorer.
- Learn how to convert an image file to pyramidal, tiled OME-TIFF with the QuPath graphical user interface (GUI).
- Learn how to convert an image file to pyramidal, tiled OME-TIFF with command line options:
- QuPath command line (CLI, command line option)
- Tifffile Python library
- To use QuPath, download and install the software.
- To use the Tifffile library, you will need
python,tifffile, andopencv. We recommend using Miniconda to install Python and manage libraries.
The instructions in this tutorial demonstrate saving an H&E image from a 10x Genomics public dataset. Download example data from the 10x Genomics website to follow along with these instructions. This dataset provides post-Xenium unaligned H&E TIFF files for Sample 1 Replicate 1 and 2.
The instructions in this tutorial show example input/output for the Replicate 1 H&E image. You can also follow the instructions with any experimental H&E or IF image of interest.
# Example curl command to download file for Rep 1
# Post-Xenium H&E TIFF file
curl -O https://cf.10xgenomics.com/samples/xenium/1.0.1/Xenium_FFPE_Human_Breast_Cancer_Rep1/Xenium_FFPE_Human_Breast_Cancer_Rep1_he_image.tif
# Output Files
curl -O https://cf.10xgenomics.com/samples/xenium/1.0.1/Xenium_FFPE_Human_Breast_Cancer_Rep1/Xenium_FFPE_Human_Breast_Cancer_Rep1_outs.zip
For the methods we have tested for Xenium Explorer compatibility, these are the general recommended image export settings.
| Parameter | Setting |
|---|---|
| Compression type | ZLIB or JPEG 2000 (lossless) (Use ZLIB compression in QuPath) |
| Pyramidal scale | 2 (Each pyramid image is downsampled by a factor of 2) |
| Tile size | 1024 px (A smaller tile size may lead to reduced performance in Xenium Explorer) |
QuPath is available both as a GUI application and a command line interface - instructions for both are provided below. The supported input image formats for QuPath are listed here.
Download and install QuPath following the instructions here for Mac, Windows, or Linux (download page here). If you encounter an error with QuPath download on MacOS Ventura, please see suggestions in this forum and on QuPath's troubleshooting page.
The instructions below were written with QuPath v0.4.4 for MacOS.
- After installation, open QuPath.
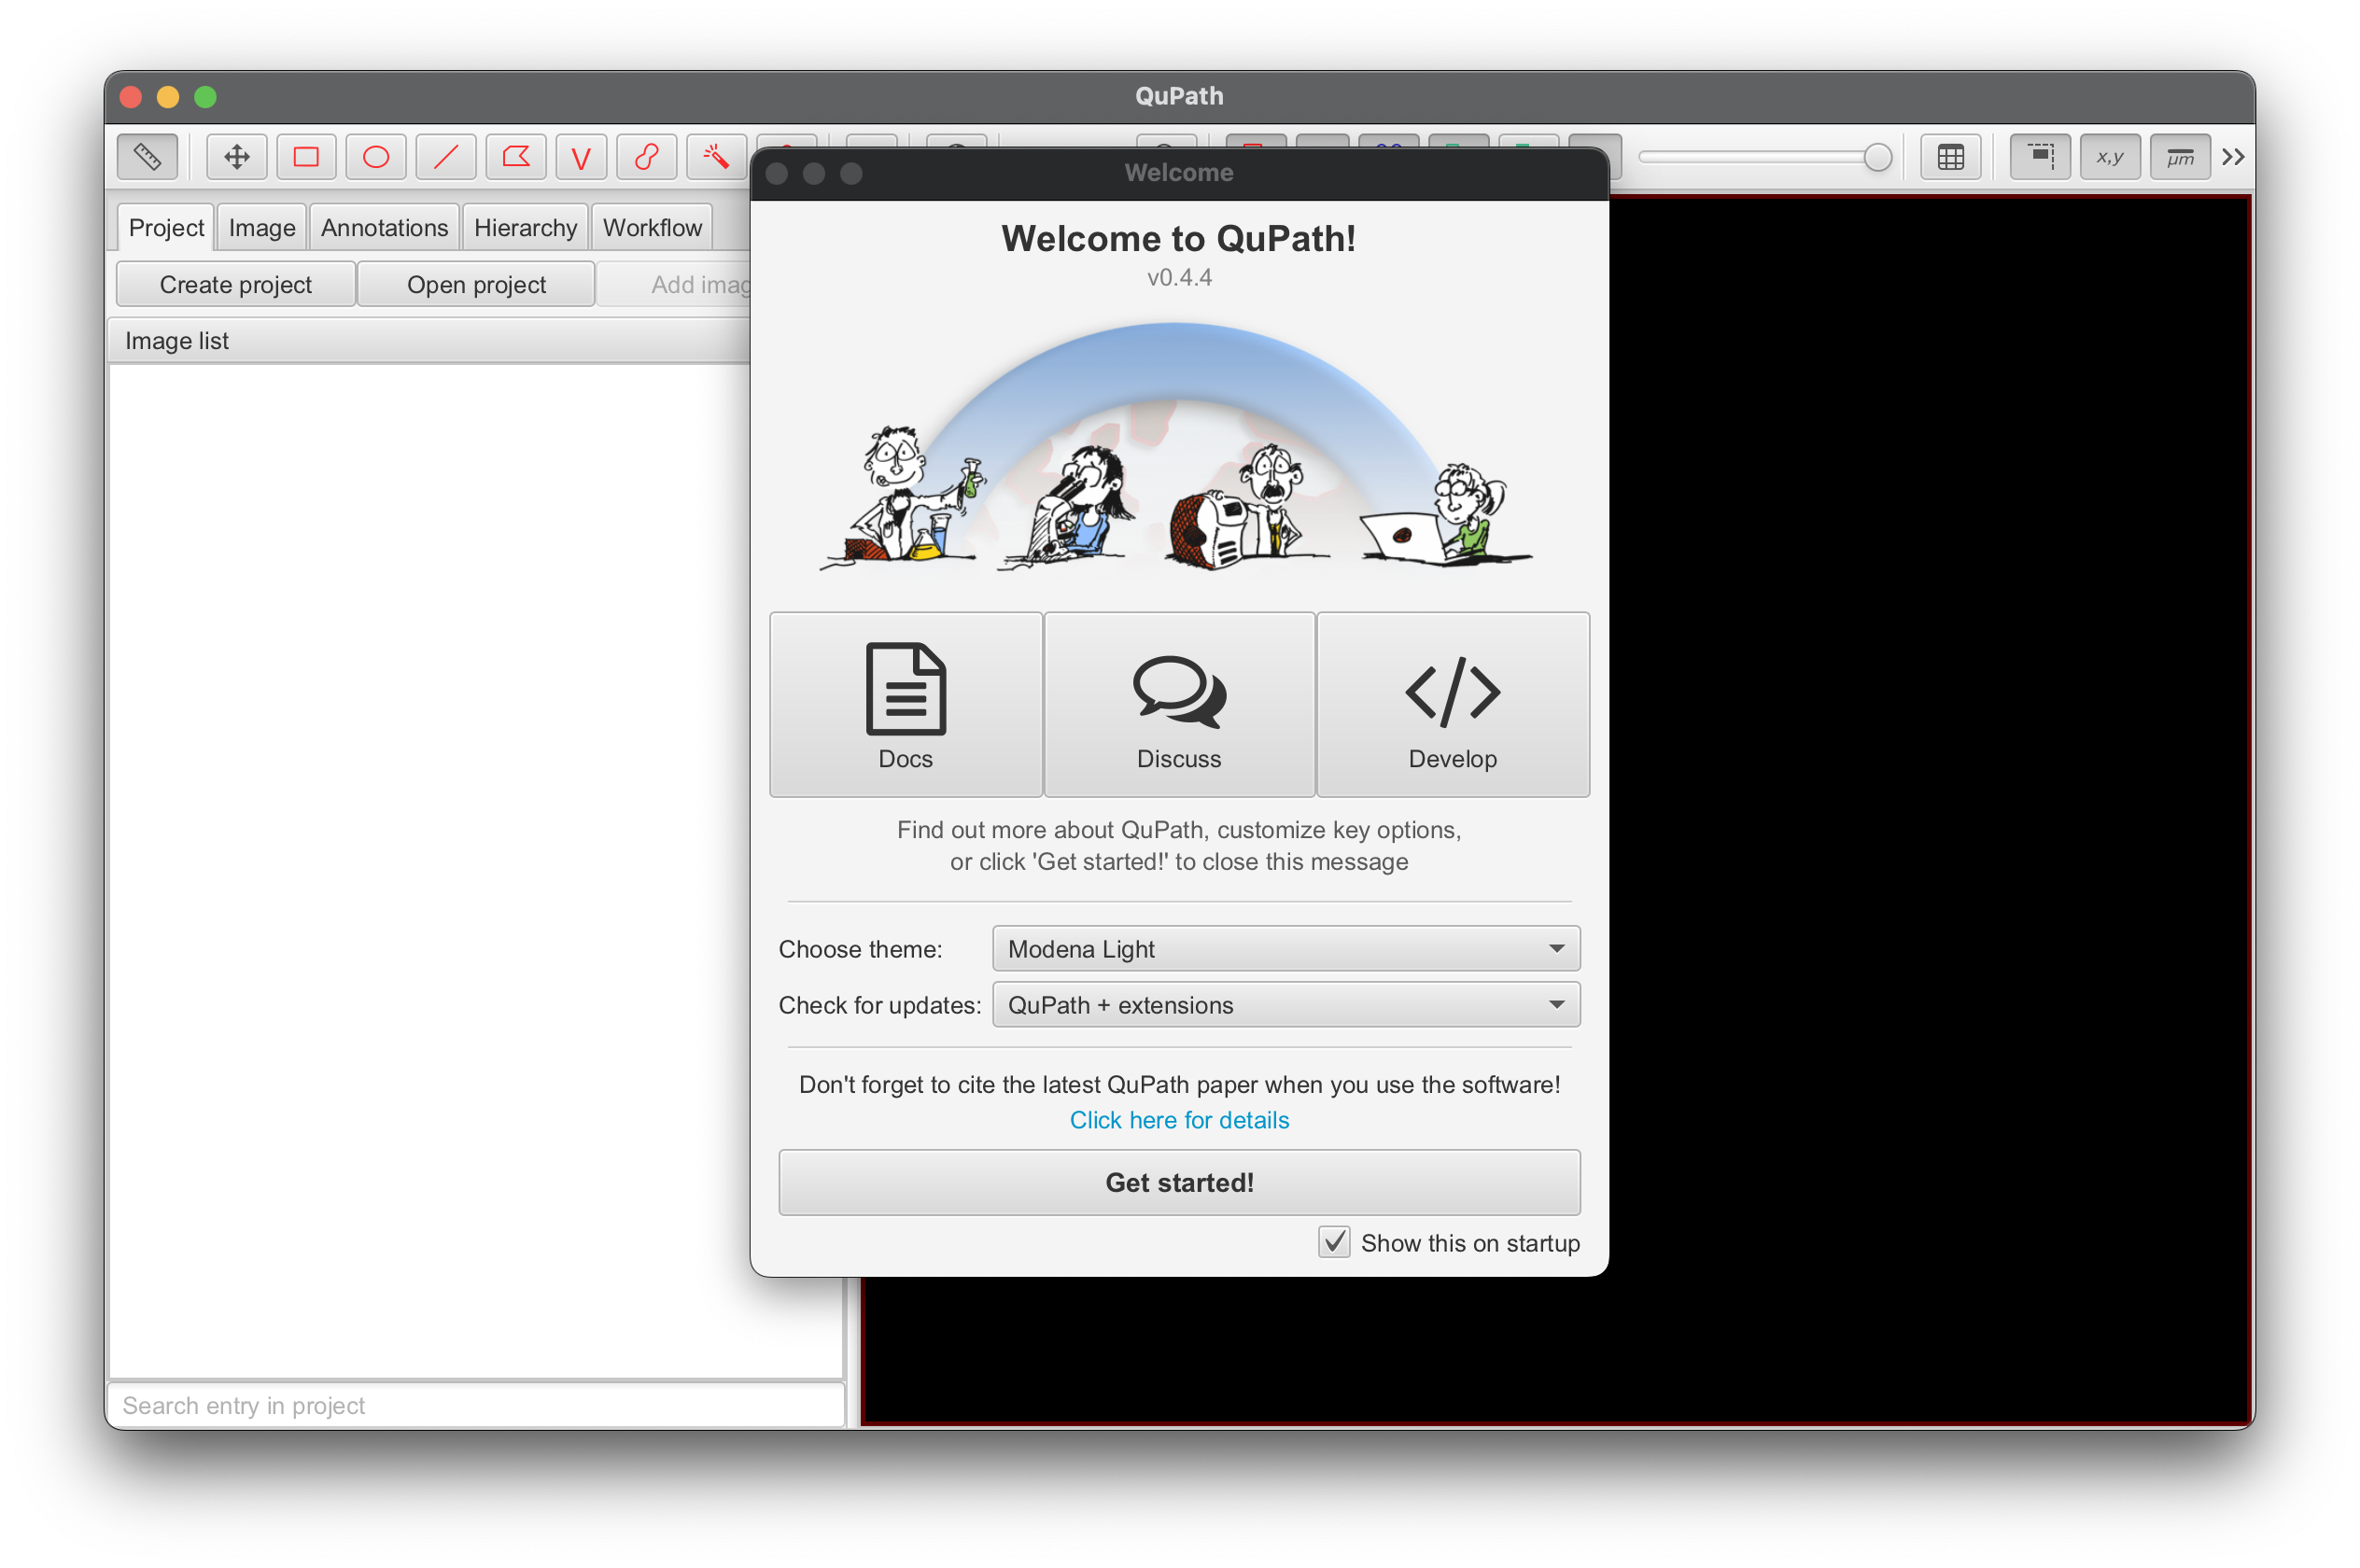
- Open the image file: File > Open > Select image file
- The default maximum memory setting in QuPath may not be high enough to open the file depending on the image size and resolution (error message shown below).
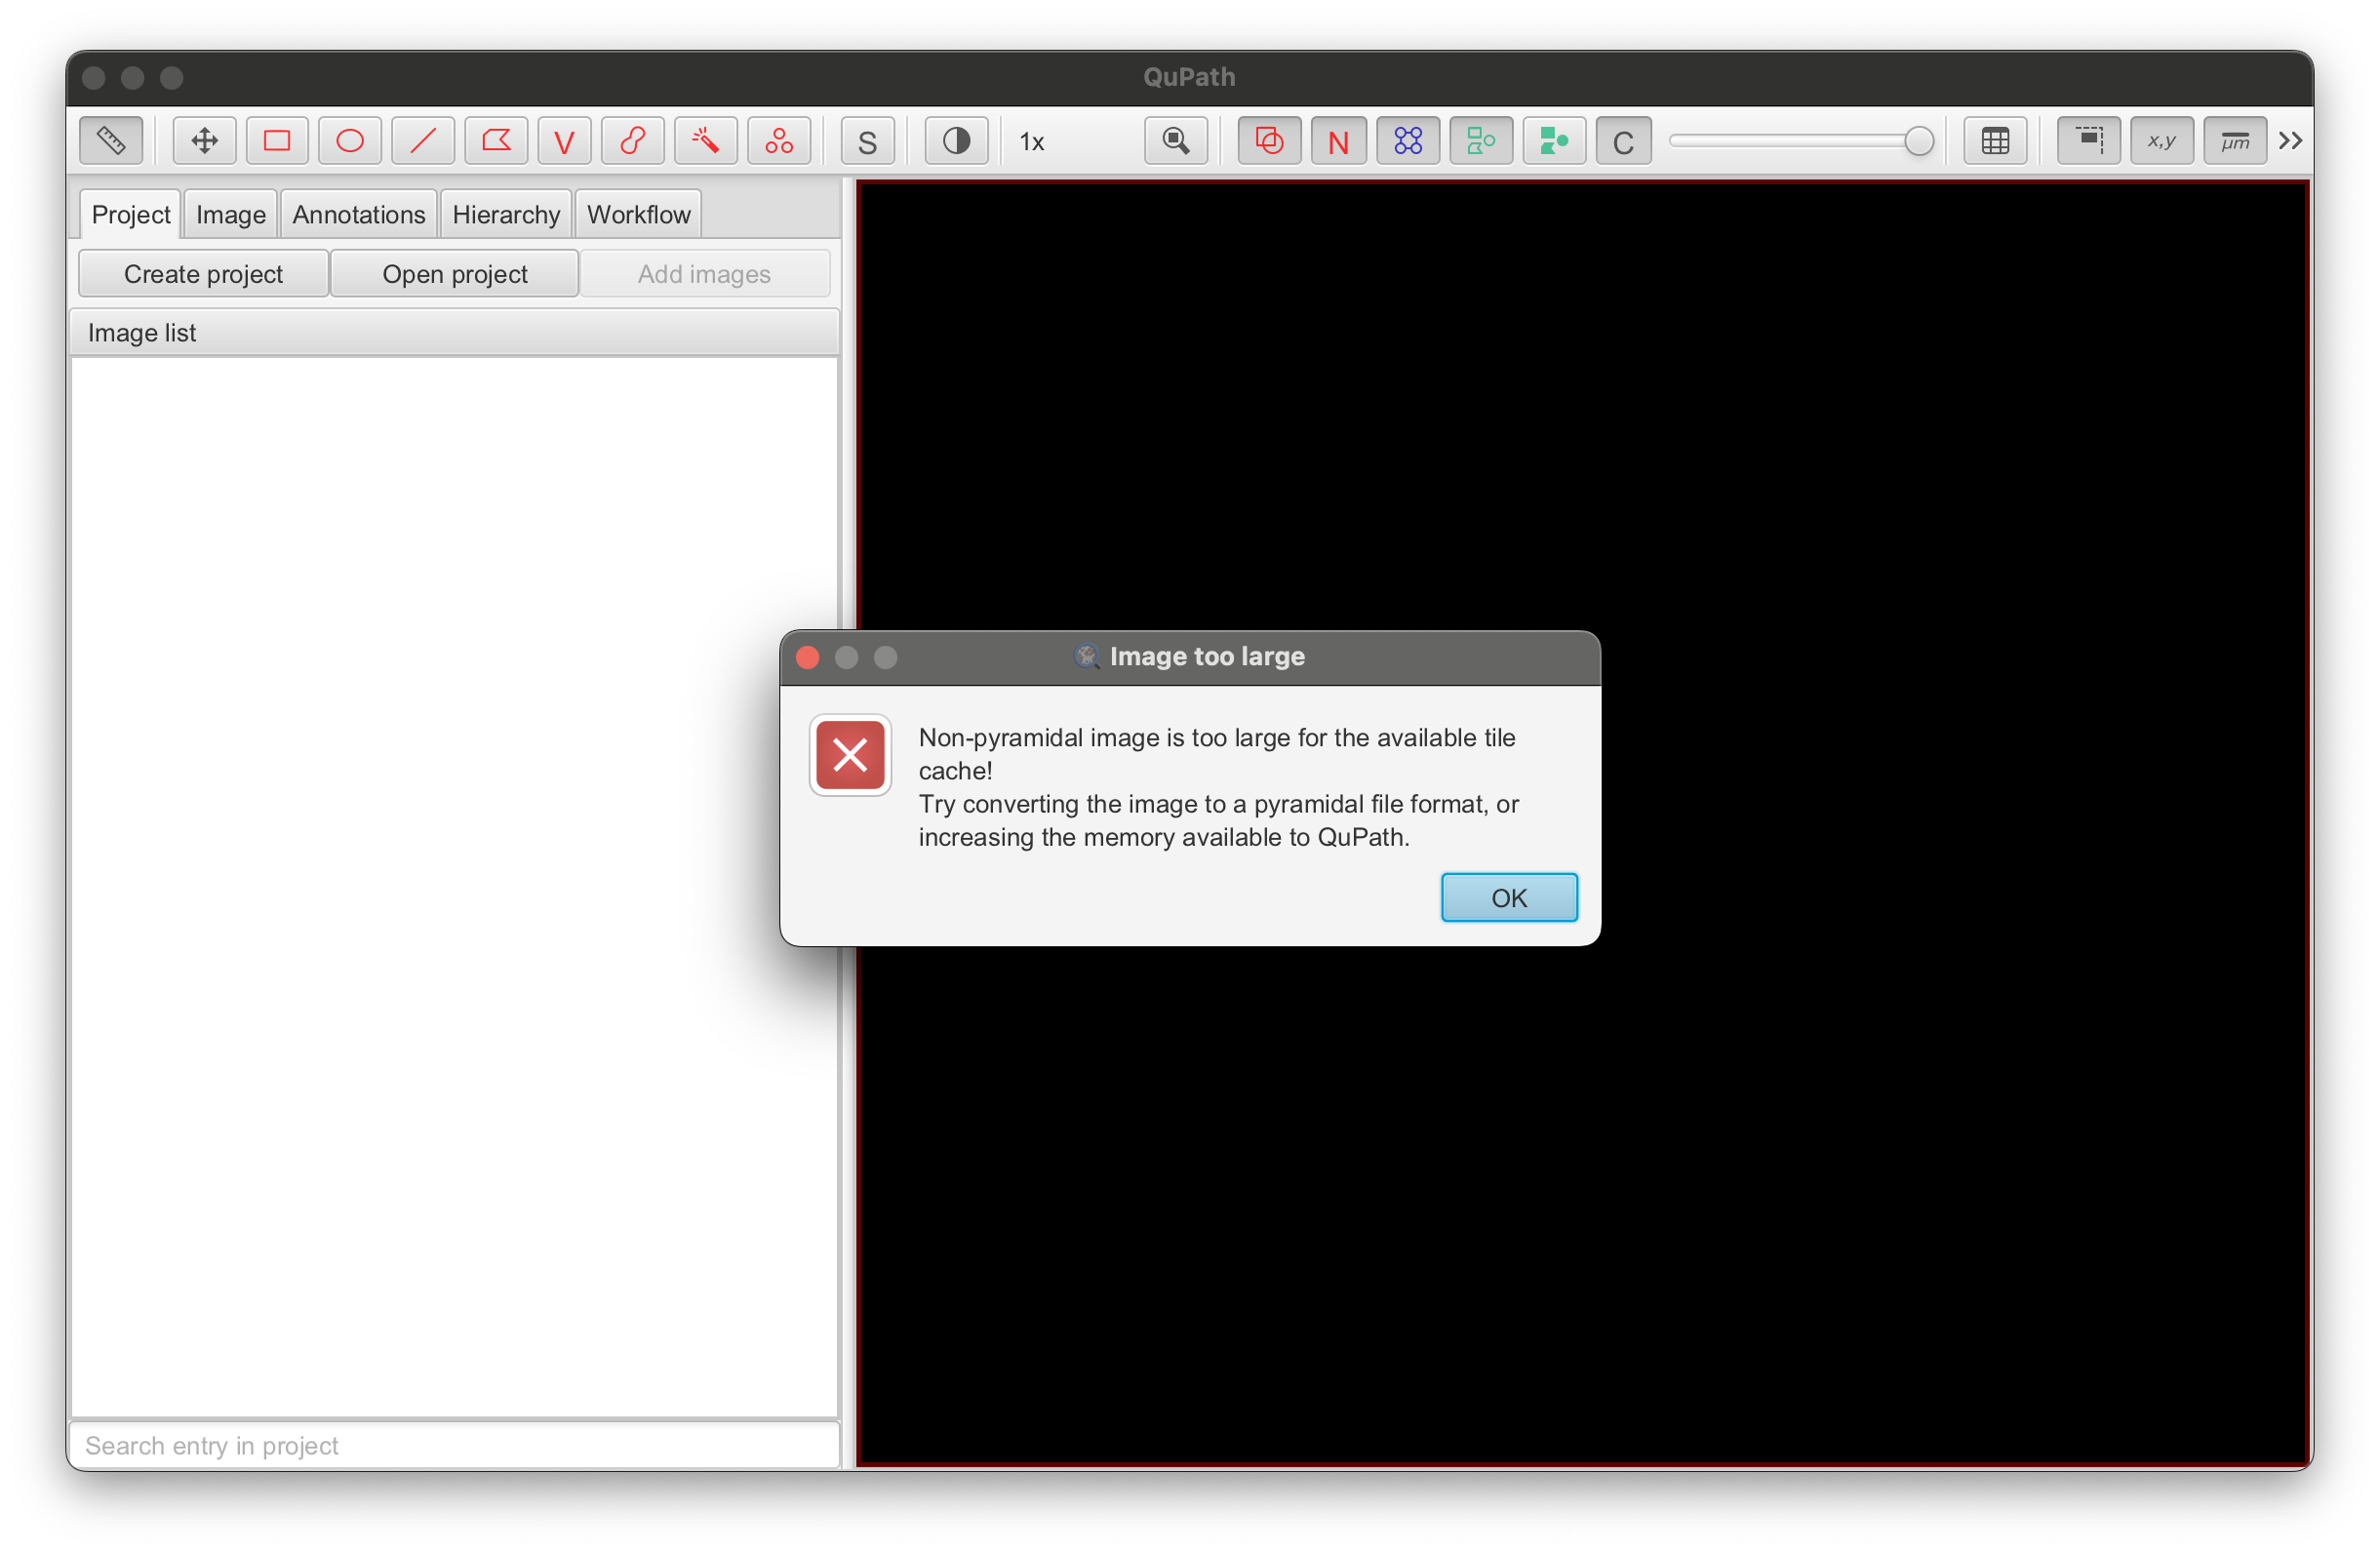
- If you see the "Image too large" error, follow the Why can I not set the maximum memory? instructions from QuPath’s documentation to increase the memory setting (also shown below for MacOS). QuPath recommends changing the maximum memory to 12 GB - make sure this does not exceed your computer’s memory!
In this tutorial, the .cfg file was modified. On a Mac with QuPath v0.4.4, this file is located in /Applications/QuPath.app/Contents/app/QuPath.cfg. If you do not have admin permissions, you may need to change write permissions to edit the file. Open the file in a text editor and edit the JavaOptions section at the end of the file:
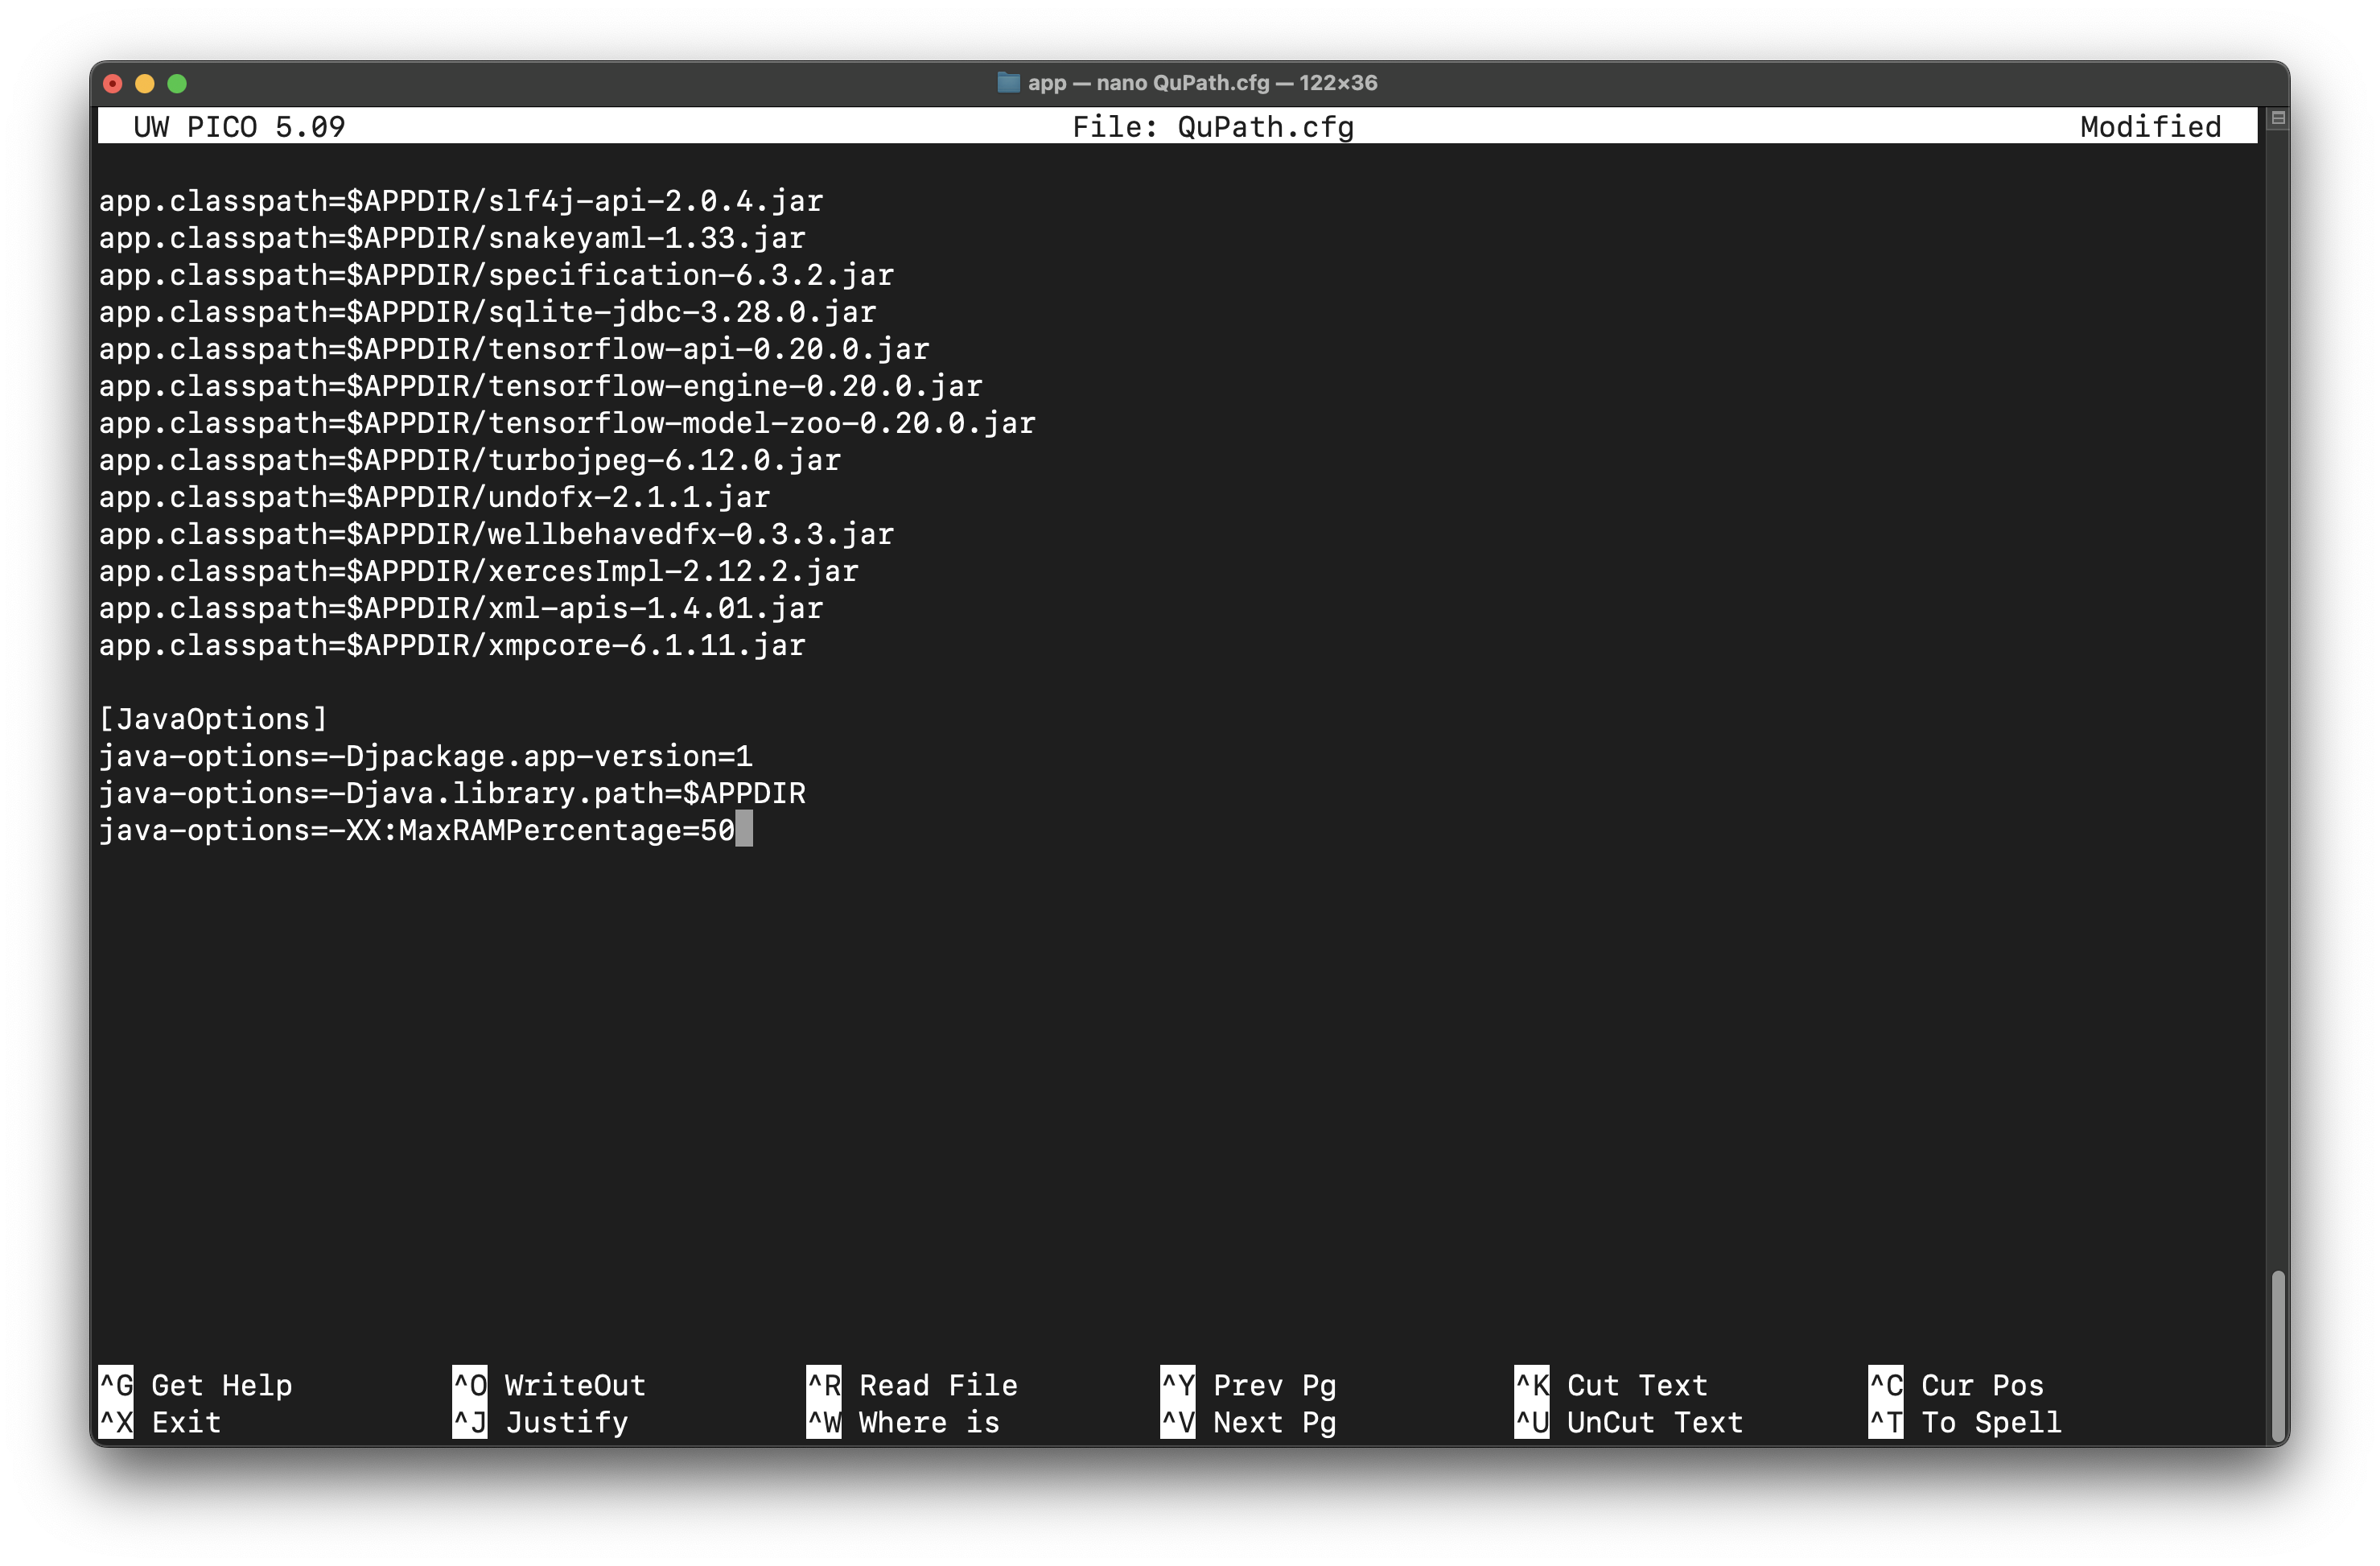
# Default setting
java-options=-XX:MaxRAMPercentage=50
# At the end of the file, edit settings to:
java-options=-Xmx12G
-
Try opening the file again (you may need to close QuPath and reopen): File > Open > Select image file
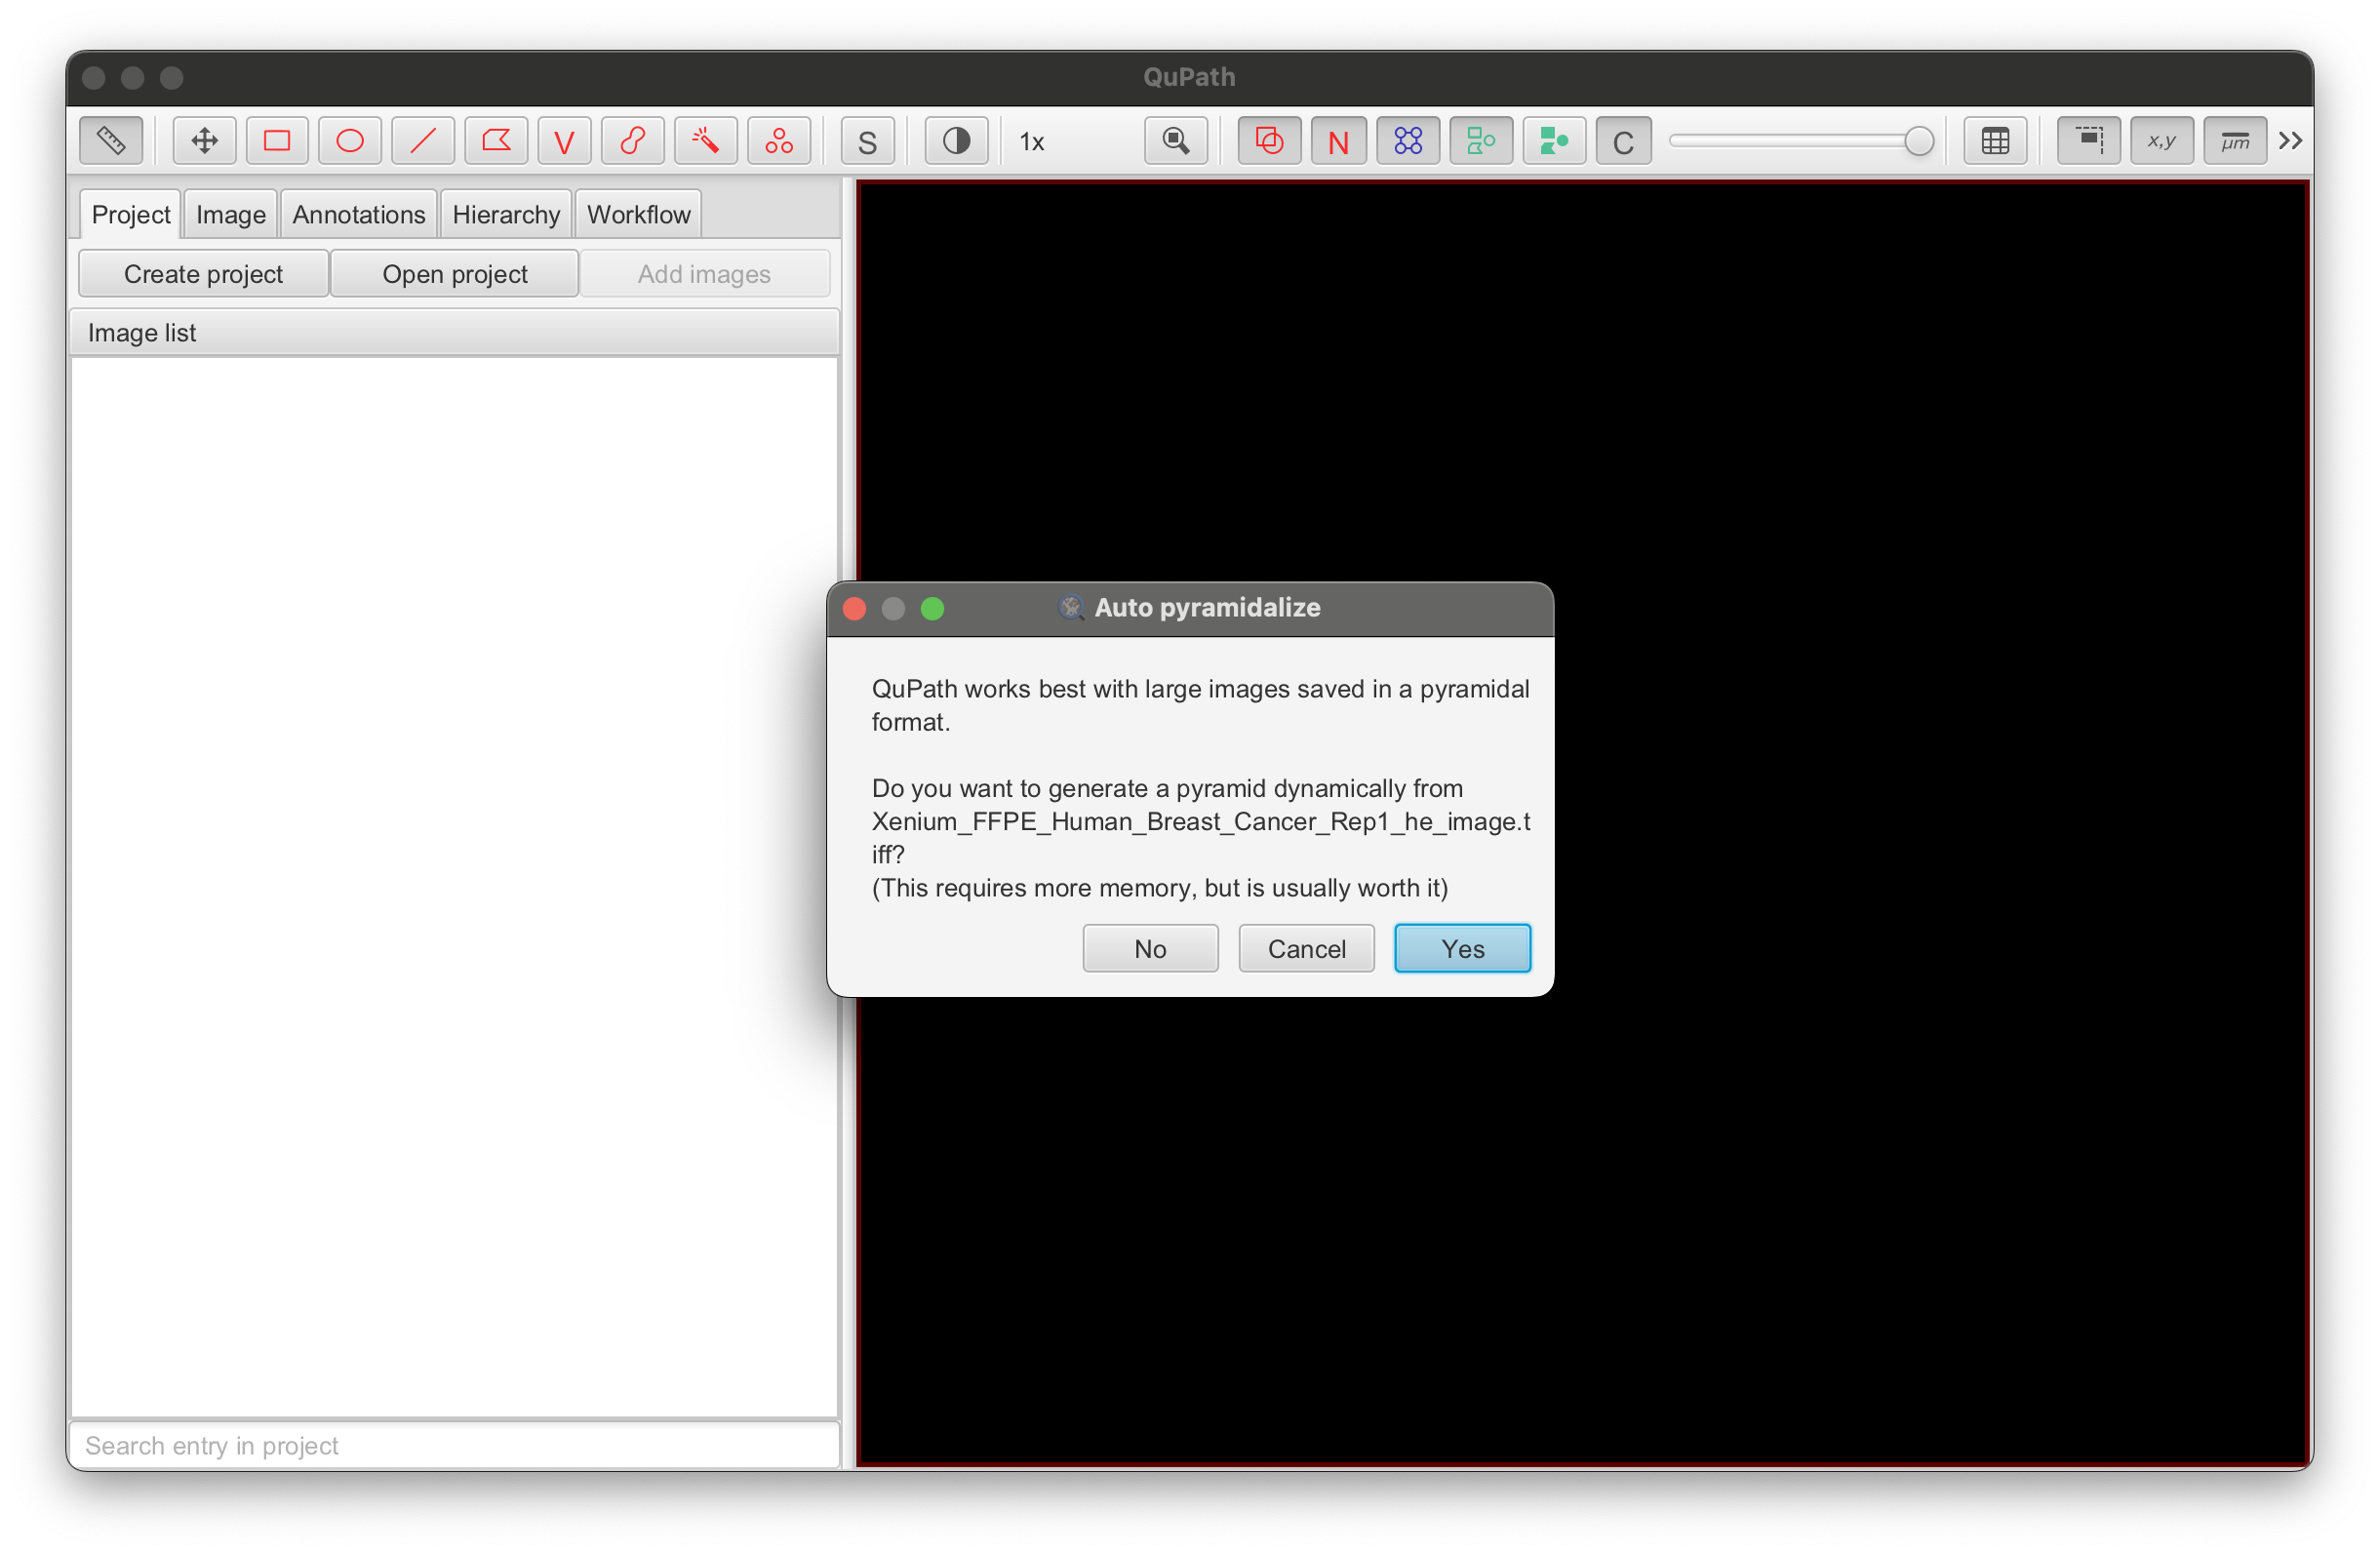
-
Click Yes to save the image in a pyramidal format.
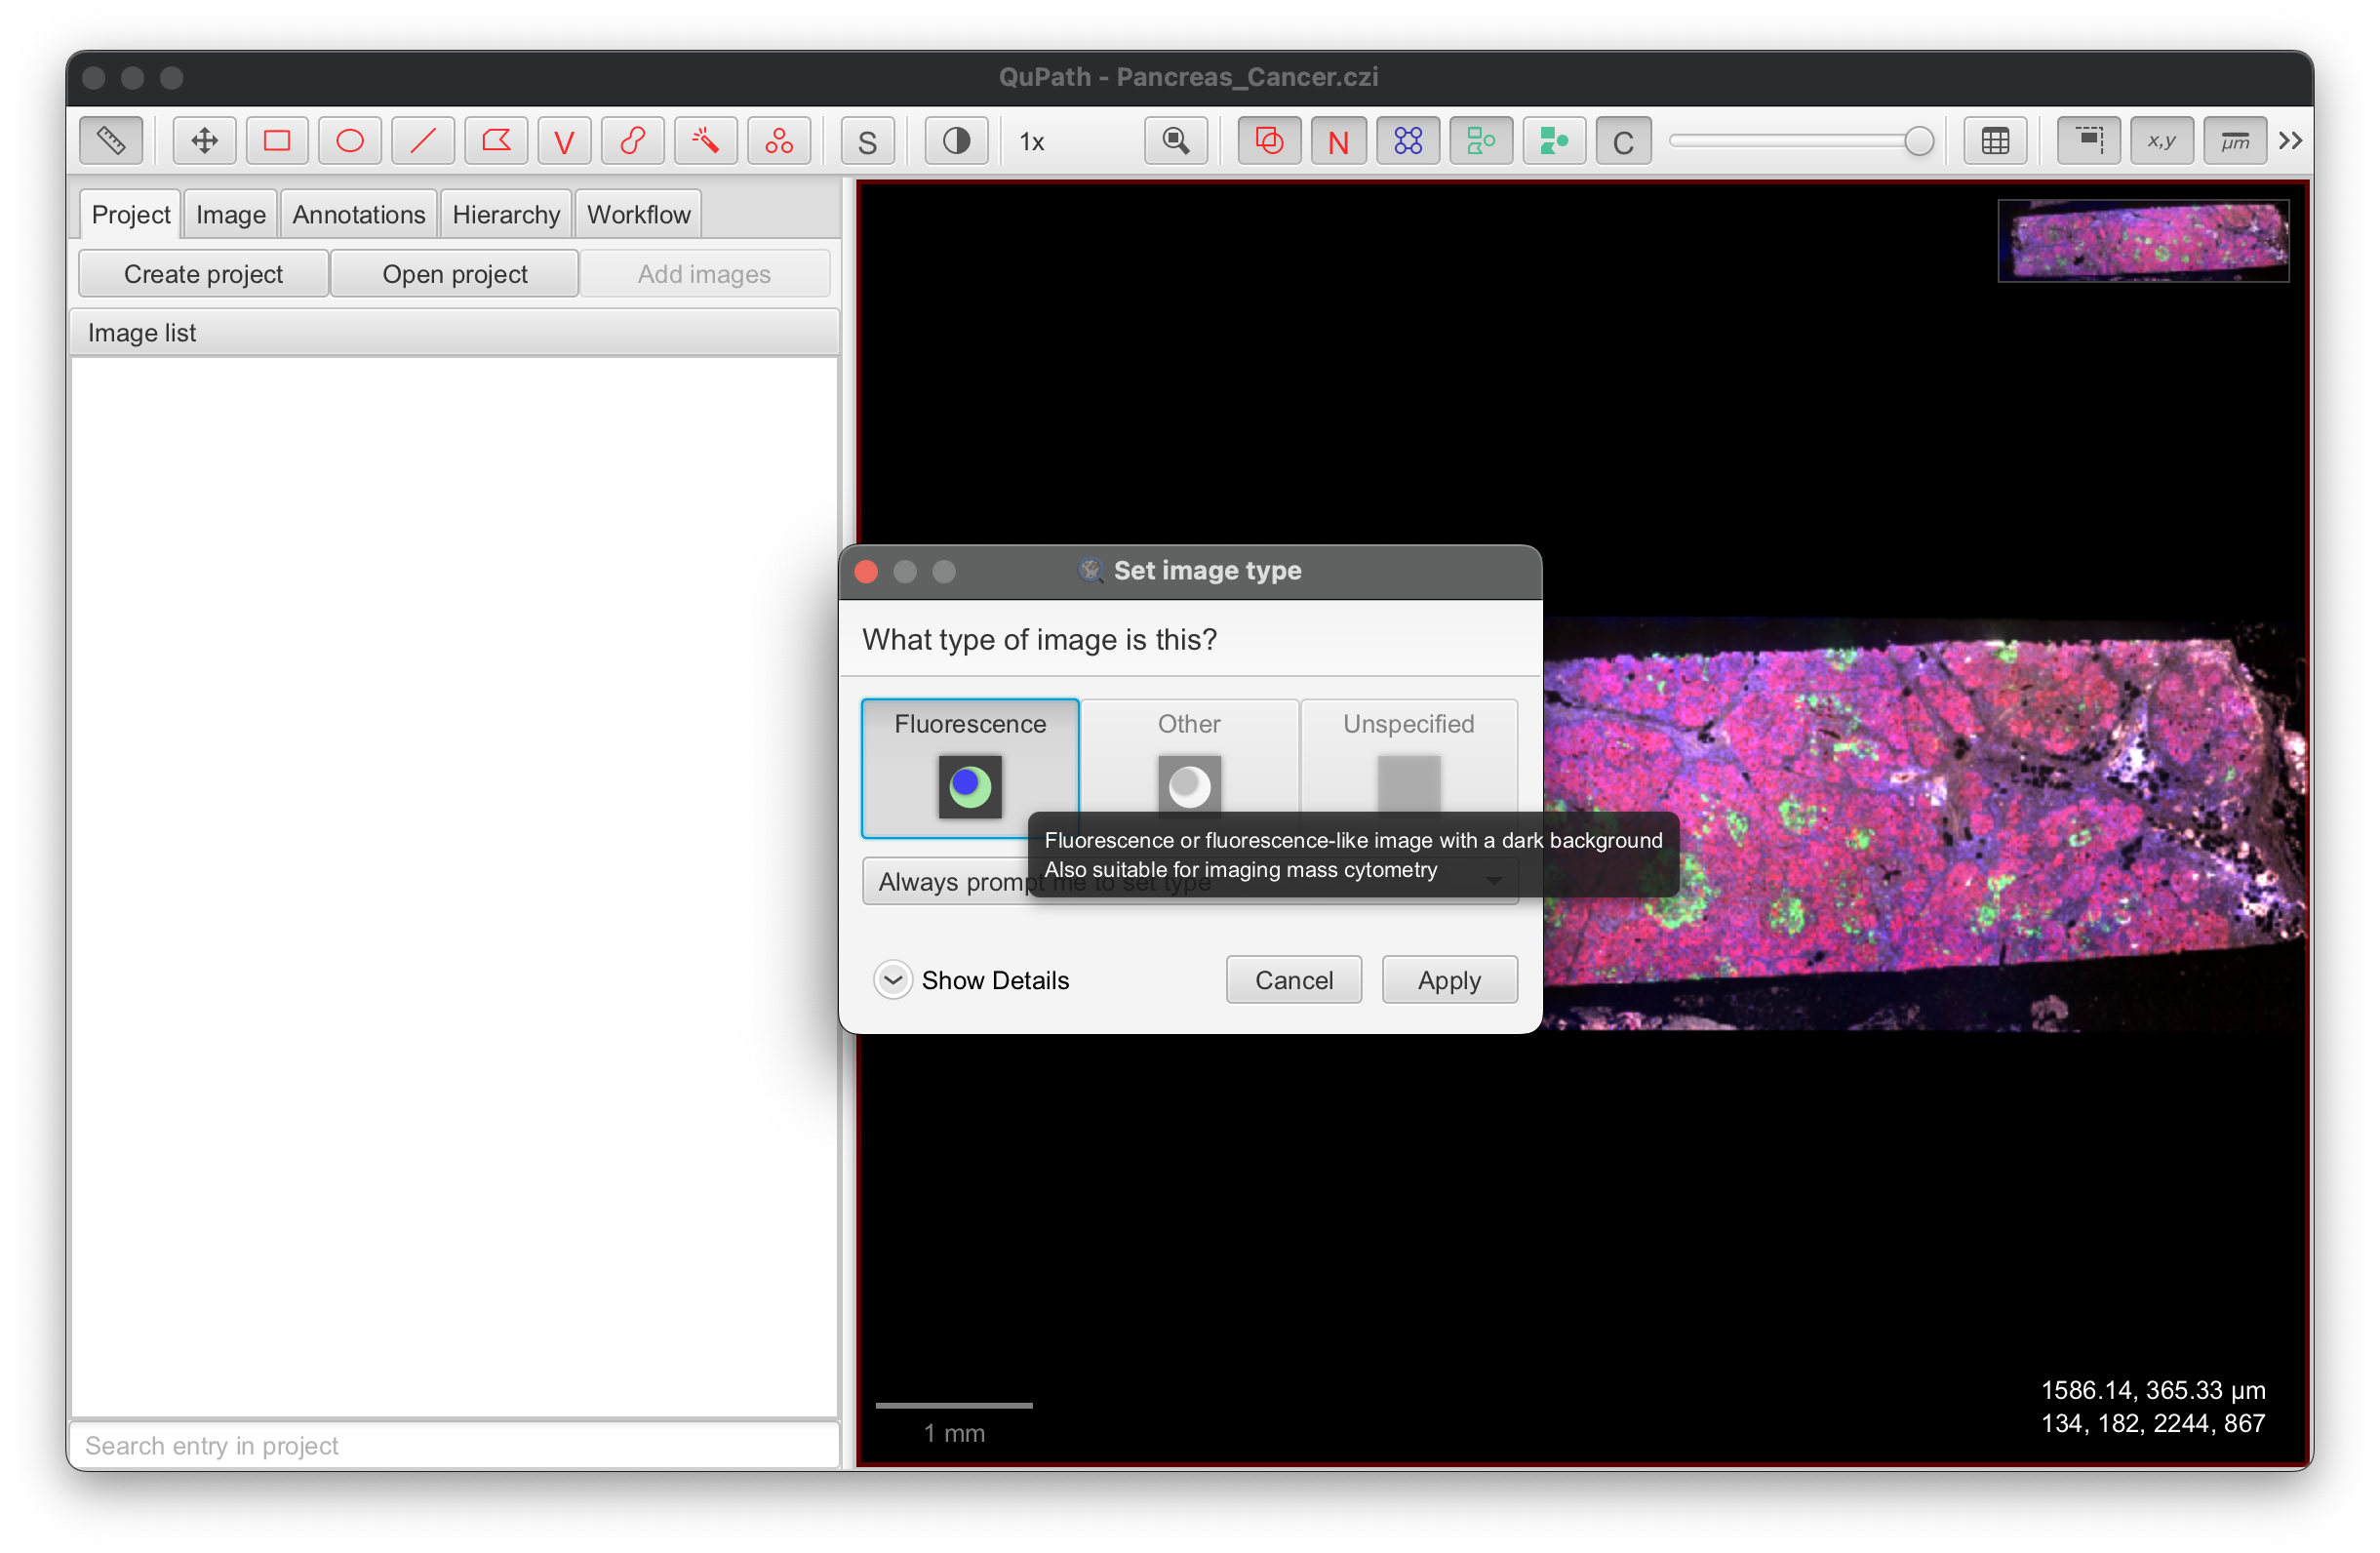
- Select the image type:
- For H&E images, select Brightfield H&E.
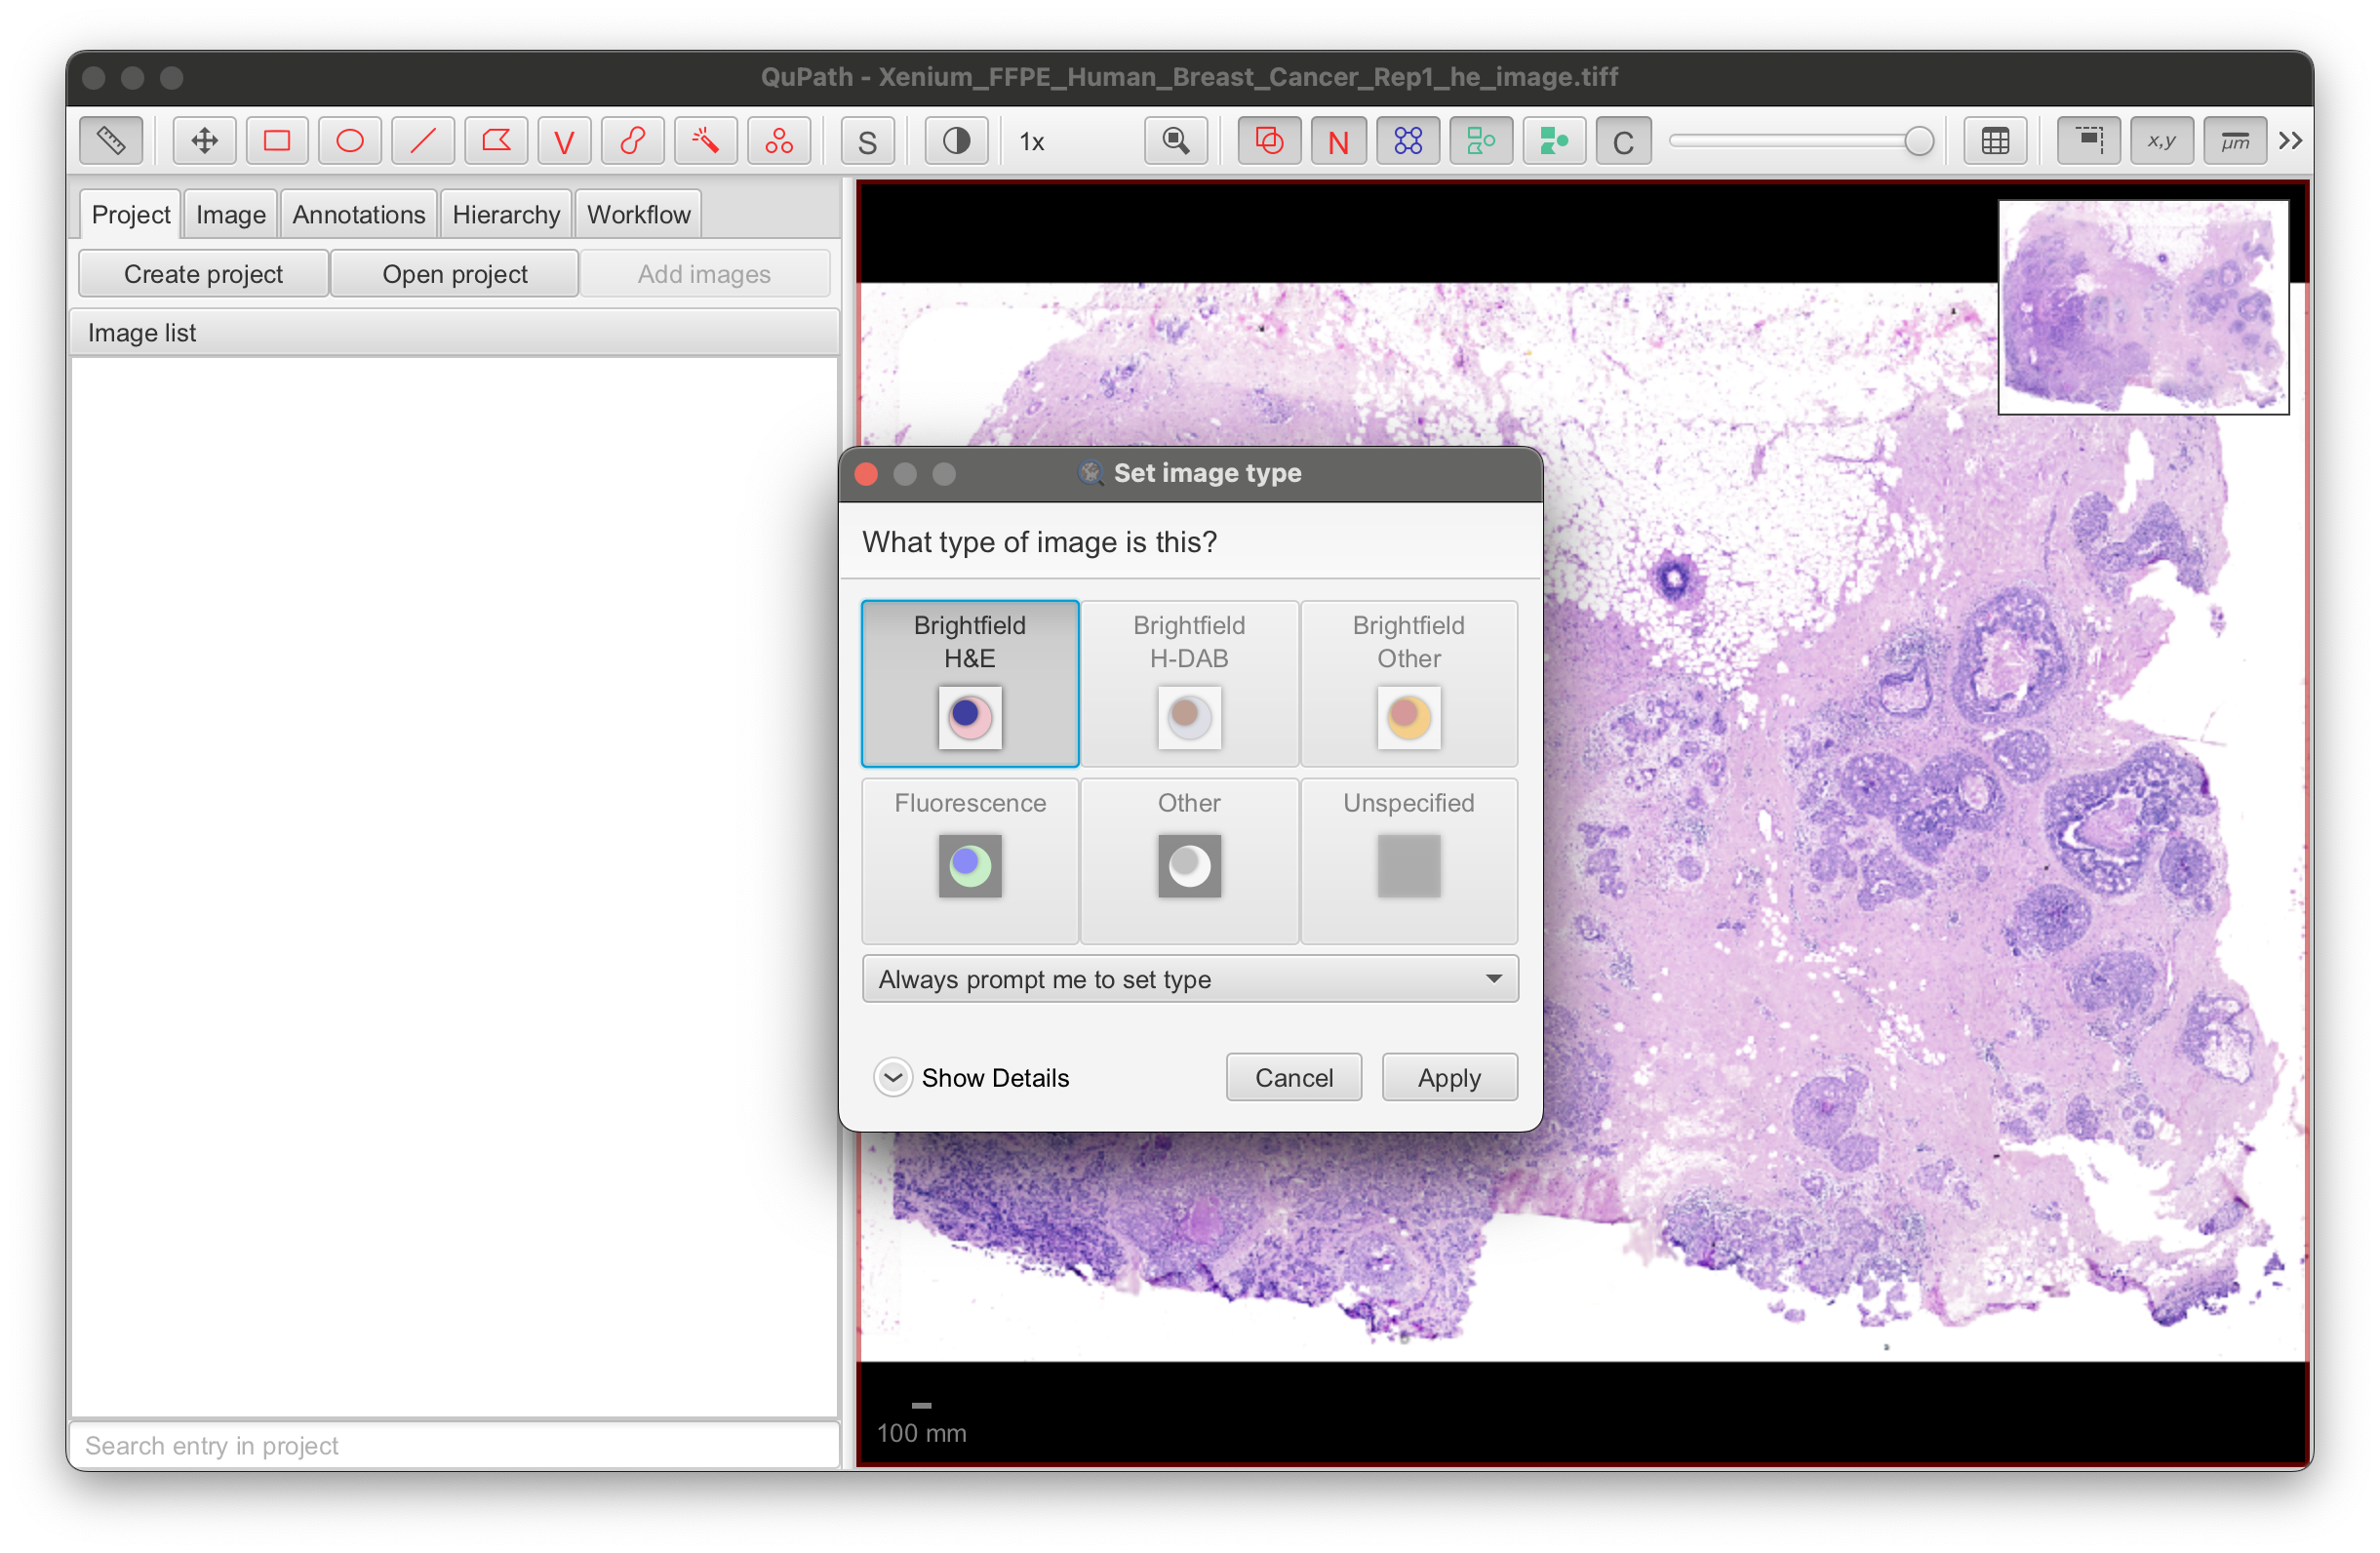
- For IF images, select Fluorescence.
-
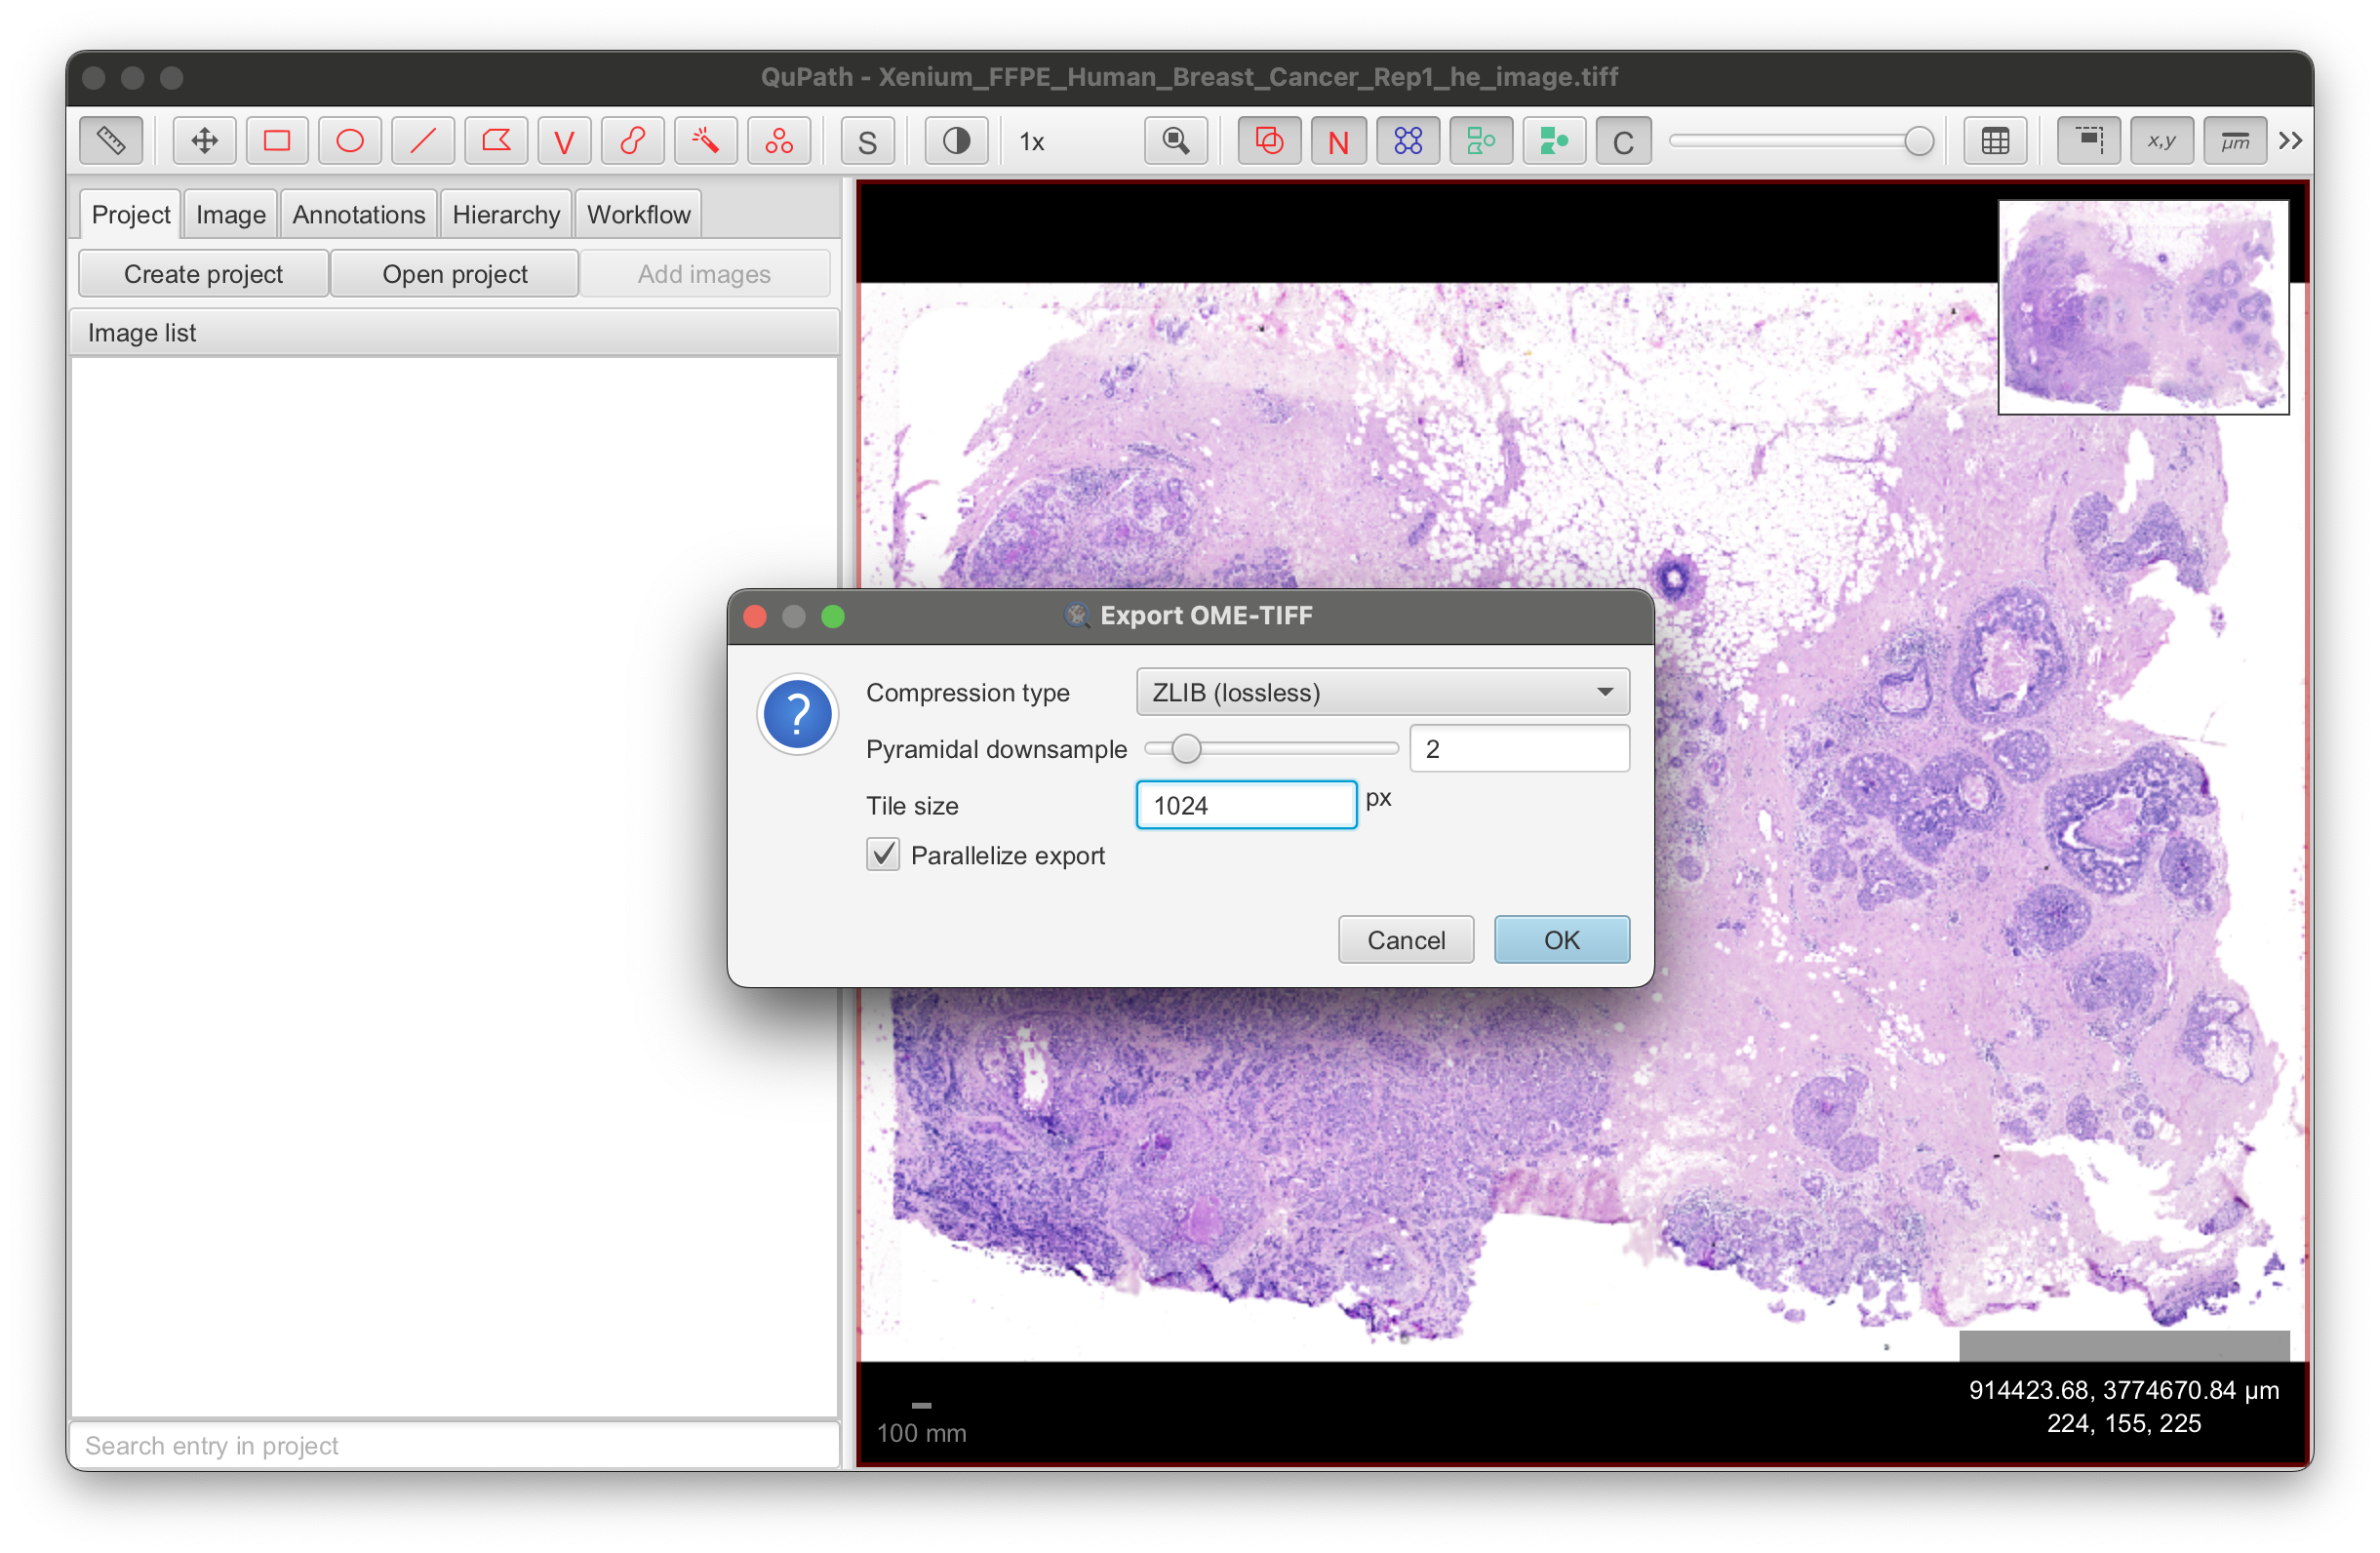
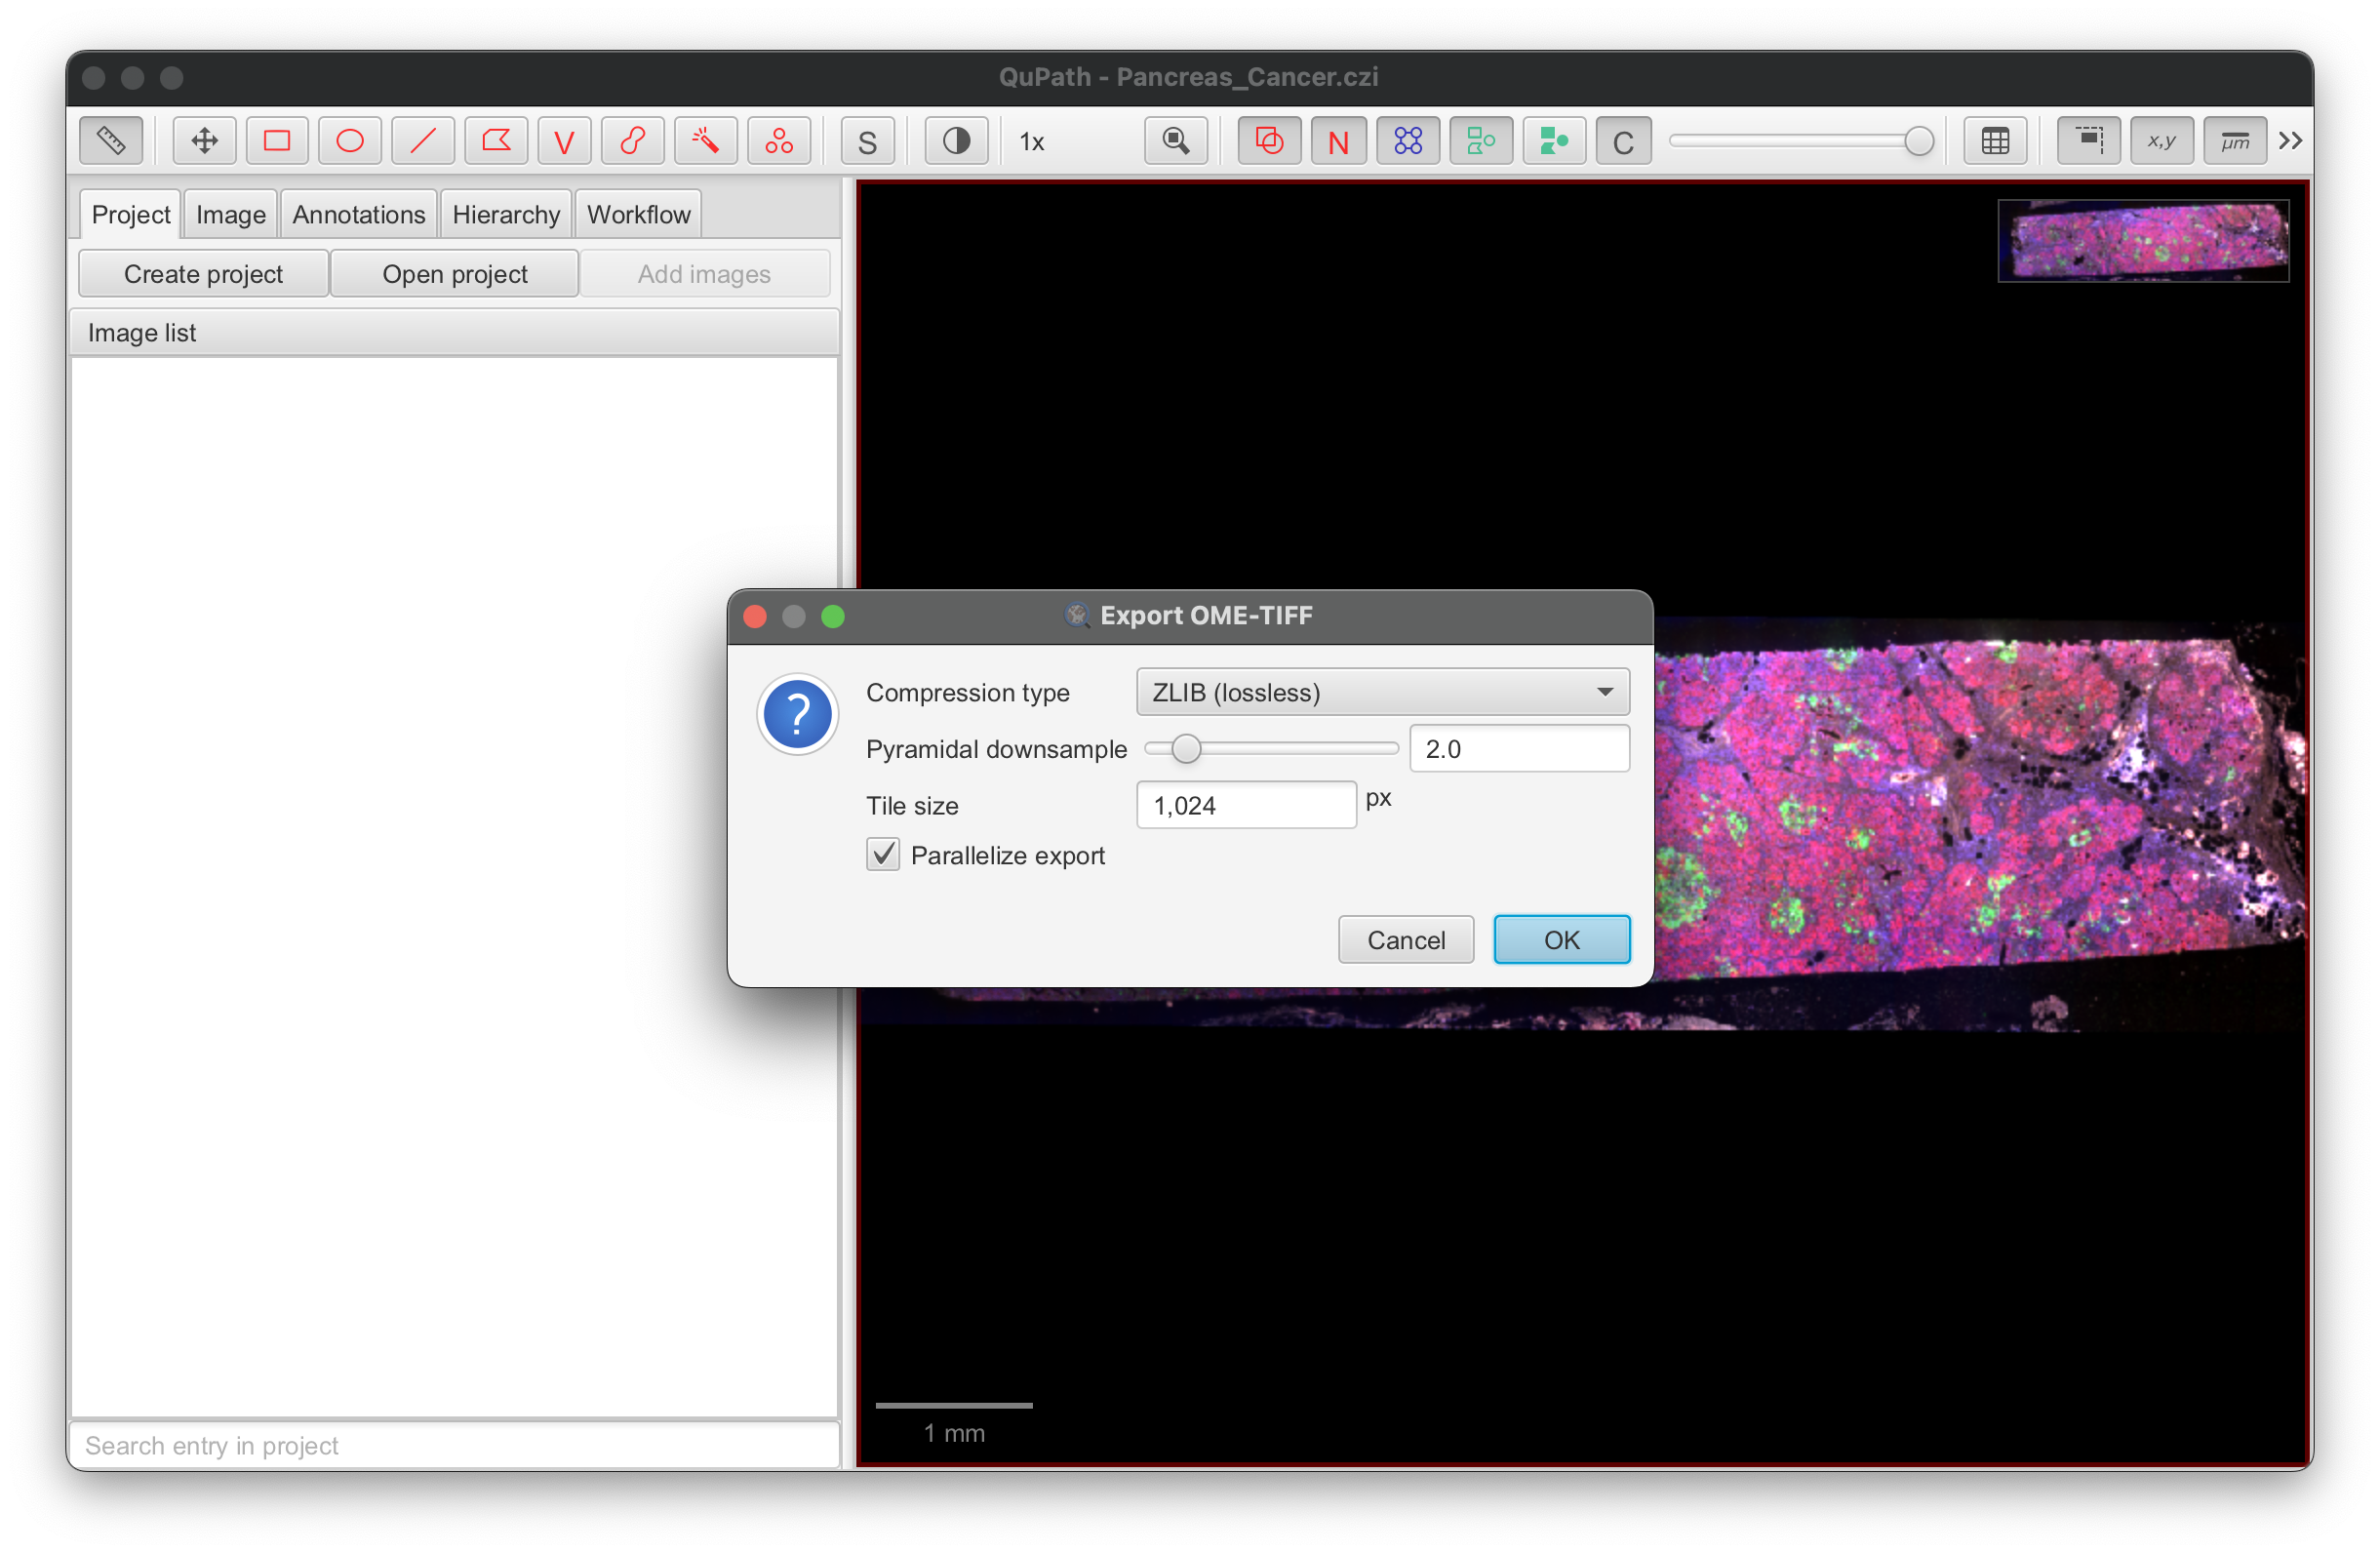
Export the image to save it as an OME-TIFF formatted file: File > Export image > OME-TIFF. The output file size for this example dataset is 1.24 GB.
-
Edit the settings with the following changes to be compatible with Xenium Explorer:
- Compression type: ZLIB (lossless)
- Pyramidal scale: 2.0 (each pyramid image is downsampled by a factor of 2)
- Tile size: 1024 px (important for performance in Xenium Explorer; smaller tile sizes may cause laggy performance)
- Parallelize export: Keep setting checked
Use the same settings for an IF image, for example:
-
Next, wait for the file export process to complete.
On a Mac with 16 GB memory, it took ~2 minutes to complete for the example image. File conversion time is linearly correlated with image size. Some images may require more time to process (i.e., IF images with many channels). For Macs, QuPath resumes the file conversion process if your computer goes into sleep mode.
- Continue on to the Image Alignment tutorial to view the image in Xenium Explorer.
The QuPath command line (CLI) option also enables image file conversion to the OME-TIFF format.
The QuPath documentation for Windows and MacOS CLI are here.
The commands below show how to view the help text and run the convert-ome subcommand on a Mac.
Use the same settings as in the GUI application for compression, pyramidal scale, tile size, and parallelization. Remember to change the file paths in the commands below depending on where QuPath and the input/output files are located on your computer.
# Show QuPath CLI options
/Applications/QuPath.app/Contents/MacOS/QuPath --help
# Show QuPath convert-ome subcommand options
/Applications/QuPath.app/Contents/MacOS/QuPath convert-ome --help
# Run convert-ome subcommand
# Usage: QuPath convert-ome <input file full path> <output full path> <parameter settings>
# QuPath adds the file extension. This example saves the exported output as "test_qupath_CLI.ome.tif"
# Edit input/output paths
# Example with the Rep 1 H&E image
/Applications/QuPath.app/Contents/MacOS/QuPath convert-ome \
/path_to/Xenium_FFPE_Human_Breast_Cancer_Rep1_he_image.tif \
/path_to/test_qupath_CLI \
--pyramid-scale=2 \
--tile-size=1024 \
--compression=ZLIB \
--parallelize
If the command is running successfully, the terminal screen outputs the following:
09:30:59.269 [main] [INFO ] qupath.lib.common.ThreadTools - Setting parallelism to 7
09:30:59.274 [main] [INFO ] qupath.lib.gui.prefs.PathPrefs - Setting default Locale to en_US
09:30:59.274 [main] [INFO ] qupath.lib.gui.prefs.PathPrefs - Setting Locale for FORMAT to en_US
09:30:59.274 [main] [INFO ] qupath.lib.gui.prefs.PathPrefs - Setting Locale for DISPLAY to en_US
09:30:59.293 [main] [INFO ] q.l.i.writers.ome.ConvertCommand - Setting tile cache size to 2048.00 MB (25.0% max memory)
09:30:59.401 [main] [INFO ] q.l.i.s.o.OpenslideServerBuilder - OpenSlide version 3.4.1
09:30:59.606 [main] [INFO ] q.l.i.s.b.BioFormatsServerOptions - Setting max Bio-Formats readers to 8
09:31:00.241 [main] [INFO ] q.l.i.writers.ome.OMEPyramidWriter - Creating pyramidal server
09:31:00.254 [main] [INFO ] q.l.i.writers.ome.OMEPyramidWriter - Setting to big tiff (estimated 2156.44 MB
09:31:00.257 [main] [INFO ] q.l.i.writers.ome.OMEPyramidWriter - Writing Xenium_FFPE_Human_Breast_Cancer_Rep1_he_image.tif to /path_to/test_qupath_CLI.ome.tif (series 1/1)
09:31:00.257 [main] [INFO ] q.l.i.writers.ome.OMEPyramidWriter - Setting series 0 compression to zlib
09:31:00.280 [main] [INFO ] q.l.i.writers.ome.OMEPyramidWriter - Writing resolution 1 of 5 (downsample=1.0, 567 tiles)
09:31:00.282 [main] [INFO ] q.l.i.writers.ome.OMEPyramidWriter - Writing plane 1/1
09:31:05.711 [ForkJoinPool-1-worker-2] [INFO ] q.l.i.writers.ome.OMEPyramidWriter - Written 10% tiles
09:31:08.692 [ForkJoinPool-1-worker-3] [INFO ] q.l.i.writers.ome.OMEPyramidWriter - Written 20% tiles
09:31:12.134 [ForkJoinPool-1-worker-3] [INFO ] q.l.i.writers.ome.OMEPyramidWriter - Written 30% tiles
09:31:15.391 [ForkJoinPool-1-worker-2] [INFO ] q.l.i.writers.ome.OMEPyramidWriter - Written 40% tiles
09:31:18.879 [ForkJoinPool-1-worker-1] [INFO ] q.l.i.writers.ome.OMEPyramidWriter - Written 50% tiles
09:31:22.237 [ForkJoinPool-1-worker-1] [INFO ] q.l.i.writers.ome.OMEPyramidWriter - Written 60% tiles
09:31:27.156 [ForkJoinPool-1-worker-4] [INFO ] q.l.i.writers.ome.OMEPyramidWriter - Written 70% tiles
09:32:26.095 [ForkJoinPool-1-worker-1] [INFO ] q.l.i.writers.ome.OMEPyramidWriter - Written 80% tiles
09:32:59.564 [ForkJoinPool-1-worker-4] [INFO ] q.l.i.writers.ome.OMEPyramidWriter - Written 90% tiles
09:33:13.150 [ForkJoinPool-1-worker-4] [INFO ] q.l.i.writers.ome.OMEPyramidWriter - Written 100% tiles
09:33:13.152 [main] [INFO ] q.l.i.writers.ome.OMEPyramidWriter - Plane written in 132870 ms
09:33:13.161 [main] [INFO ] q.l.i.writers.ome.OMEPyramidWriter - Writing resolution 2 of 5 (downsample=2.0, 154 tiles)
09:33:13.163 [main] [INFO ] q.l.i.writers.ome.OMEPyramidWriter - Writing plane 1/1
09:34:47.023 [ForkJoinPool-2-worker-1] [INFO ] q.l.i.writers.ome.OMEPyramidWriter - Written 10% tiles
09:34:56.262 [ForkJoinPool-2-worker-4] [INFO ] q.l.i.writers.ome.OMEPyramidWriter - Written 20% tiles
[...]
09:41:54.267 [main] [INFO ] q.l.i.writers.ome.ConvertCommand - /path_to/test_qupath_CLI.ome.tif written in 655.0 seconds
Check the specified output folder for the exported OME-TIFF file.
Continue on to the Image Alignment tutorial to view the image in Xenium Explorer.
The Tifffile Python library can be used to save TIFF images to OME-TIFF format.
- Copy the script below and save it (i.e.,
omeconvert.py). This script uses the JPEG 2000 compression standard (lossless).
import tifffile as tf import sys import numpy as np import cv2 def img_resize(img,scale_factor): width = int(np.floor(img.shape[1] * scale_factor)) height = int(np.floor(img.shape[0] * scale_factor)) return cv2.resize(img, (width, height), interpolation = cv2.INTER_AREA) def write_ome_tif(filename, image, channel_names, photometric_interp, metadata, subresolutions): subresolutions = subresolutions fn = filename + ".ome.tif" with tf.TiffWriter(fn, bigtiff=True, ) as tif: px_size_x = metadata['PhysicalSizeX'] px_size_y = metadata['PhysicalSizeY'] options = dict( photometric=photometric_interp, tile=(1024, 1024), maxworkers=4, compression='jpeg2000', compressionargs={'level':85}, resolutionunit='CENTIMETER', ) print("Writing pyramid level 0") tif.write( image, subifds=subresolutions, resolution=(1e4 / px_size_x, 1e4 / px_size_y), metadata=metadata, **options ) scale = 1 for i in range(subresolutions): scale /= 2 if photometric_interp == 'minisblack': if image.shape[0] < image.shape[-1]: image = np.moveaxis(image,0,-1) image = img_resize(image,0.5) image = np.moveaxis(image,-1,0) else: image = img_resize(image,0.5) print("Writing pyramid level {}".format(i+1)) tif.write( image, subfiletype=1, resolution=(1e4 / scale / px_size_x, 1e4 / scale / px_size_y), **options ) with tf.TiffFile(sys.argv[1]) as tif: image = tif.asarray() channel_names=None if tif.pages[0].samplesperpixel == 3: photometric_interp='rgb' elif tif.pages[0].samplesperpixel == 1: photometric_interp='minisblack' if tif.pages[0].get_resolution(): res = tif.pages[0].get_resolution() if tif.pages[0].resolutionunit == 2: unit = "in" elif tif.pages[0].resolutionunit == 3: unit = "cm" elif tif.pages[0].resolutionunit == 4: unit = "mm" elif tif.pages[0].resolutionunit == 5: unit = "um" if tif.is_ome: meta = tf.xml2dict(tif.ome_metadata) res = (meta['OME']['Image']['Pixels']['PhysicalSizeX'],meta['OME']['Image']['Pixels']['PhysicalSizeY']) unit = meta['OME']['Image']['Pixels']['PhysicalSizeXUnit'] try: channel_names=[] for i, element in enumerate(meta['OME']['Image']['Pixels']['Channel']): channel_names.append(meta['OME']['Image']['Pixels']['Channel'][i]['Name']) except KeyError: channel_names=None metadata={ 'PhysicalSizeX': res[0], 'PhysicalSizeXUnit': unit, 'PhysicalSizeY': res[1], 'PhysicalSizeYUnit': unit, 'Channel': {'Name': channel_names} } filename = sys.argv[1].rsplit('.',1)[0] write_ome_tif(filename, image, channel_names, photometric_interp, metadata, subresolutions = 7)
- To run the script, one option is to set up a conda environment with all the required software packages, as shown below:
# Create conda environment with tifffile and opencv packages
# This script was tested with python v3.11.4, opencv v4.8.0, and tifffile v2023.7.18
conda create --name tiff tifffile opencv
conda activate tiff
# Run script
# Usage: python omecovert.py <path to image file being converted>
# Example with the Rep 1 H&E image
python omeconvert.py Xenium_FFPE_Human_Breast_Cancer_Rep1_he_image.tif
The script saves the converted file in the same directory as the input TIFF, and with the same file name but now with the ome.tif extension (e.g., Xenium_FFPE_Human_Breast_Cancer_Rep1_he_image.ome.tif). On a Mac with 16 GB memory, it took about 3 minutes to complete.
Continue on to the Image Alignment tutorial to view the image in Xenium Explorer.
Xenium Onboard Analysis v2.0 and later outputs include 2D images in multi-file OME-TIFF format. If needed, these files can be converted to a single stack OME-TIFF format by following the QuPath or Tifffile instructions provided on this page.
QuPath
Open the ch0000_dapi.ome.tif file in QuPath to import all images in the morphology_focus/ directory. Follow the steps above to create and export the image stack.
Tifffile
Save a copy of the script above. Run the commands below to import all images in the morphology_focus/ directory and create the stack. As is, the script will name the new file ch0000_dapi.ome.ome.tif.
# Create conda environment with tifffile and opencv packages
# This script was tested with python v3.11.4, opencv v4.8.0, and tifffile v2023.7.18
conda create --name tiff tifffile opencv
conda activate tiff
# Run script
# Usage: python omecovert.py <path to image file being converted>
python omeconvert.py <path to>/morphology_focus/ch0000_dapi.ome.tif
- Bankhead, P et al. QuPath: Open source software for digital pathology image analysis. Scientific Reports. 7: 16878, 2017.
- Christoph Gohlke. "Cgohlke/tifffile: V2022.5.4". Zenodo, July 4, 2022. https://doi.org/10.5281/zenodo.6795861.