Space Ranger supports CytAssist-enabled Gene Expression analysis, which uses the instrument-generated image on a CytAssist slide along with an optional microscope image of the same tissue section on a standard glass slide. The pipeline uses an automatic image registration algorithm to align and optimize the overlay of the two image inputs. However, for fluorescence images, or in cases where the fiducial markers are obstructed or tissue boundaries are unclear, manual image registration will be required.
Loupe Browser provides the CytAssist Image Alignment wizard for manual image registration. The alignment wizard guides the user through uploading the two image inputs, selecting key landmark points between the images, and refining the alignment. The alignment wizard provides an option to export a standalone alignment file with image registration results or to continue with the manual fiducial alignment workflow to generate a combined alignment file.
The Visium manual alignment wizard can be found on the Loupe Browser start page at the bottom of the main panel. Clicking on the link starts the alignment wizard in a new window and shows a window listing the three available workflows.
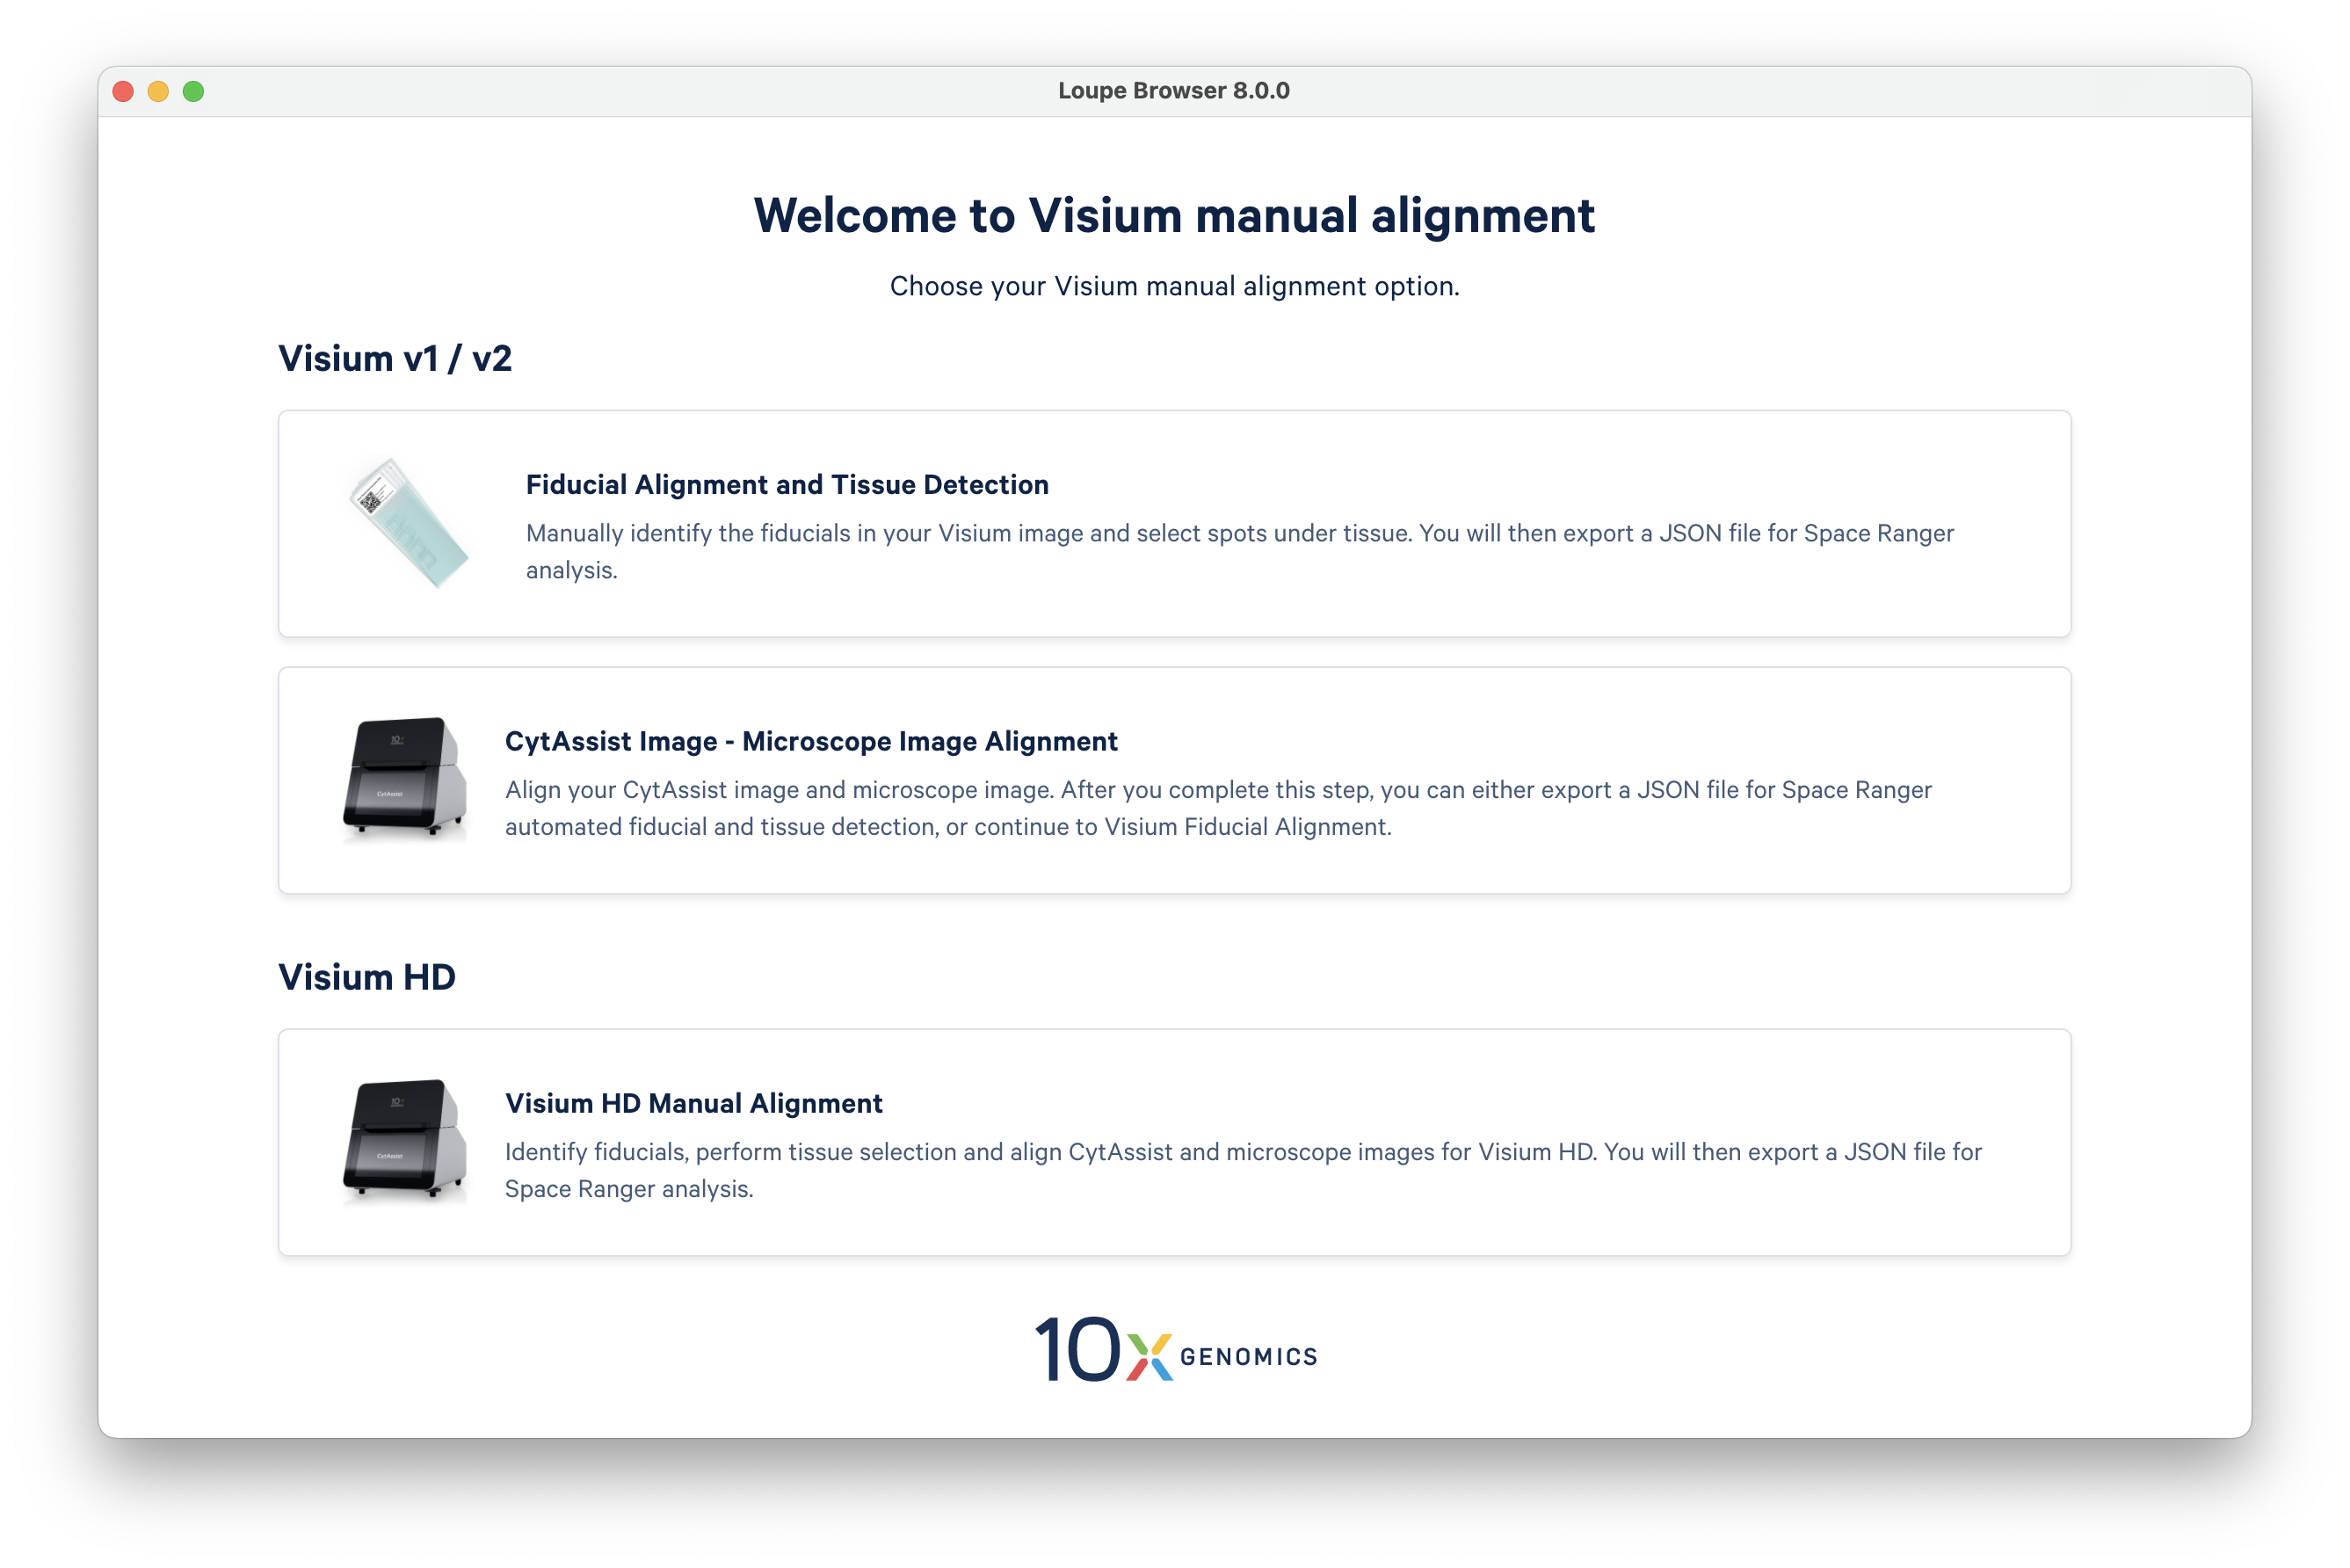
Click the second option, Manual CytAssist Image - Microscope Image Alignment, to open a pop-up window that summarizes the steps required for completion.
The two main image inputs, the CytAssist instrument-generated image and the microscope image (brightfield or fluorescence), follow the same format requirements as that for Space Ranger. The CytAssist image, which contains the fiducial frame, has fixed resolution and size specifications which are used by both Space Ranger and Loupe Browser to verify the image type. Loupe 6.2 also adds support for .qptiff image format. Loupe Browser v6.5 extend the support for BigTIFF images with file extensions .tf2, .tf8 and .btf. Refer to the Image Inputs page for details.
| Image Type | Image Format |
|---|---|
| CytAssist Image | 24-bit color TIFF |
| Microscope Brightfield Image | 24-bit color TIFF/BigTIFF or a JPEG |
| 16-bit grayscale TIFF/BigTIFF or a JPEG | |
| Microscope Fluorescence Image | 8 or 16-bit grayscale single, multi-page TIFF/BigTIFF |
| 8 or 16-bit grayscale multiple single-page TIFF/BigTIFF or a JPEG | |
| 24-bit single colored image TIFF/BigTIFF or a JPEG |
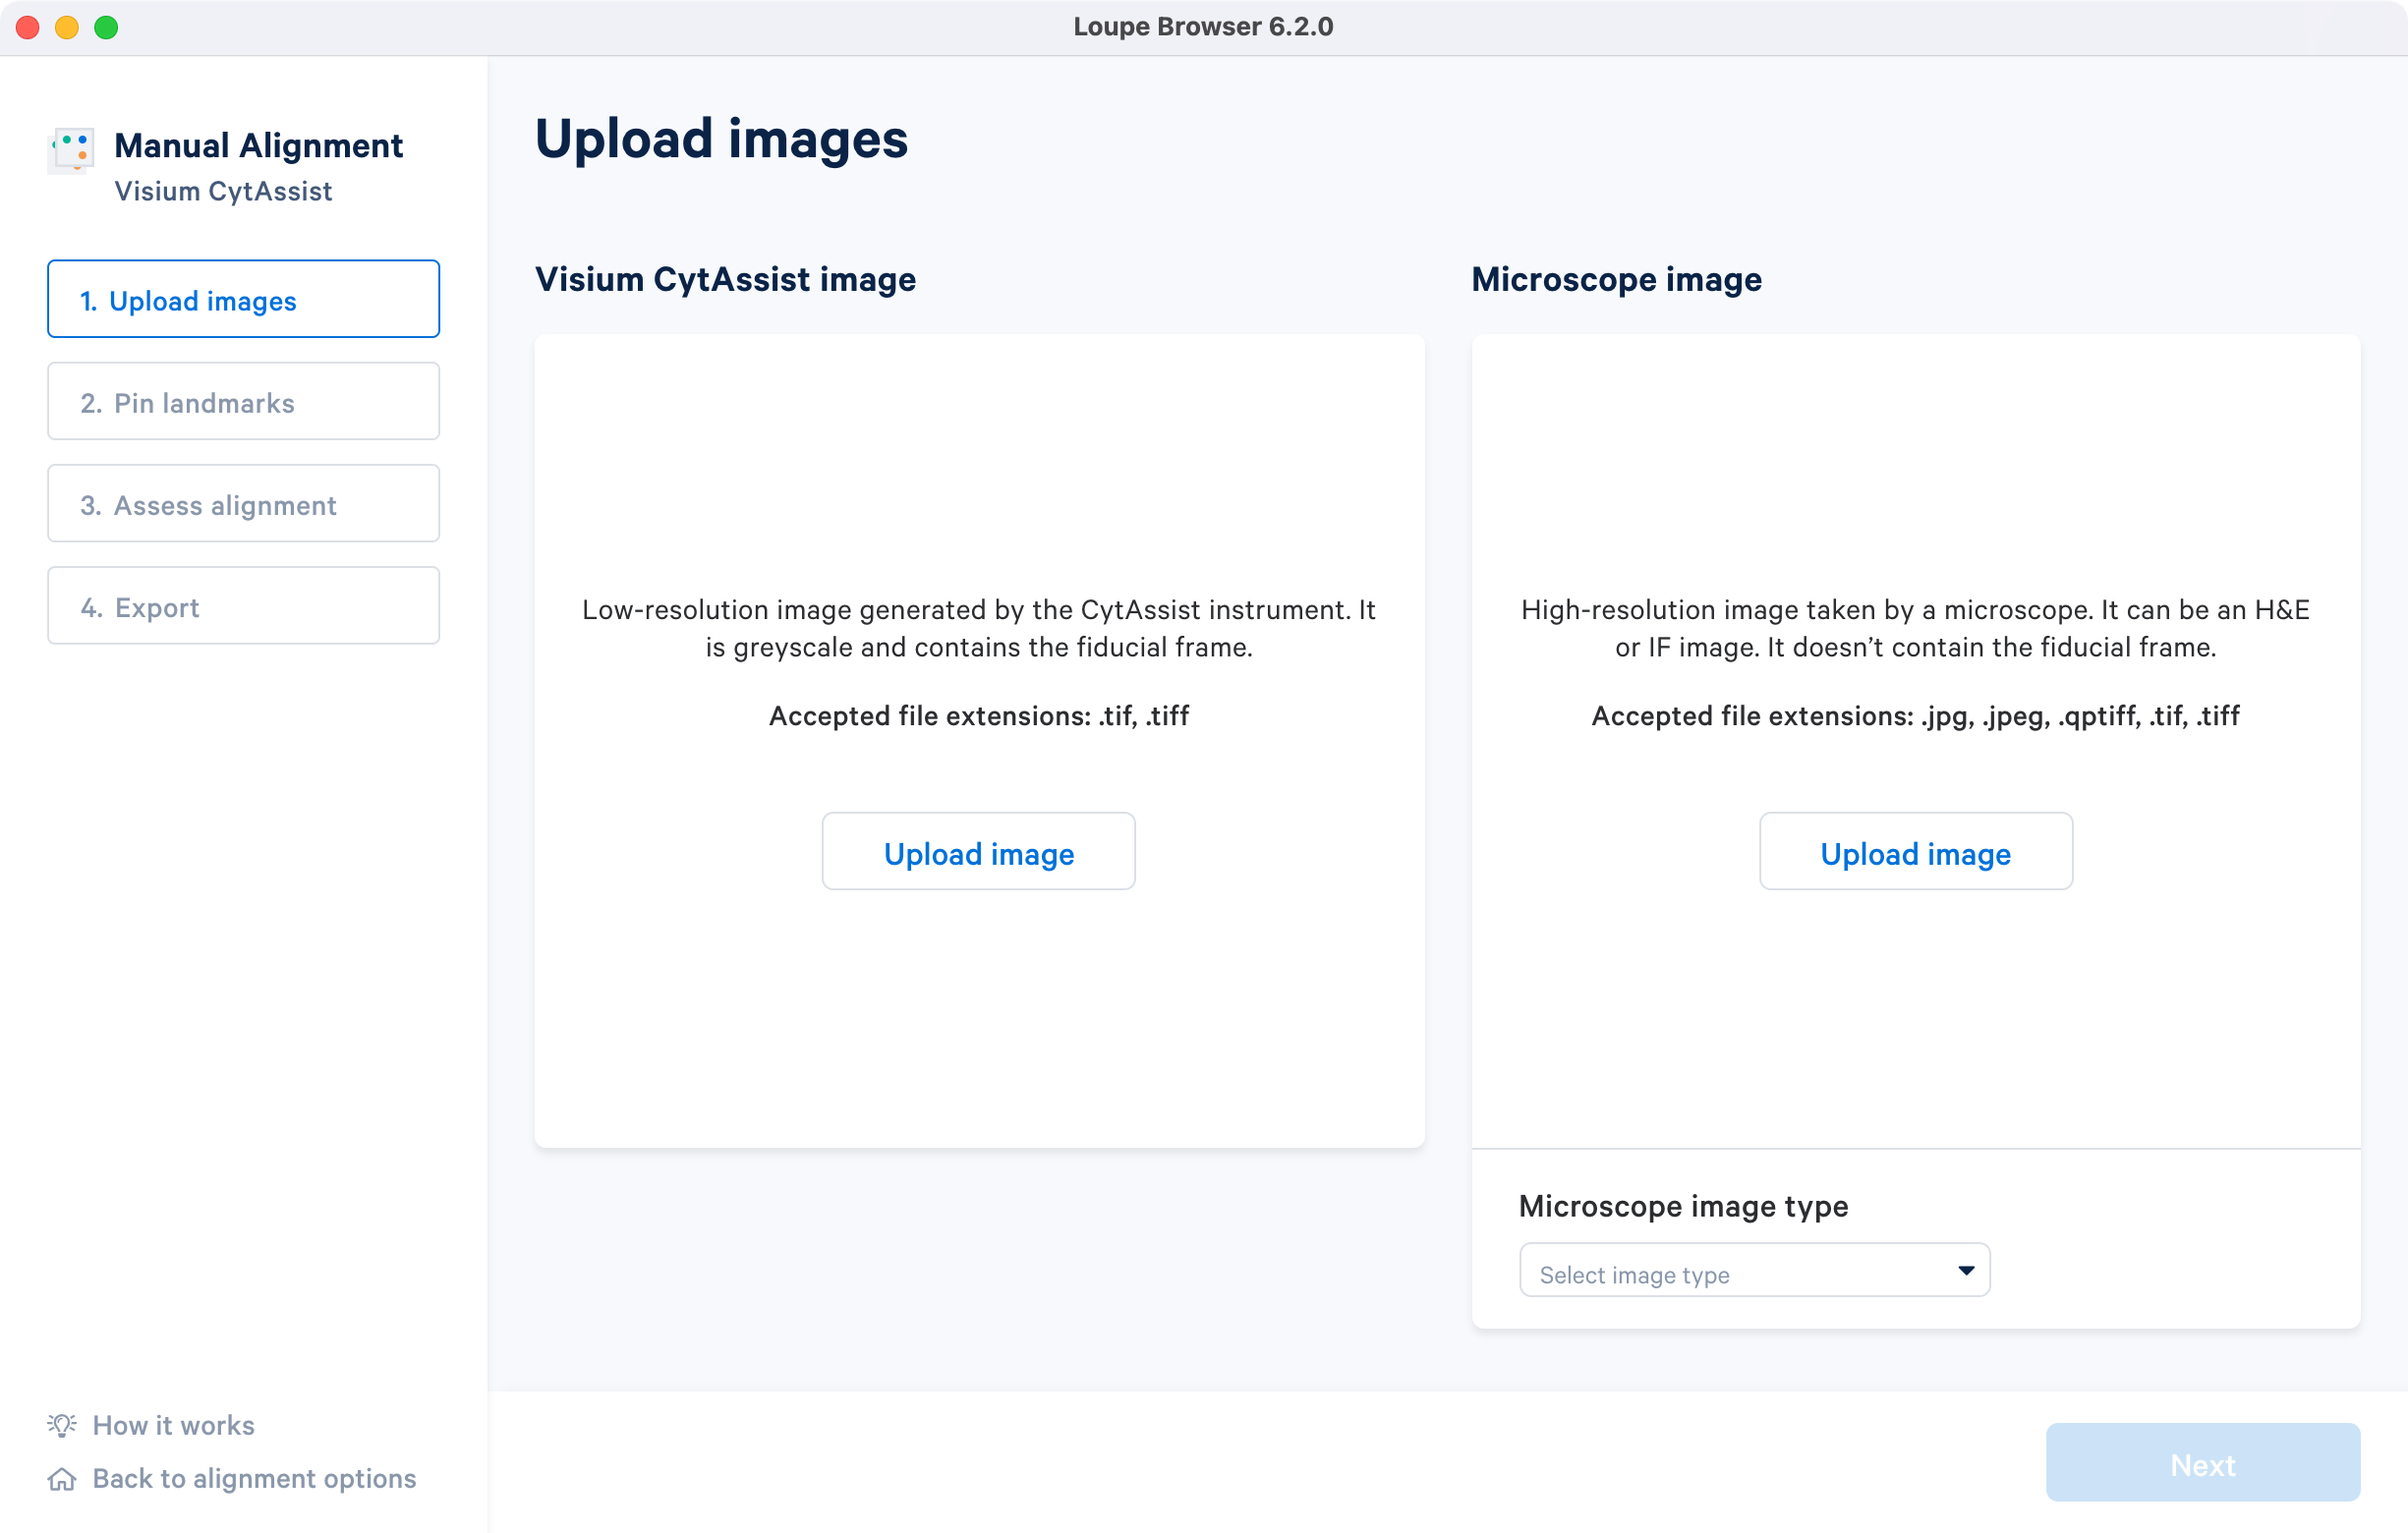
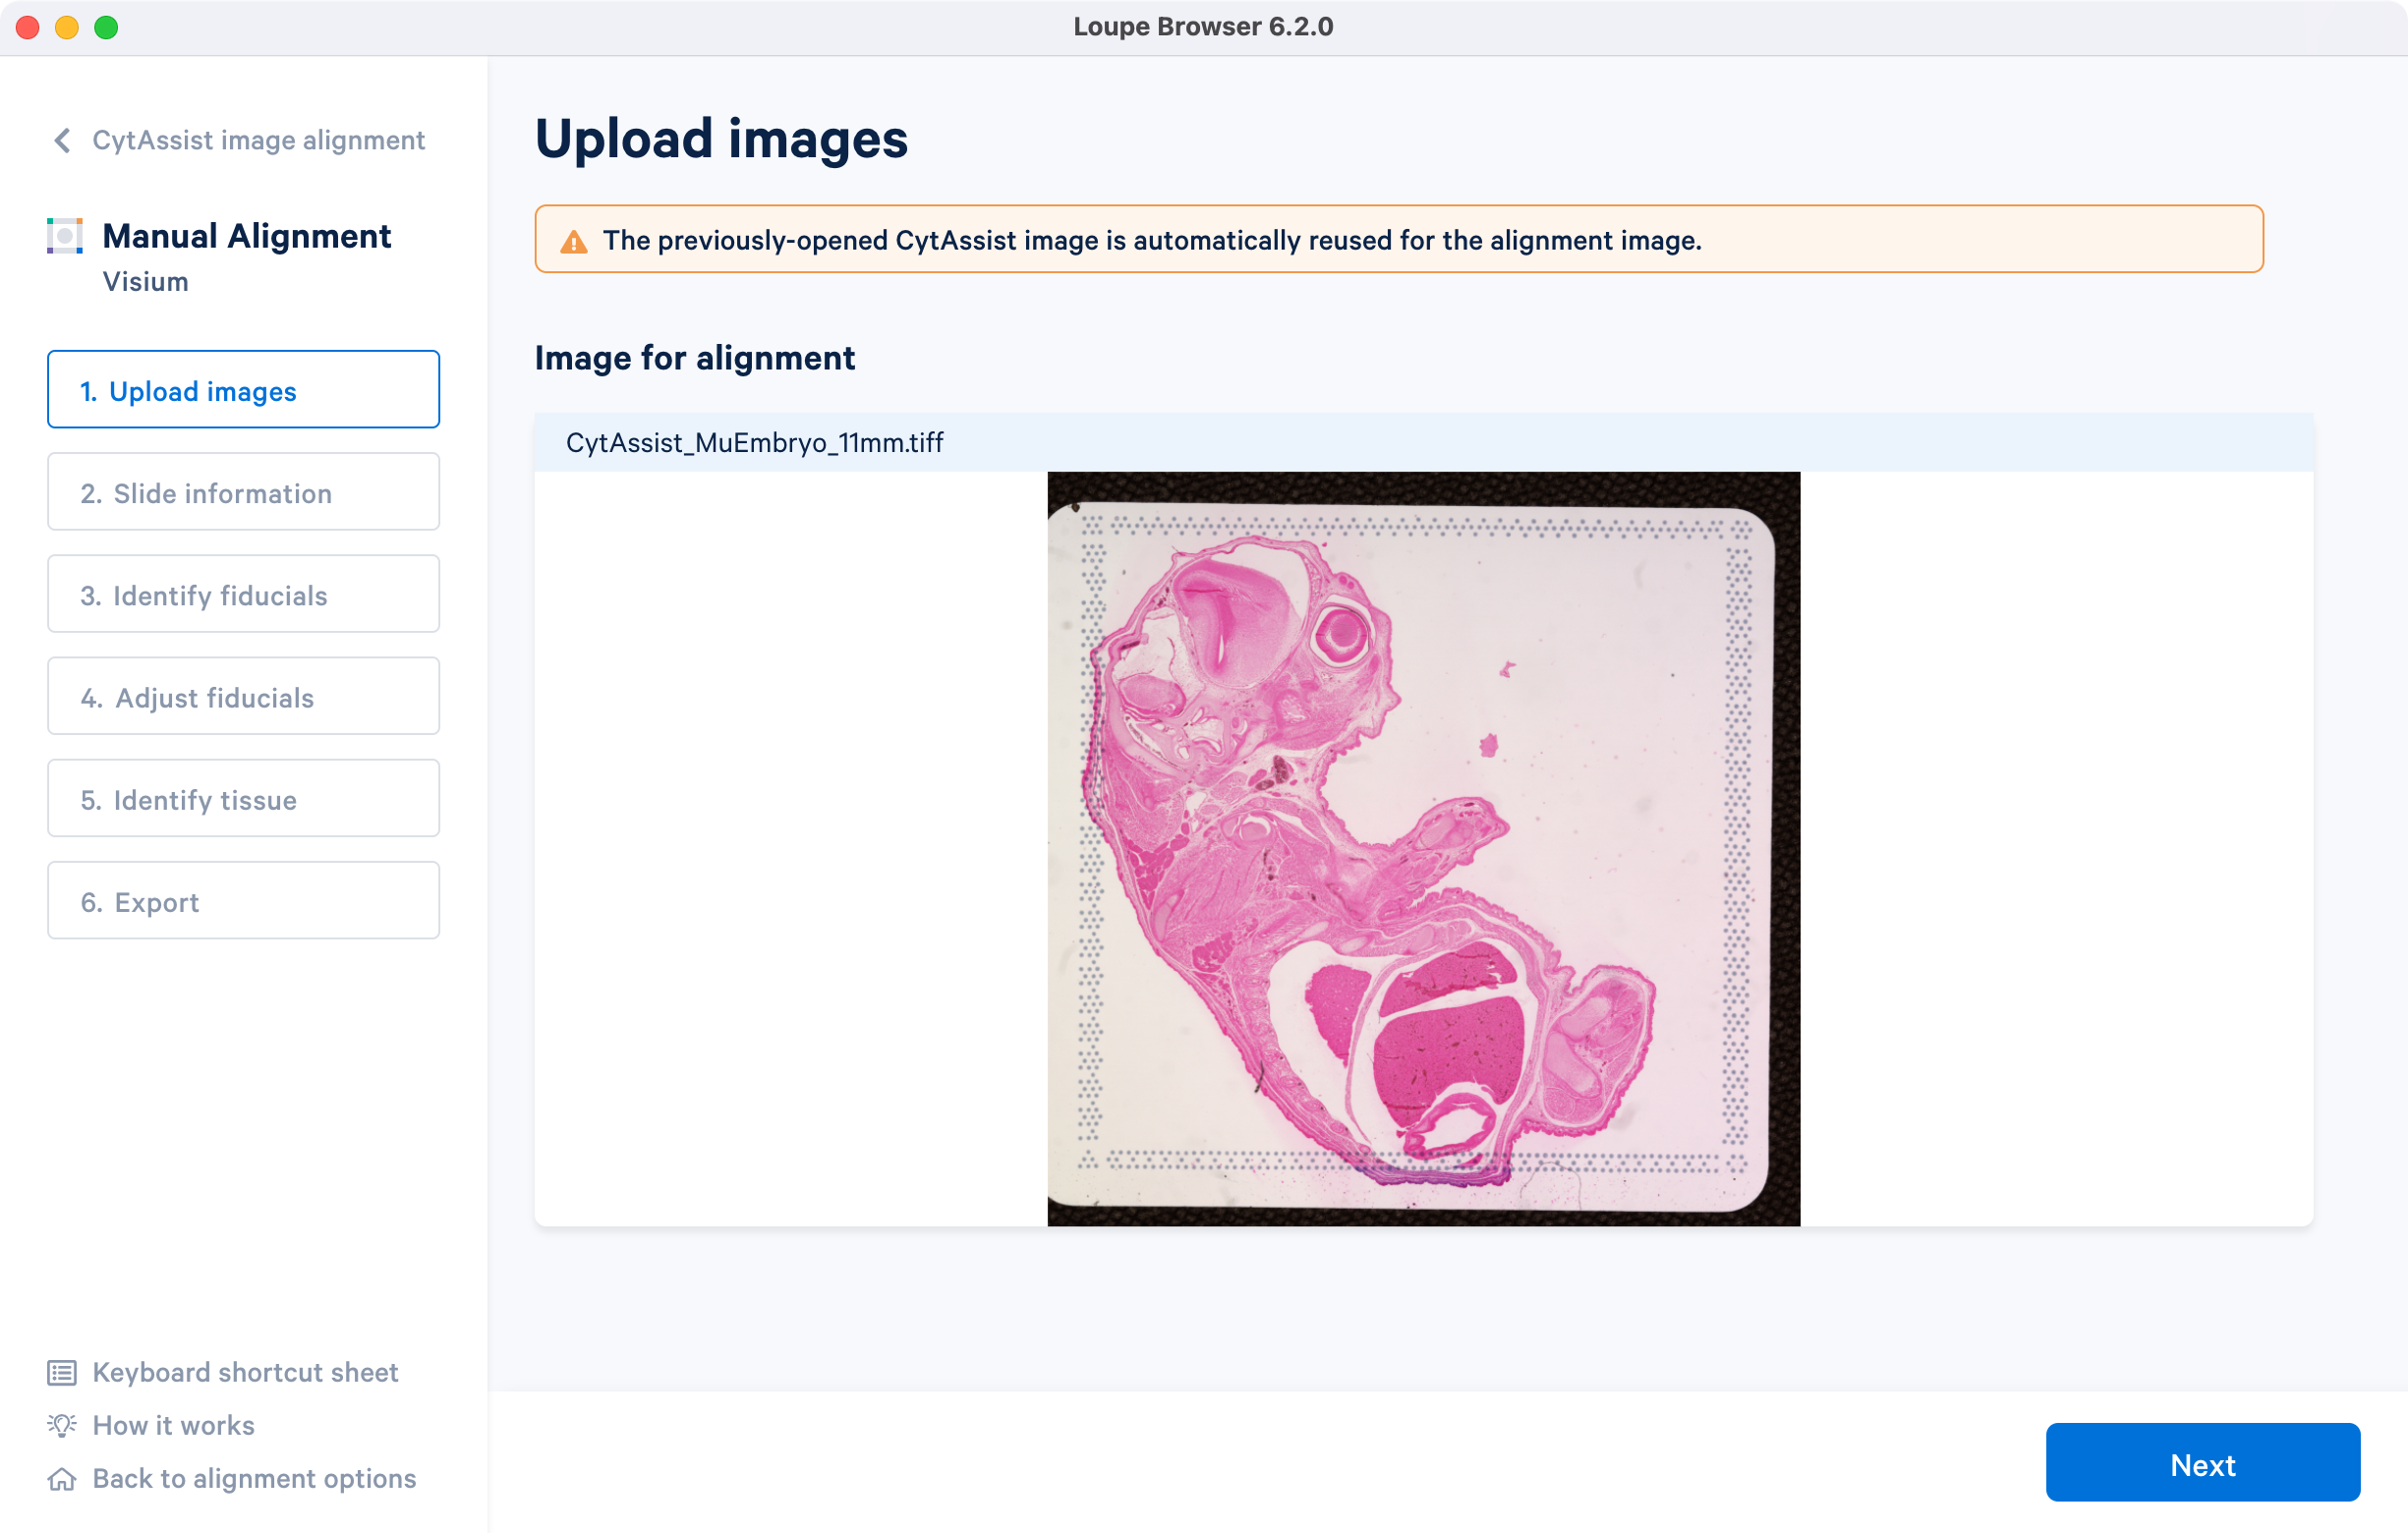
Clicking on Upload image under the Image for alignment panel opens a file dialog that filters the current filesystem for compatible image files. Selecting a file triggers a brief loading process. If the computer running the alignment wizard has insufficient RAM to efficiently load the image, the alignment wizard requires confirmation to continue. Clicking on the How it works on the lower left corner brings up the pop-up window.
Select the section corresponding to the different starting image types.
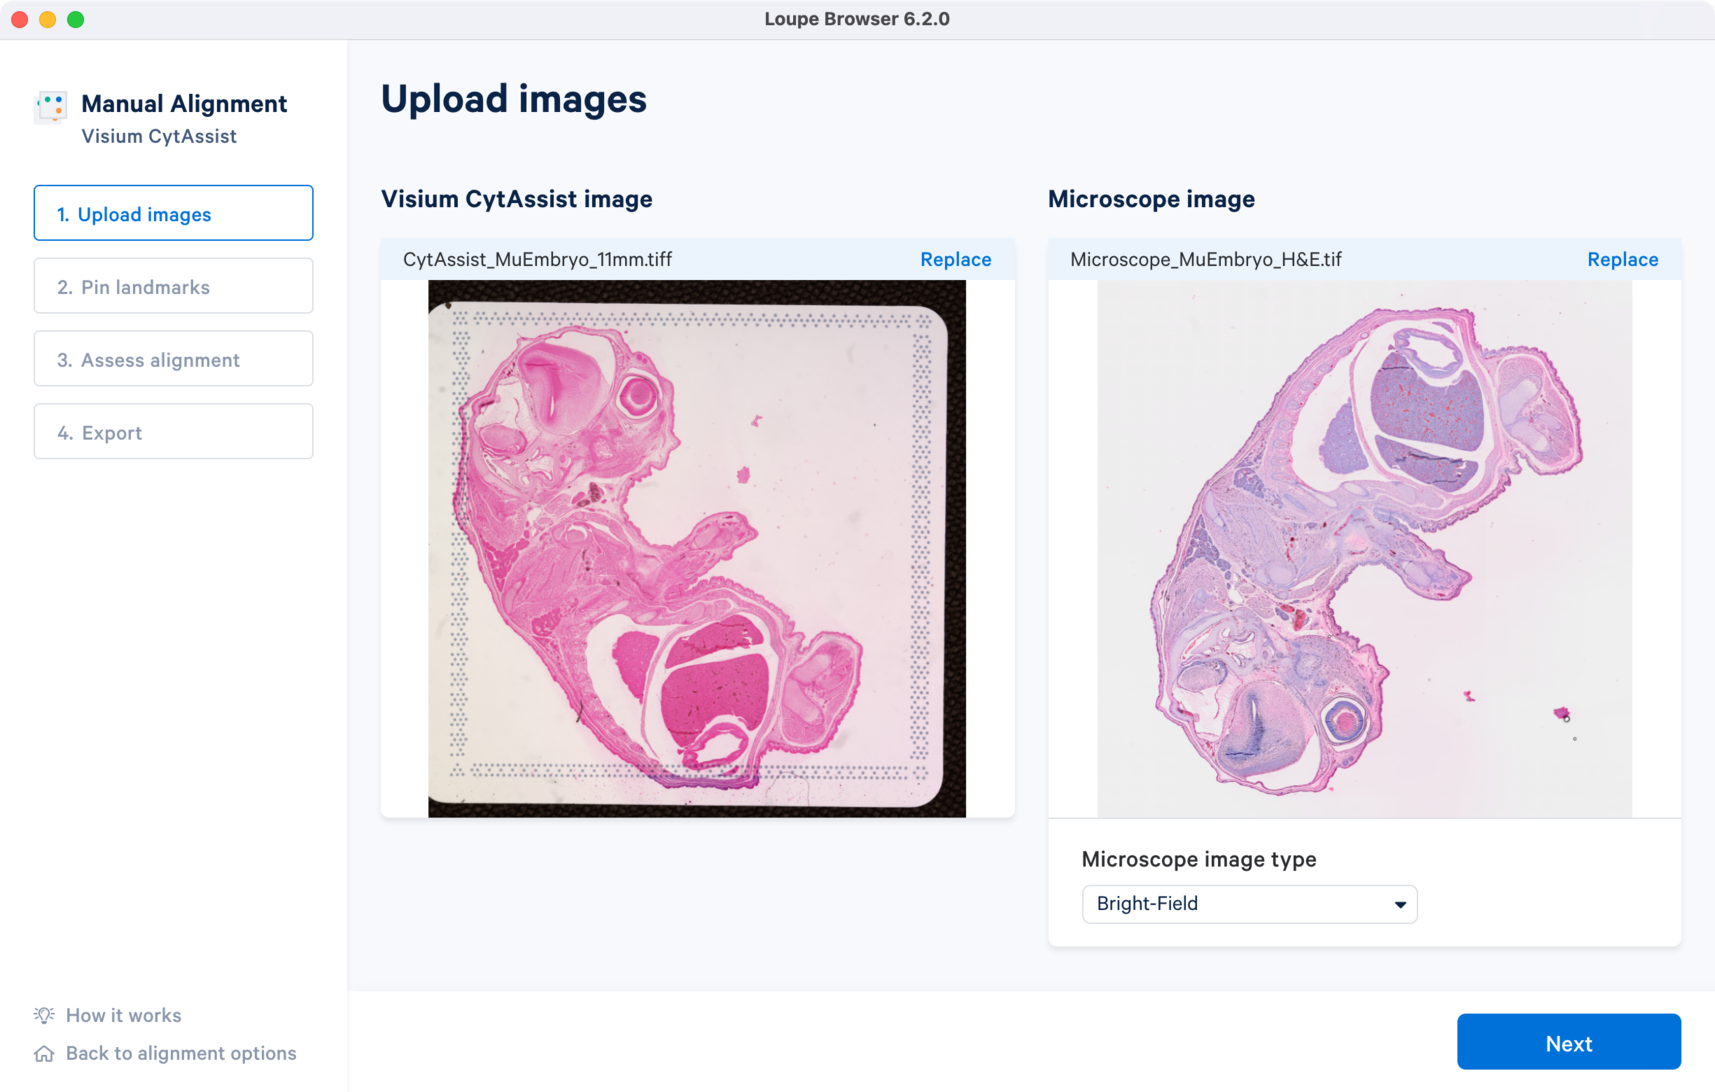
Download the following images for the CytAssist and H&E-stained brightfield microscope images.
Once the image is loaded, a preview image appears, as shown below. After uploading, select the image type from the Microscope image type drop-down menu, which will make the Next button available for clicking. Use the Replace option located at the top right corner above the image preview to change the loaded image.
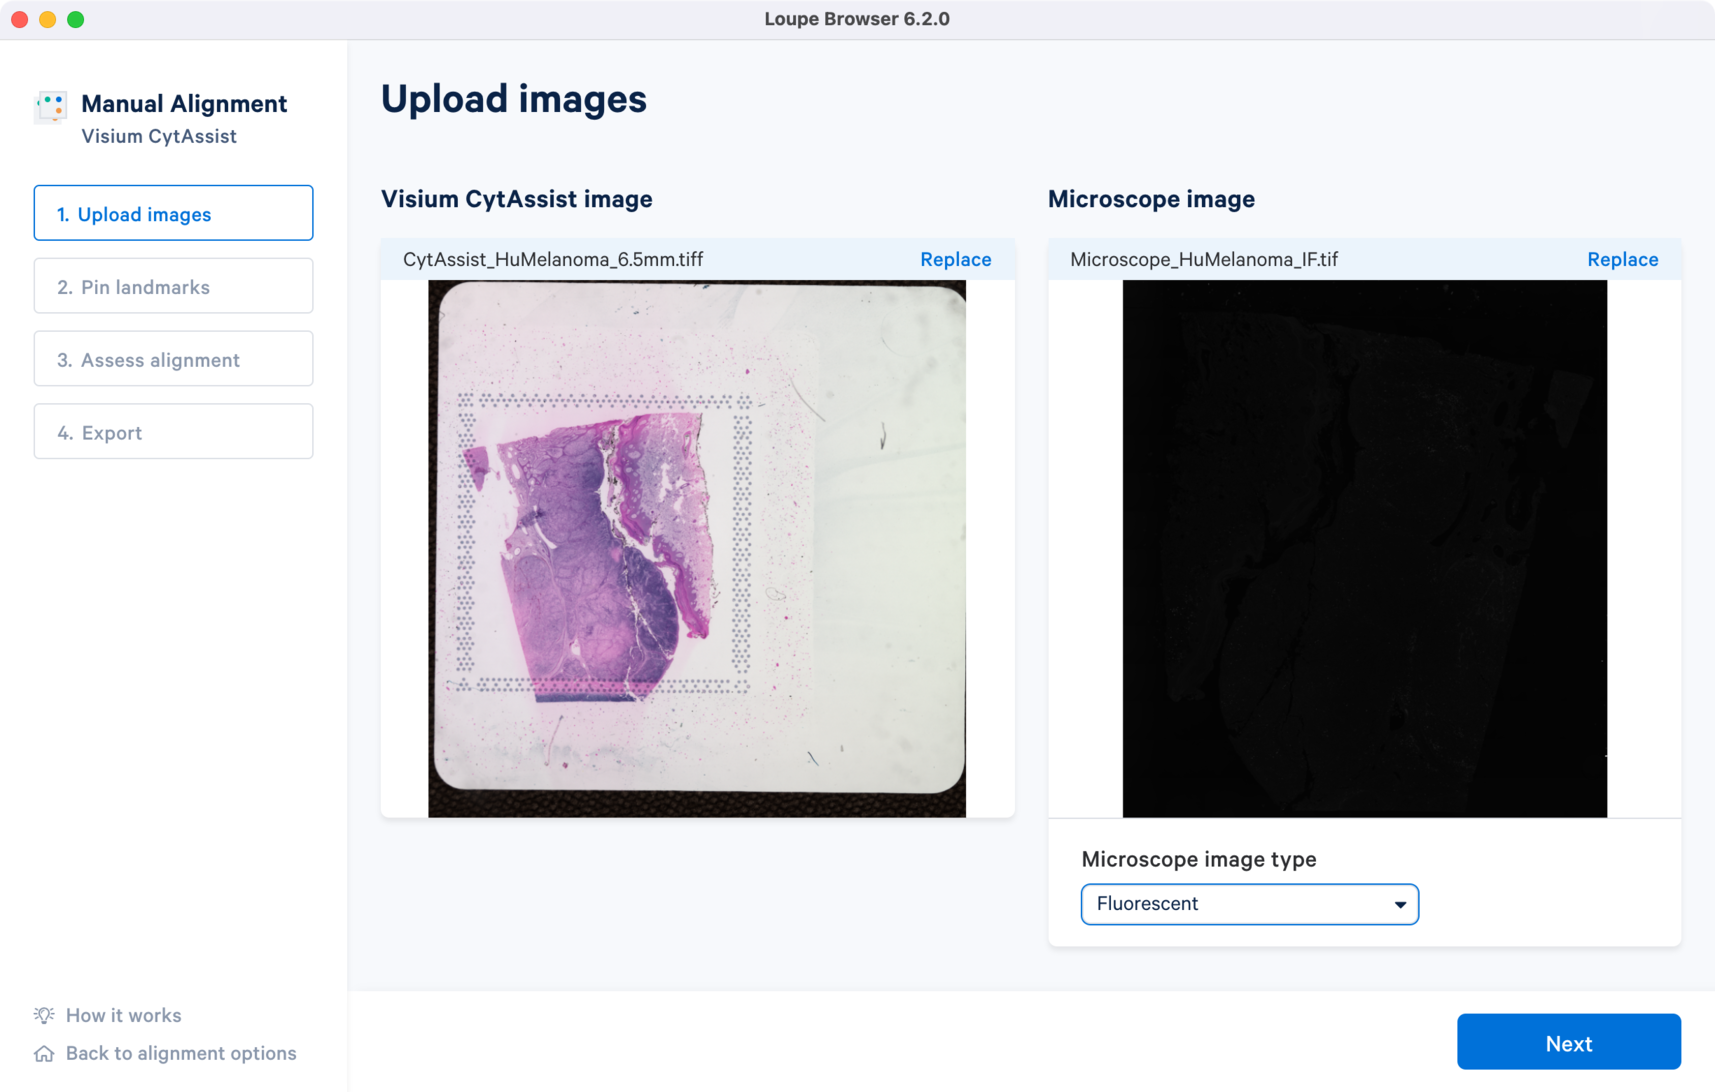
The tutorial will use the following images for the CytAssist image and multi-channel immunofluorescence microscope image.
Once the image is loaded, a preview image appears, as shown below. After the successful upload of the images, select the image type from the Microscope image type drop-down menu which will make the Next button available for clicking. Use the Replace option located at the top right corner above the image preview to change the loaded image.
For multi-channel immunofluorescence images, the Image channel dropdown to change the active channel selection will be available in Step 2.
The success of the manual image registration is dependent of accurate landmark selection between the two images. Since the initial overlay of the two images is derived from the landmark placements, there are some key considerations for choosing landmarks:
- For best results, the recommended range of landmarks is 5-8 for each of the images. There is no maximum limit set for the number of landmarks that can be applied. The Next button will not be available to click if you have less than three landmarks placed or if the number of landmarks does not match between the two image inputs.
- Use visually distinct edges (both inner and outer) as well as features as positions for landmarks. Unique morphological features common to both images make for good landmark positions.
- The spacing between the landmarks is also critical to cover the entire area of the tissue section. The recommended practice is to spread the landmarks to cover each of the four quadrants.
- Avoid placing three or more landmarks in a straight line, which can interfere with the initial alignment algorithm.
- 10x recommends the use of the zoom slider on each of the images for more precise landmark placement. This is especially useful when the tissue shape is homogenous and the morphological features appear smooth, i.e., lack of distinct identifiable features. Click
 to restore to default zoom.
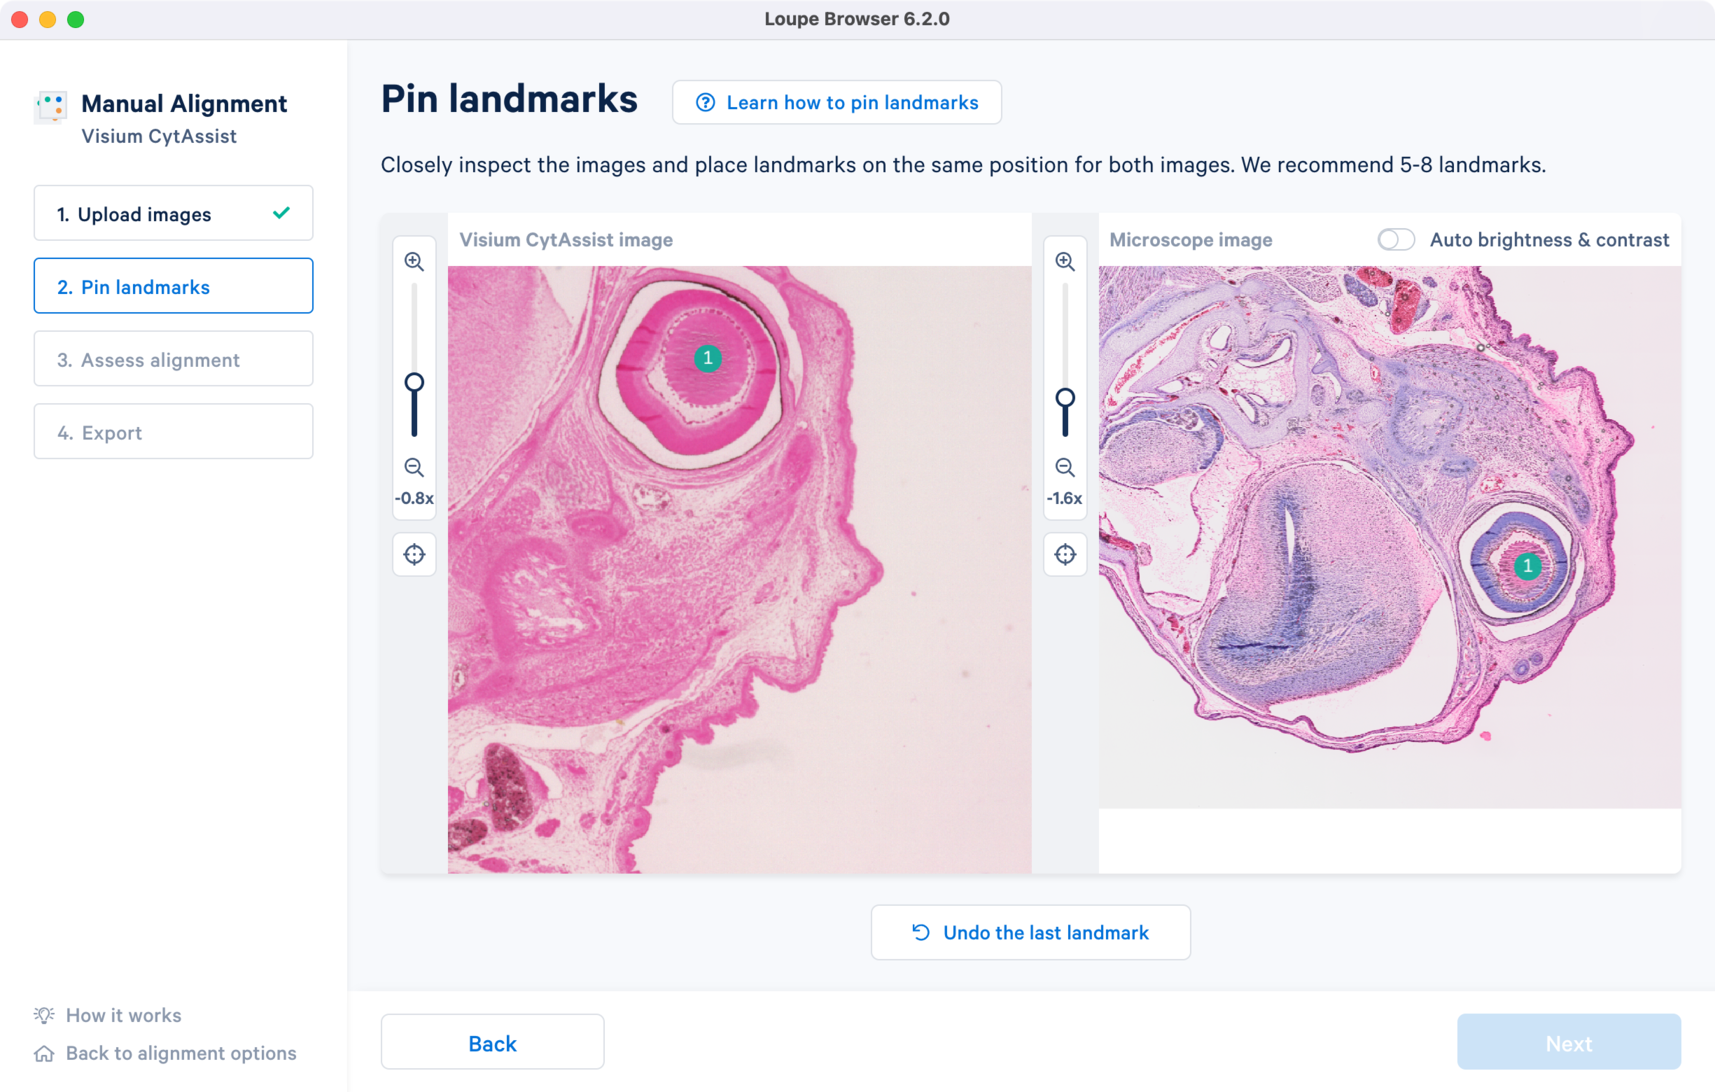
Click the Learn how to pin landmarks in the alignment wizard to access a summary of these key points along with example images.
Select the section corresponding to the different starting image types. You can click the Undo the last landmark button to undo the landmark selections.
Since the resolution between the CytAssist and microscope images will be different, with CytAssist representing a lower resolution version of the tissue section, the zoom applied to each image can be independent when selecting landmarks.
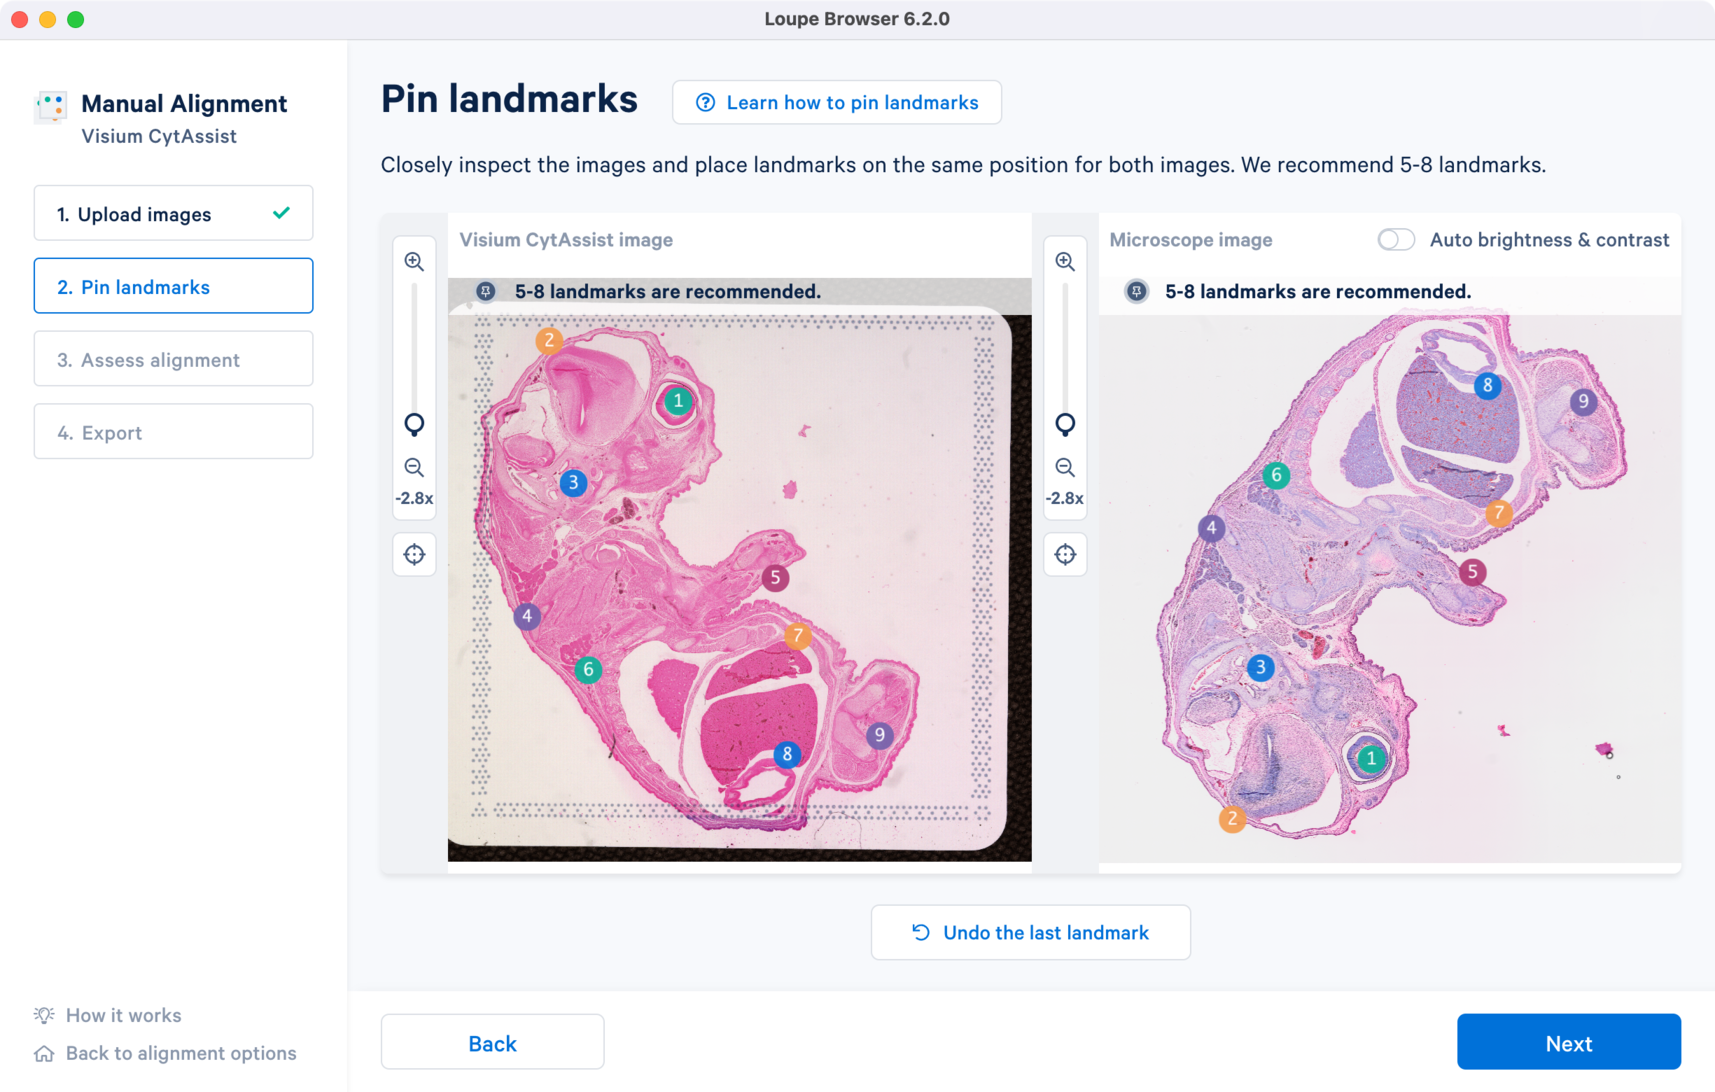
The landmarks are selected based on the above criteria. Click ![]() to zoom out and view the final landmark placements across both the images. Click Next to proceed to view the image registration results.
to zoom out and view the final landmark placements across both the images. Click Next to proceed to view the image registration results.
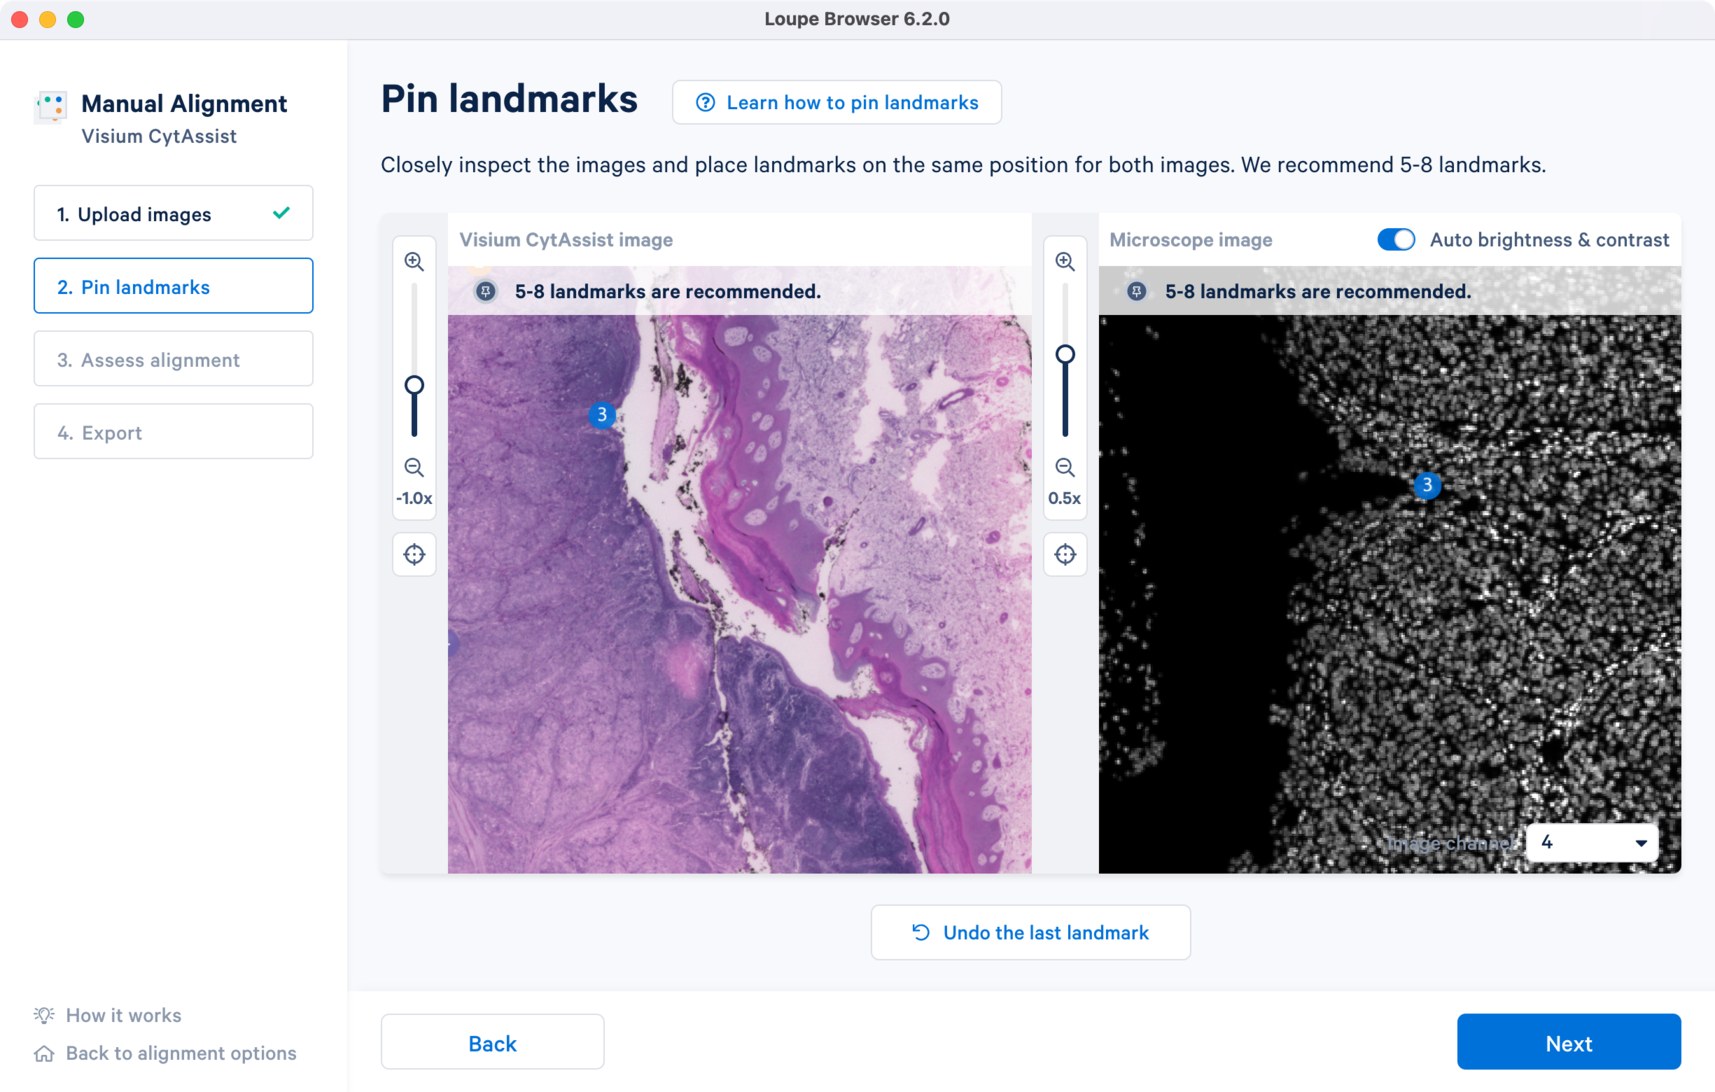
For enhanced visualization, turn on the Auto brightness & contrast which applies uniform brightness scaling across all pixels in the image. This is a useful feature for dark background fluorescence images.
For multi-channel fluorescence images, a drop-down menu for the Image channel selection is available for the microscope image. All landmarks chosen in one channel carry over when the channel view is switched. This is particularly useful because the morphological features captured by each of the antibody stain may be distinct.
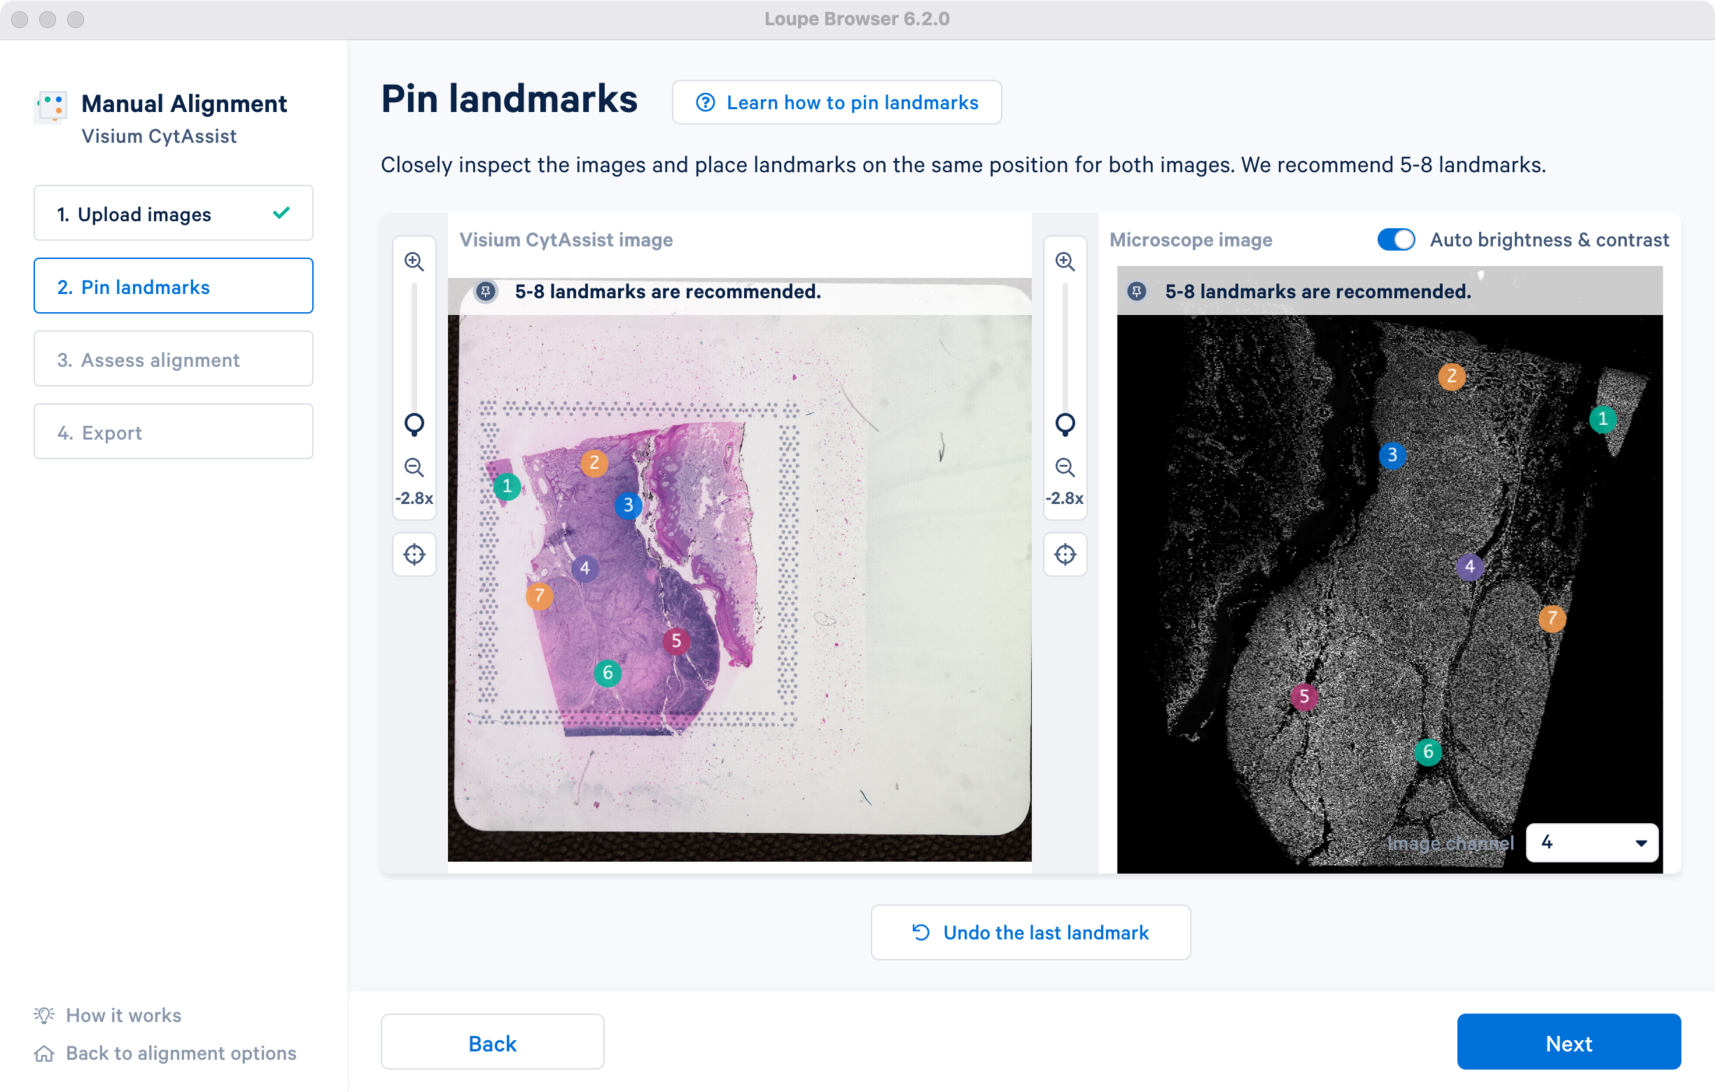
Since the resolution between the CytAssist and microscope image will be different, with CytAssist representing a lower resolution version of the tissue section, the zoom applied to each image can be independent when selecting landmarks.
Click ![]() to zoom out and view the final landmark placements across both the images. Note that the channel view set at this step will be used in Step 3.
to zoom out and view the final landmark placements across both the images. Note that the channel view set at this step will be used in Step 3.
This step provides the results of the image registration based on the landmark selection from Step 2.
In the window are the overlap of the two image inputs. The first alignment is based only on the landmark selection. An opacity slider is provided on the right, which is set to 50% value as default. To assess the quality of the registration, zoom into the image and use the opacity slider to scroll in either direction to examine the overlap between the edges and the unique tissue features between the two images. When there is no shape discontinuity or shift of one image relative to another, the images are considered to be successfully registered.
Click the Learn how to assess alignment quality button in the alignment wizard to view some example images of good and bad alignment cases.
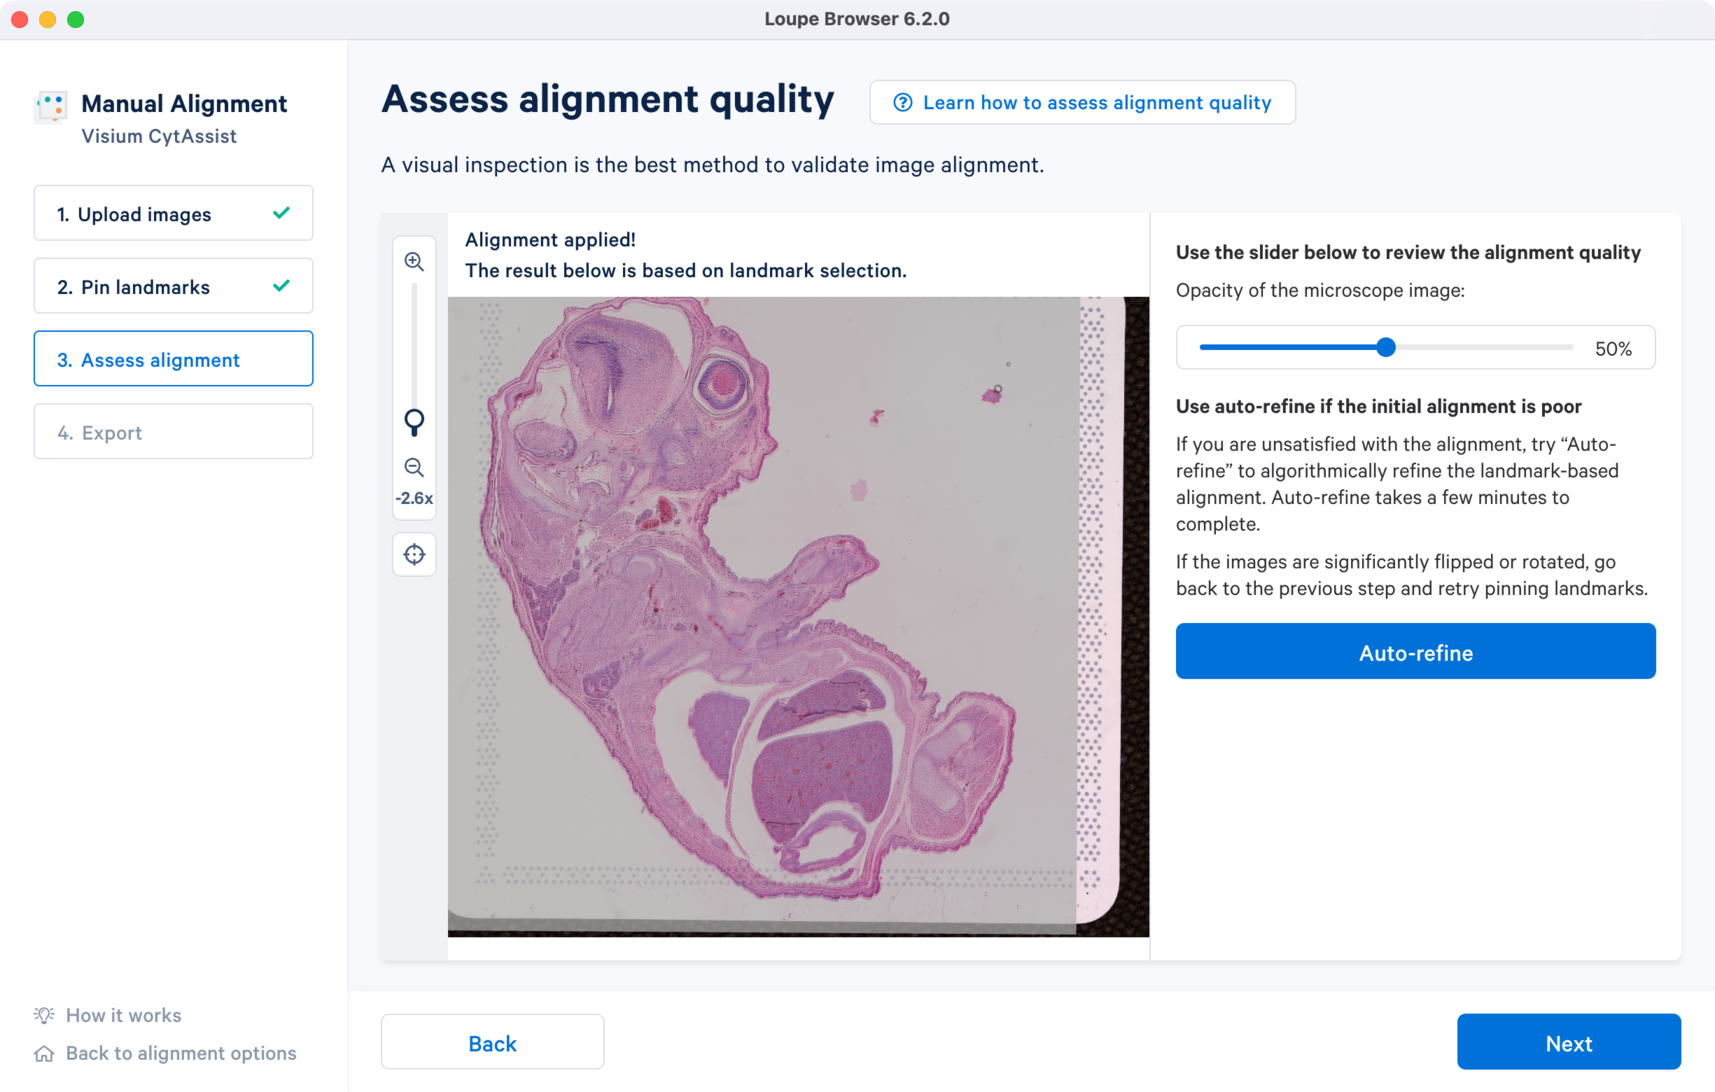
Continuing with the tutorial examples, for the set using CytAssist and Fluorescence microscope images, the initial inspection shows good alignment between the two images. In this case, the results are satisfactory and can be exported for analysis in Step 4.
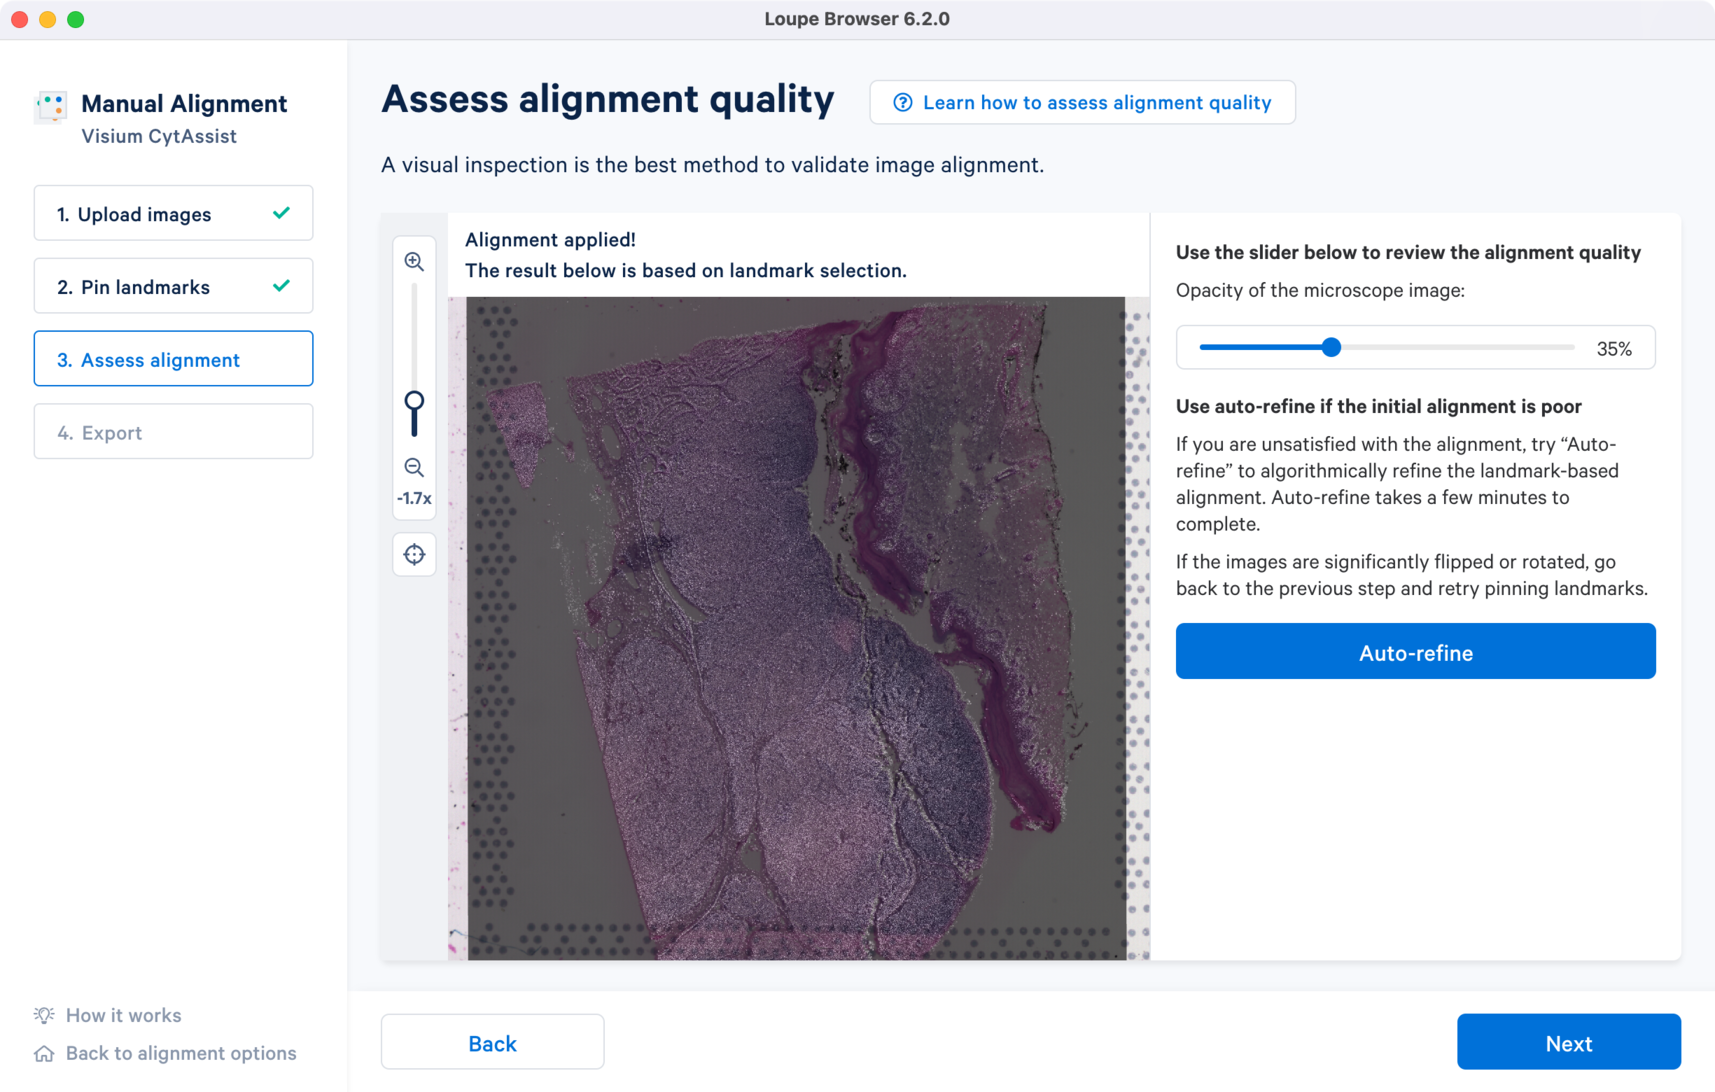
For the CytAssist + Brightfield image pair, the initial alignment looks close with some room for improvement around the edges. There are two ways to refine the alignment:
- Use the Auto-refine to algorithmically refine the initial alignment (Highly Recommended)
- Go back to Step 2 to redo the landmark placements
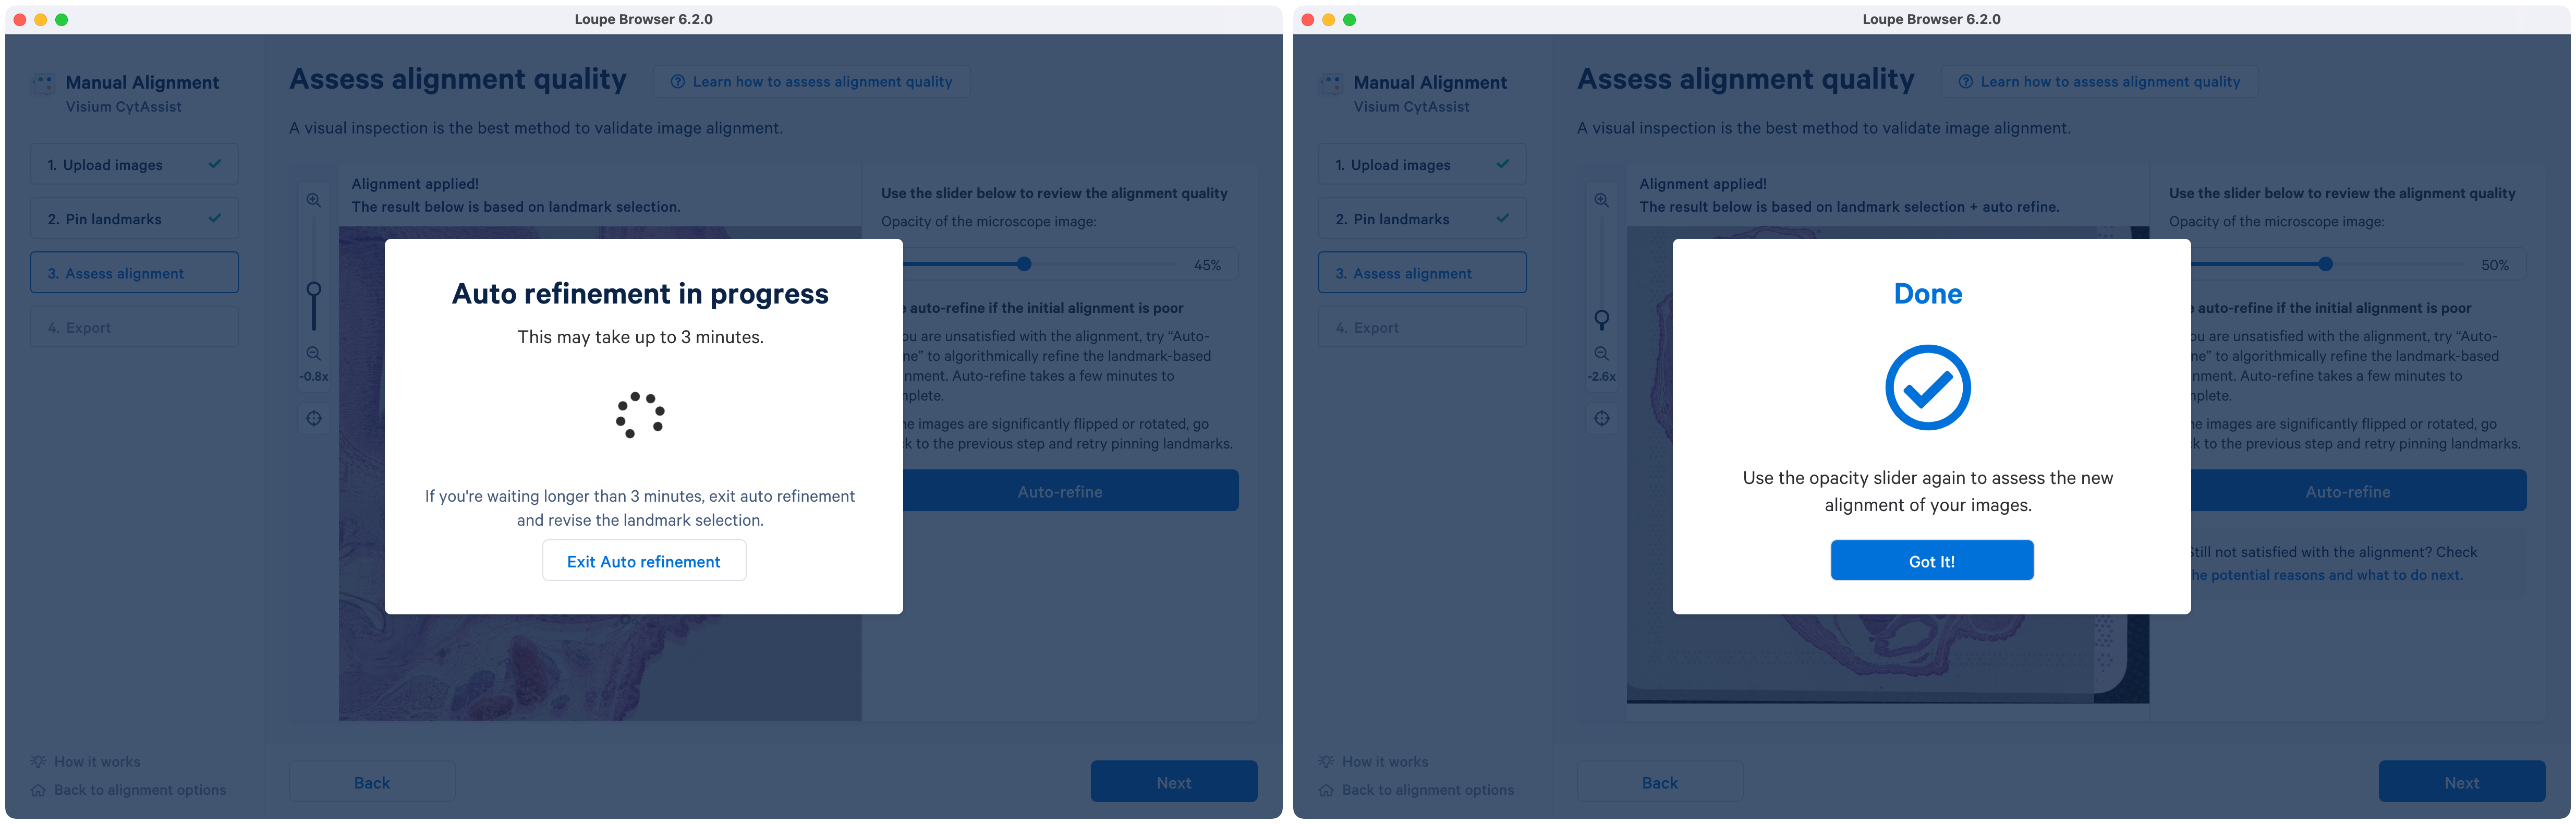
In this tutorial, the first option is chosen. Auto refinement algorithm optimizes the image registration based on the landmark-based initial state. Since it is an iterative process, it can be applied multiple times on the same image pair.
Clicking Auto-refine opens a new pop-up that shows the active state of the refinement with a spinning circle. Upon completion, the text on the window is updated and to exit click the Got it! button.
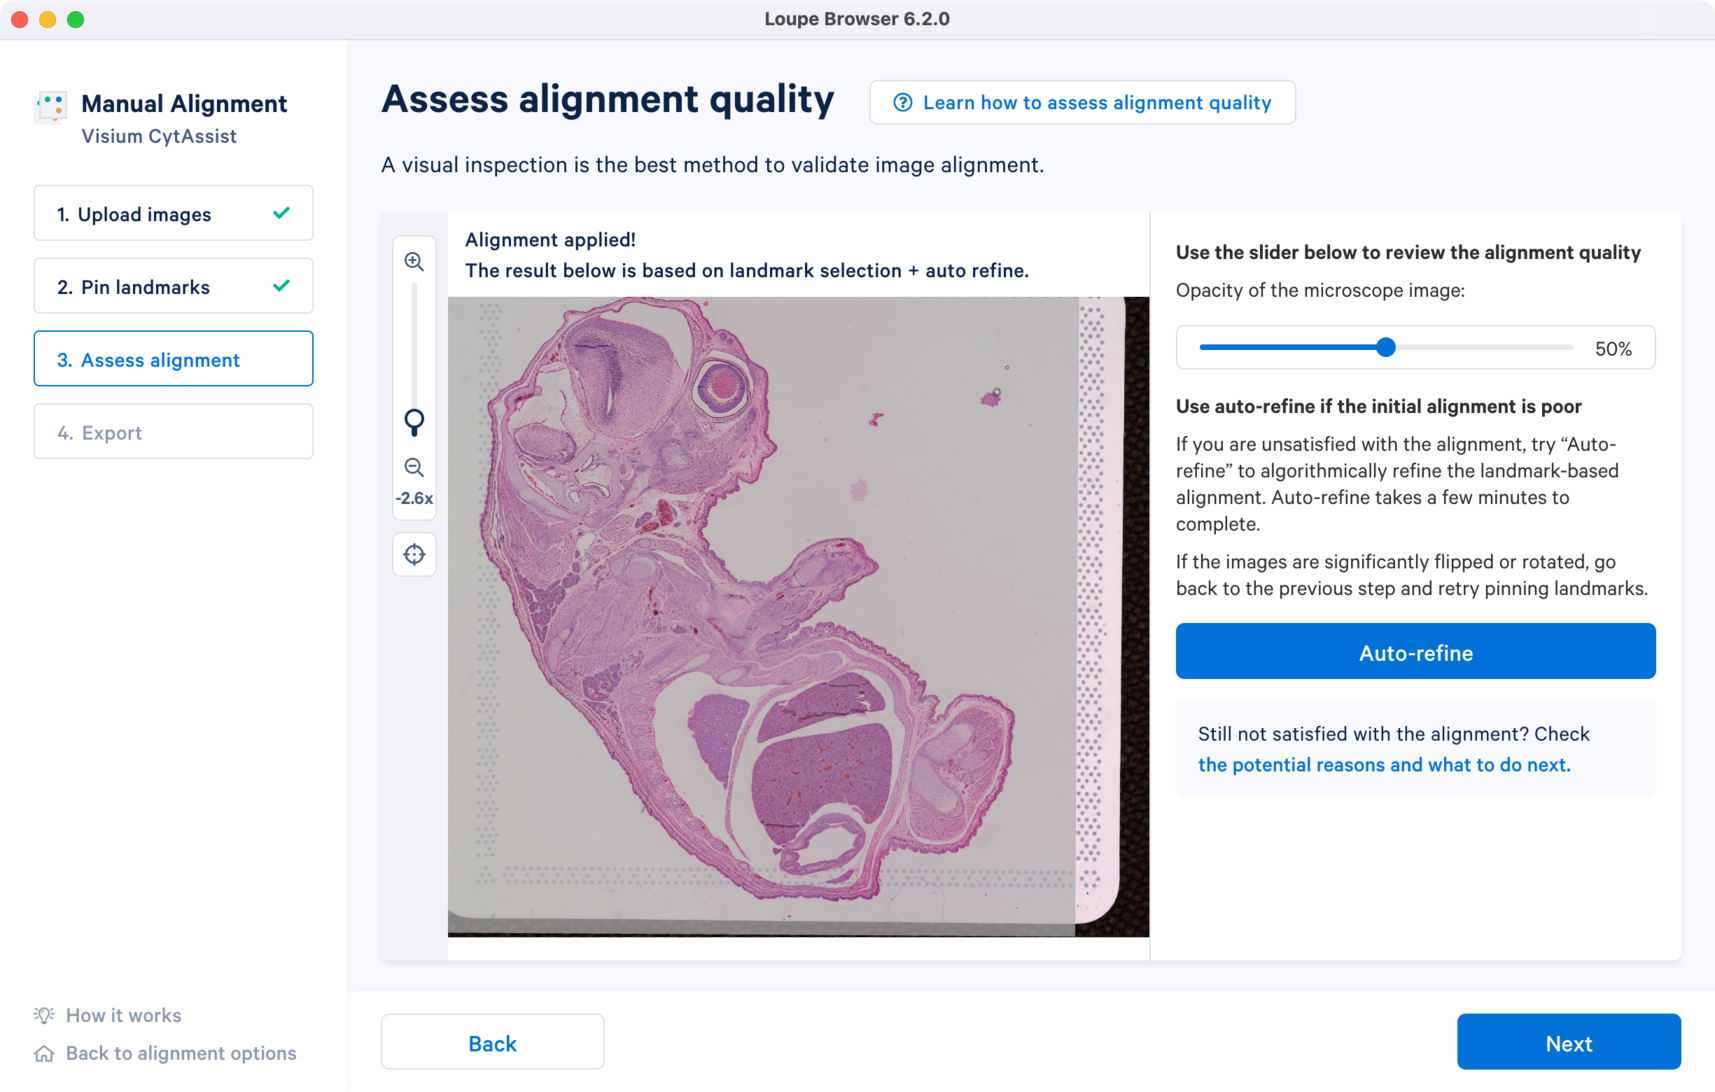
Although there is an option to exit out of the auto refinement pop-up window, it is recommended to allow the algorithm to finish. Cases where the algorithm runs longer than indicated may suggest a potential problem with the initial alignment state. In those cases, it is recommended to exit and redo the landmark selection for more accurate image registration. Potential reasons and guidance for the next steps can be found in the alignment wizard.
The image registration is significantly improved after applying the Auto-refine algorithm. Notice the overlap distance between the two images along the edges has reduced from the initial landmark-based alignment. The results are satisfactory and can be exported for analysis in Step 4.
The last step in the CytAssist Image Alignment wizard provides two options: 1) export the image registration results in a JSON file format or 2) continue to the manual fiducial alignment wizard to manually align the fiducial frame and segment the tissue section and generate a combined JSON file. More details about the different manual workflow options are listed on the spaceranger count for CytAssist analysis page.
The CytAssist images used in this tutorial have a visible fiducial frame that is largely unobstructed, and the strength of the tissue staining is sufficient to identify morphological features. In these cases, the alignment file can be exported by clicking the Export CytAssist alignment JSON file** to generate a JSON file.

If the CytAssist image has partial fiducial frame obstruction by the tissue section or one or more edges were cropped, then it warrants continuing with the manual fiducial alignment workflow. Some subset of issues with the tissue staining (weak staining, incomplete staining, or excessive staining with leakage outside of the tissue section) can also interfere with the accurate identification of the tissue-associated spots using the automated image processing pipeline. In these cases, it is recommended to complete the manual fiducial alignment workflow.
Click Continue to manual fiducial alignment which will automatically load the CytAssist image from the previous step. Follow the instructions in the manual fiducial alignment tutorial to complete the steps in the alignment wizard. The alignment file generated at the end now contains information about both the image registration as well as fiducial detection and tissue segmentation.
The path to the generated JSON file is provided to the spaceranger count pipeline via the --loupe-alignment argument.